)
)


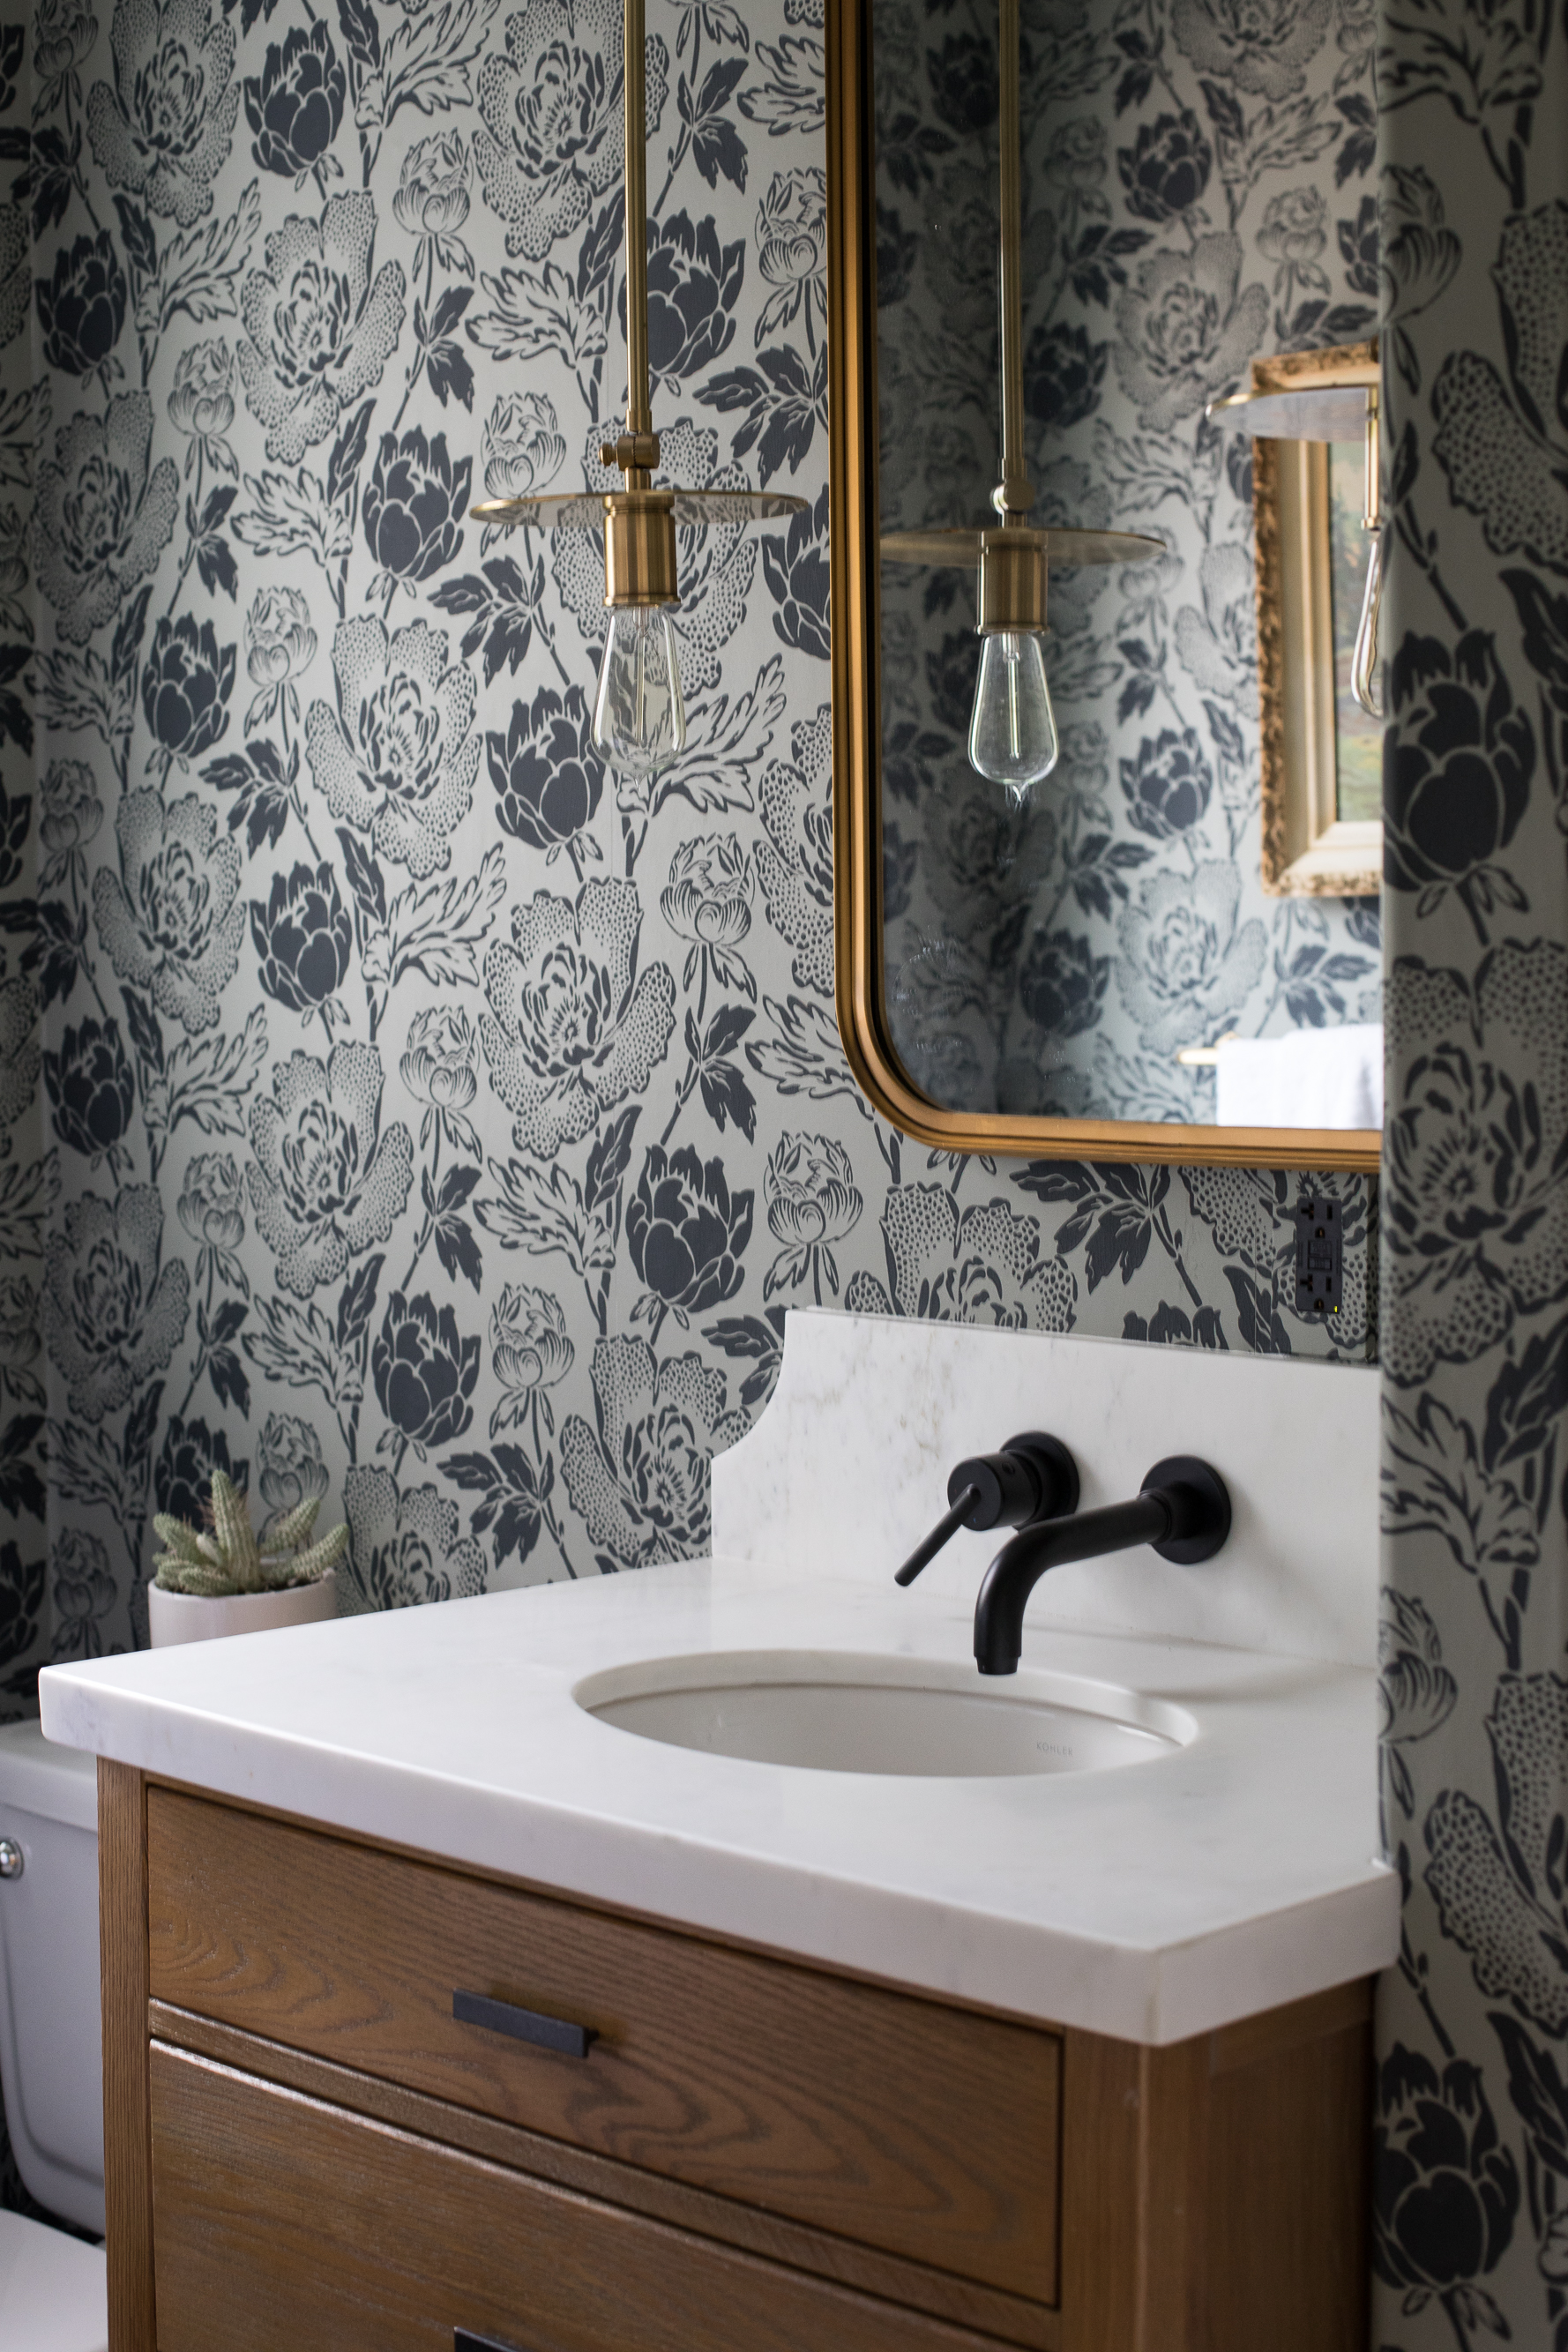
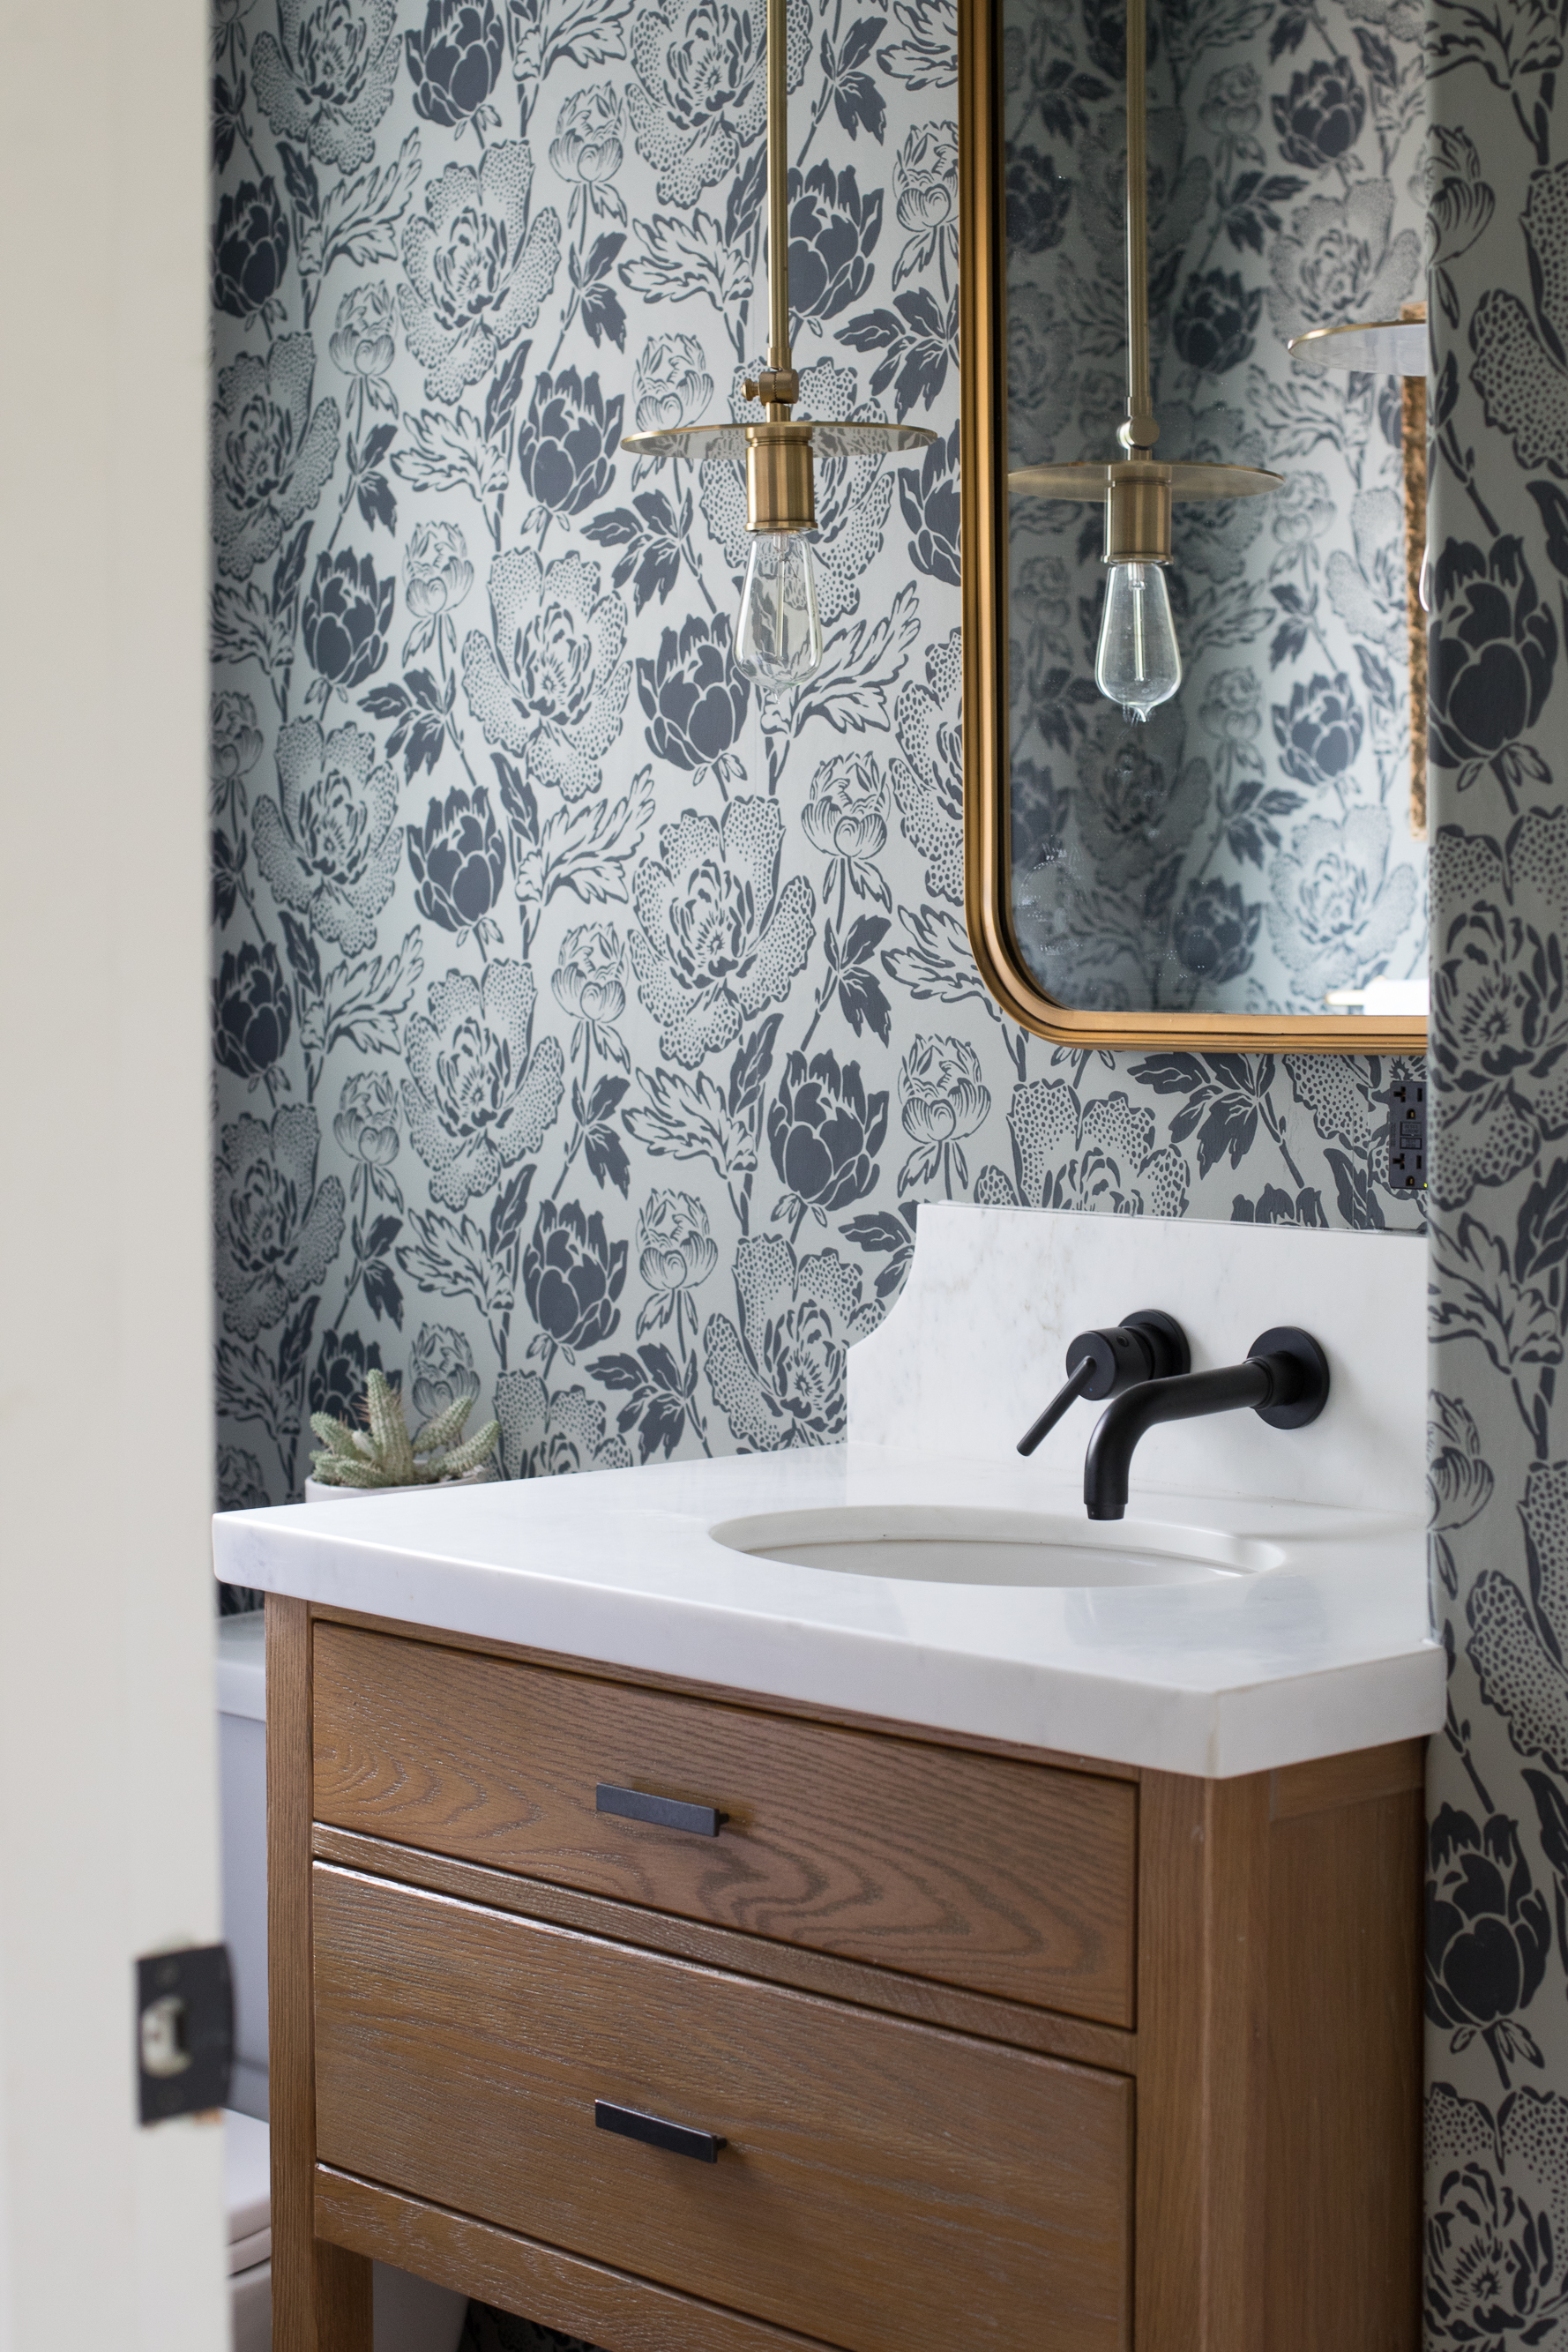
I finally (FINALLY!) get to share our finished master bathroom! We started this project back in October during the One Room Challenge, and while we finished all sponsored aspects of the bathroom (the wallpaper, the mirror, the lever door handles, and the pendant lights), we still wanted to replace the pedestal sink with a more functional (and beautiful!) vanity.
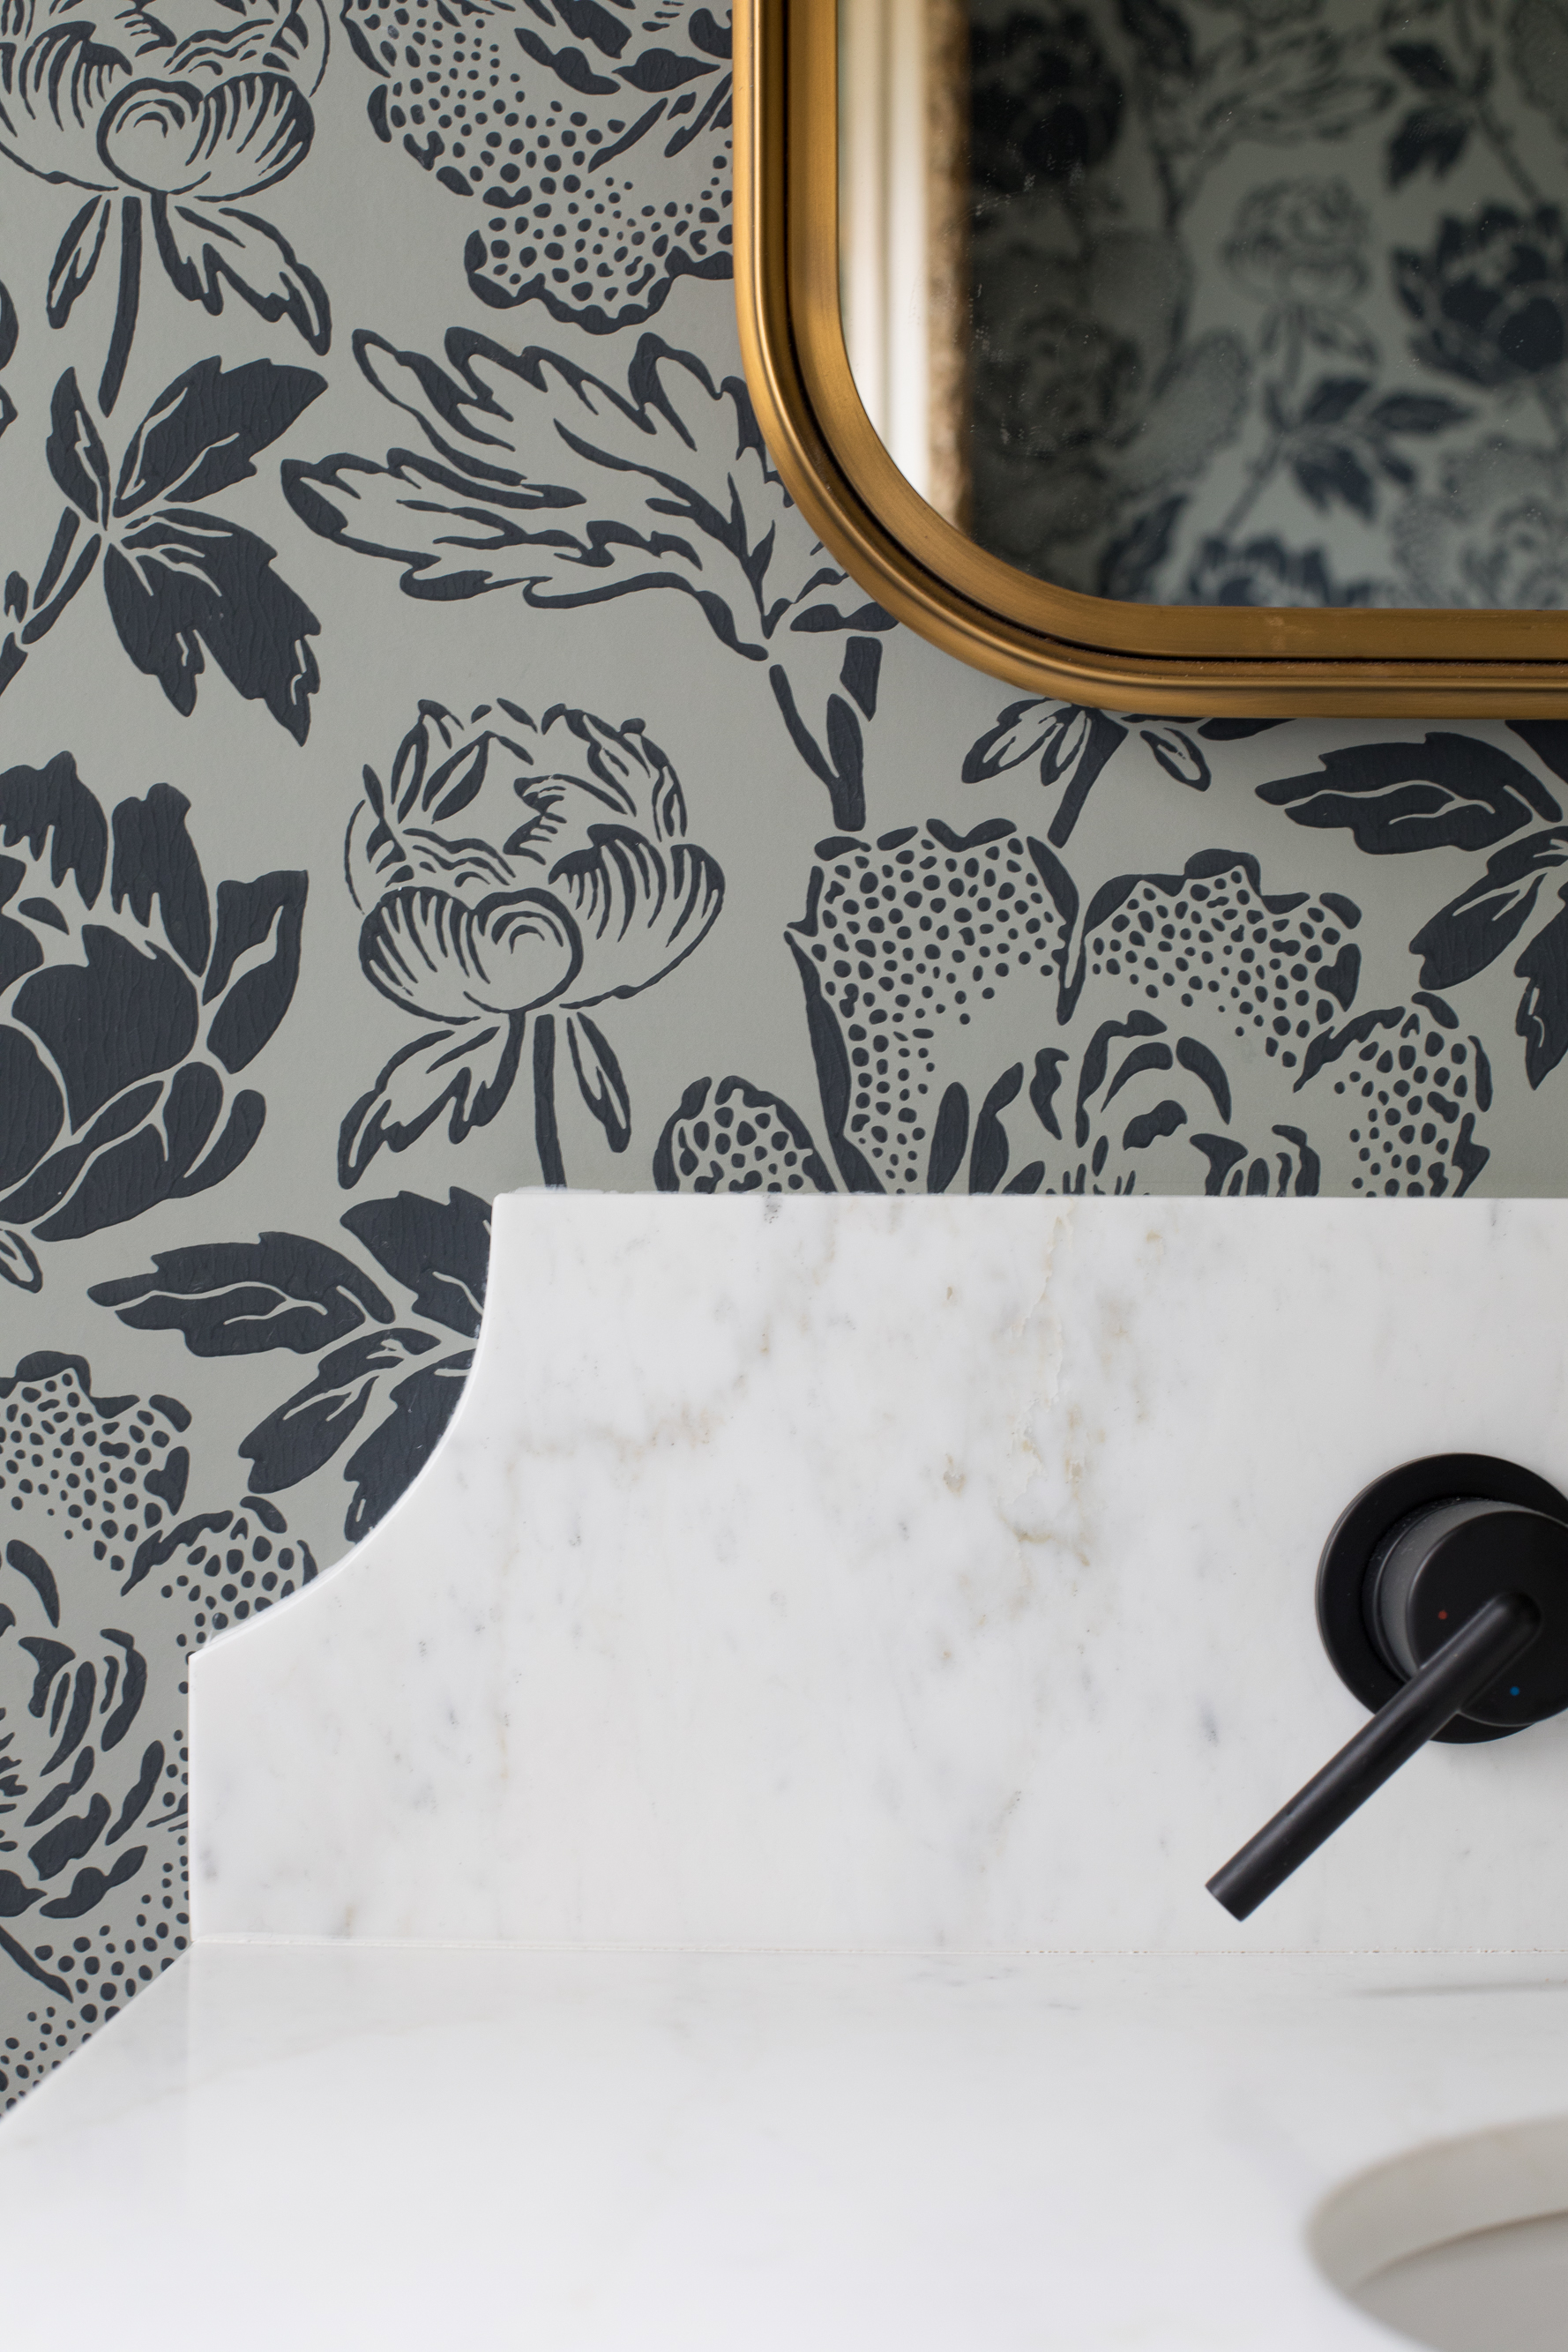
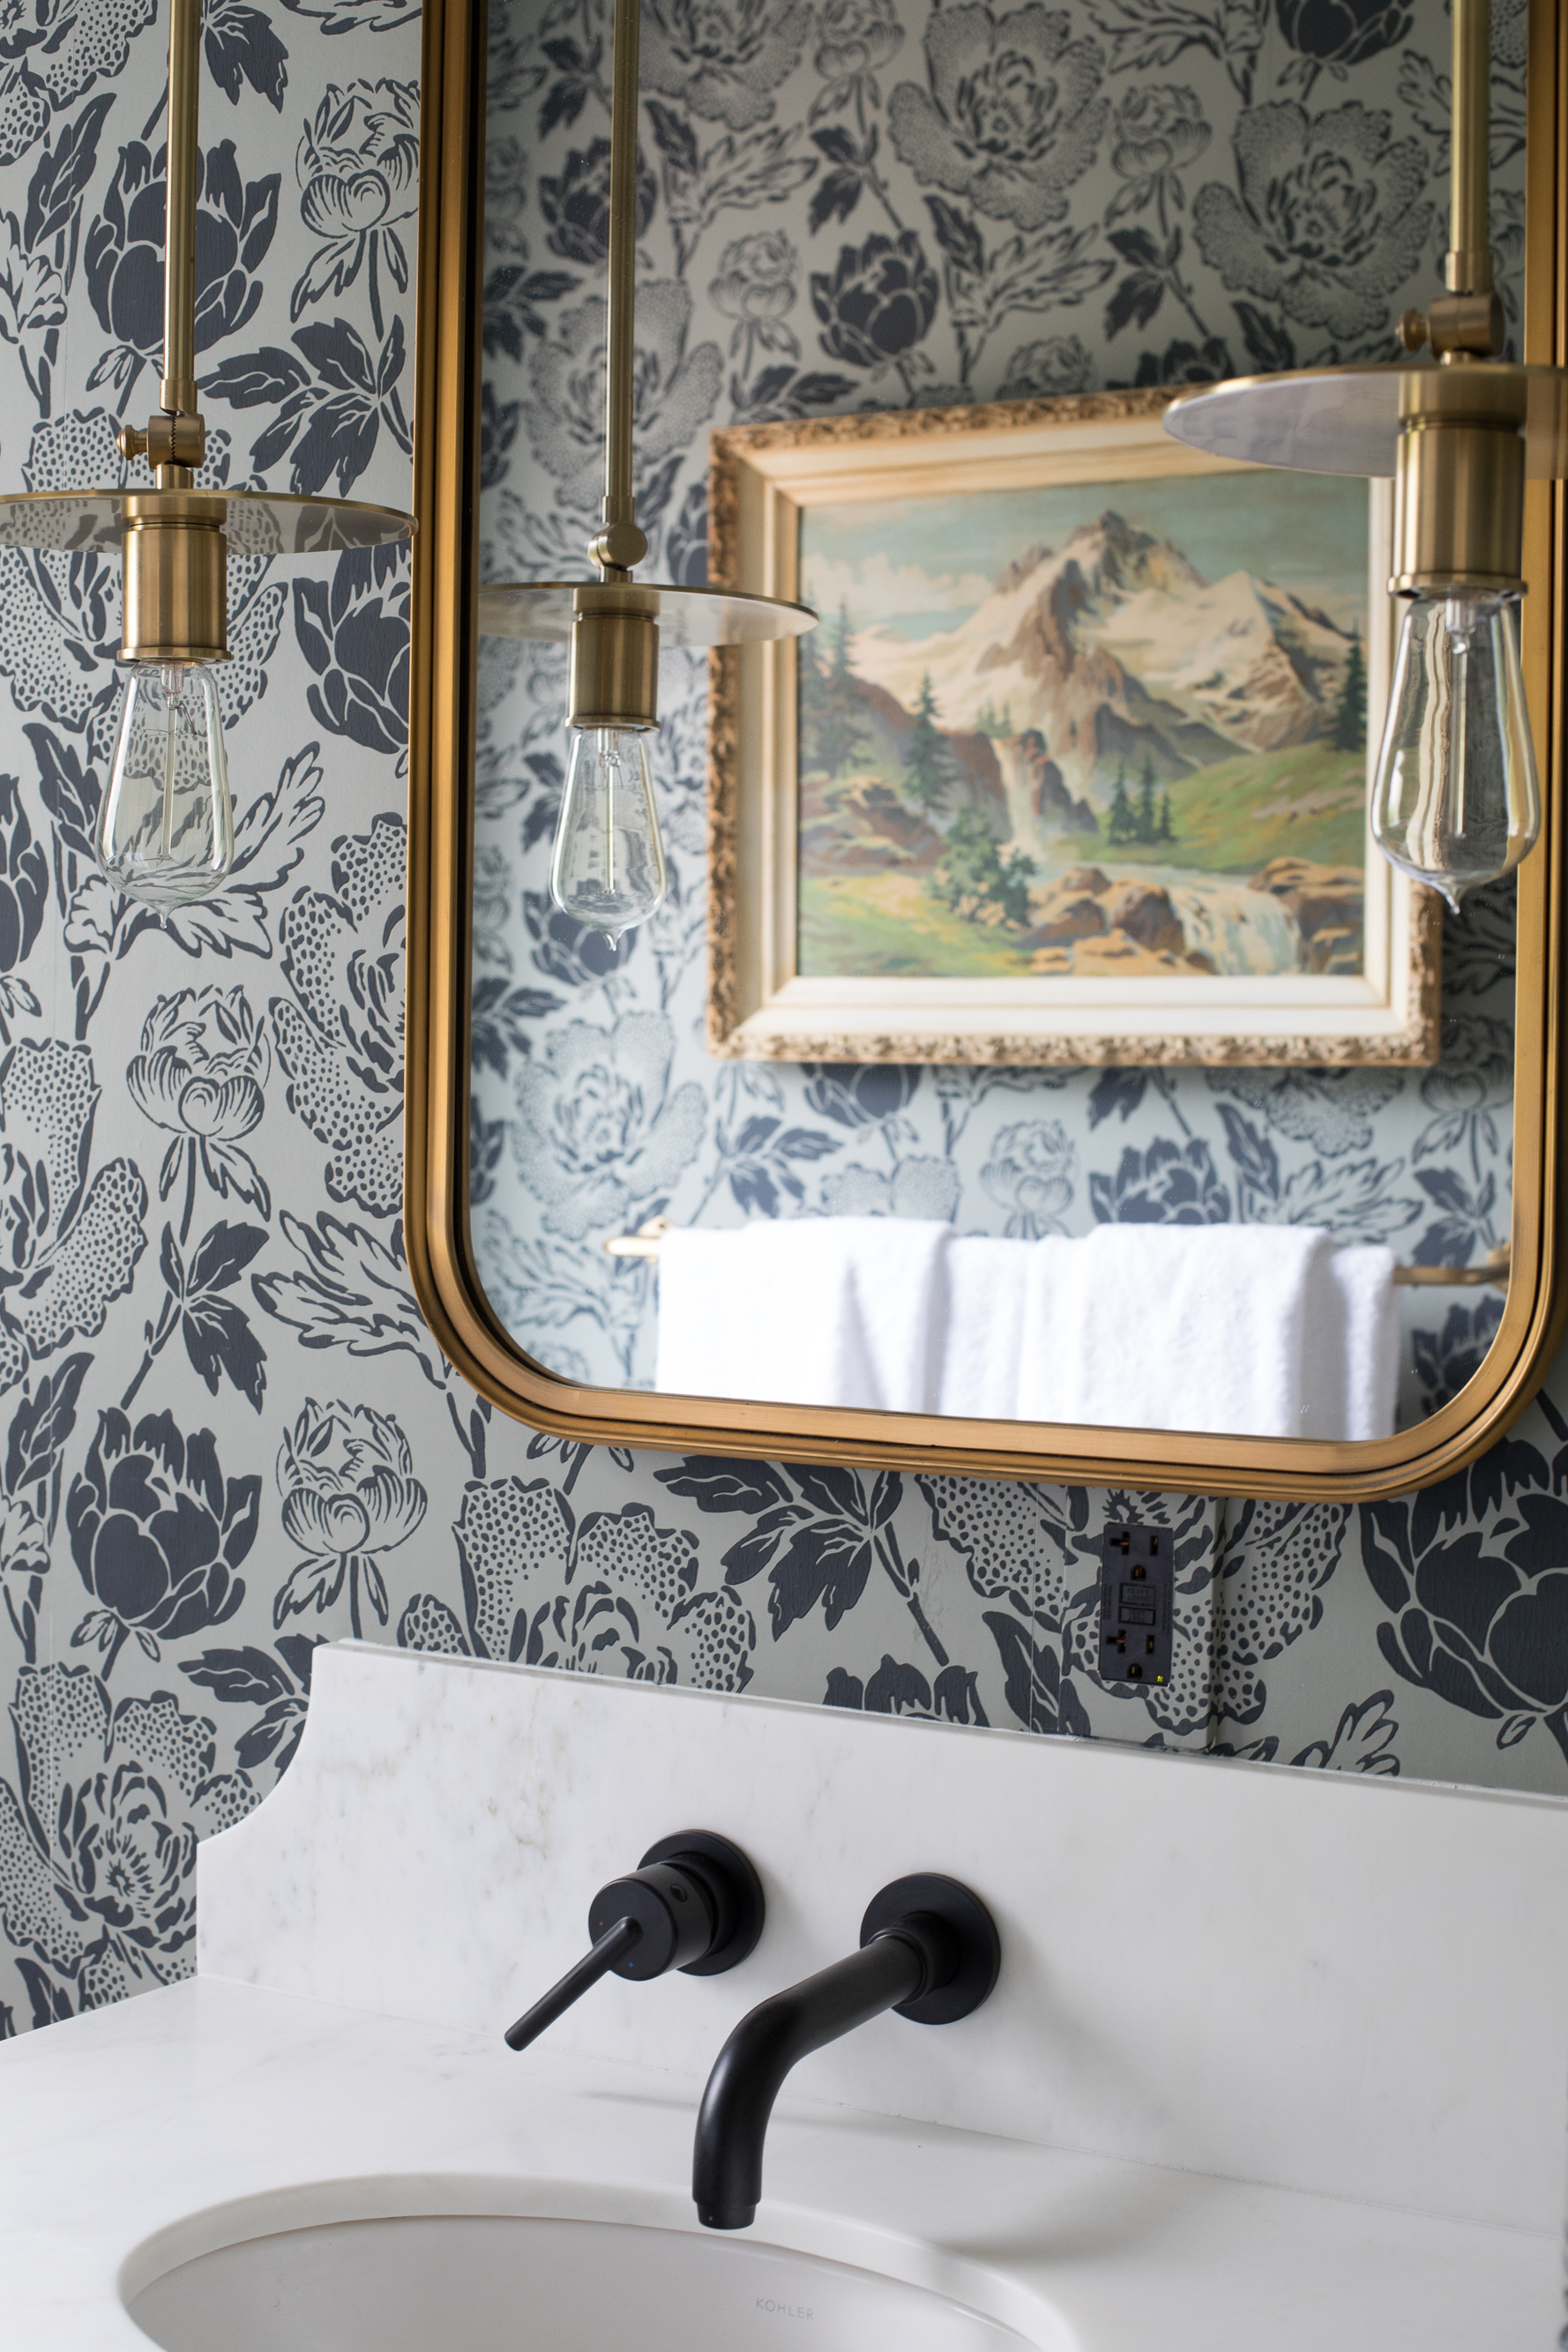
The feminine wallpaper was calling for a more modern profile vanity, and the Toby vanity was more than perfect. The open shelf at the bottom is perfect for a tray to display pretty folded towels, and the matte black pulls are a great balance to all the brass elements happening in the space. I spoke about my faucet dilemma on Instagram stories, we had ordered the champagne bronze faucet and it seriously clashed with the mirror and lights. I’m happy we settled on this matte black faucet. It’s just the perfect amount of modern to balance all the feminine elements in this space.
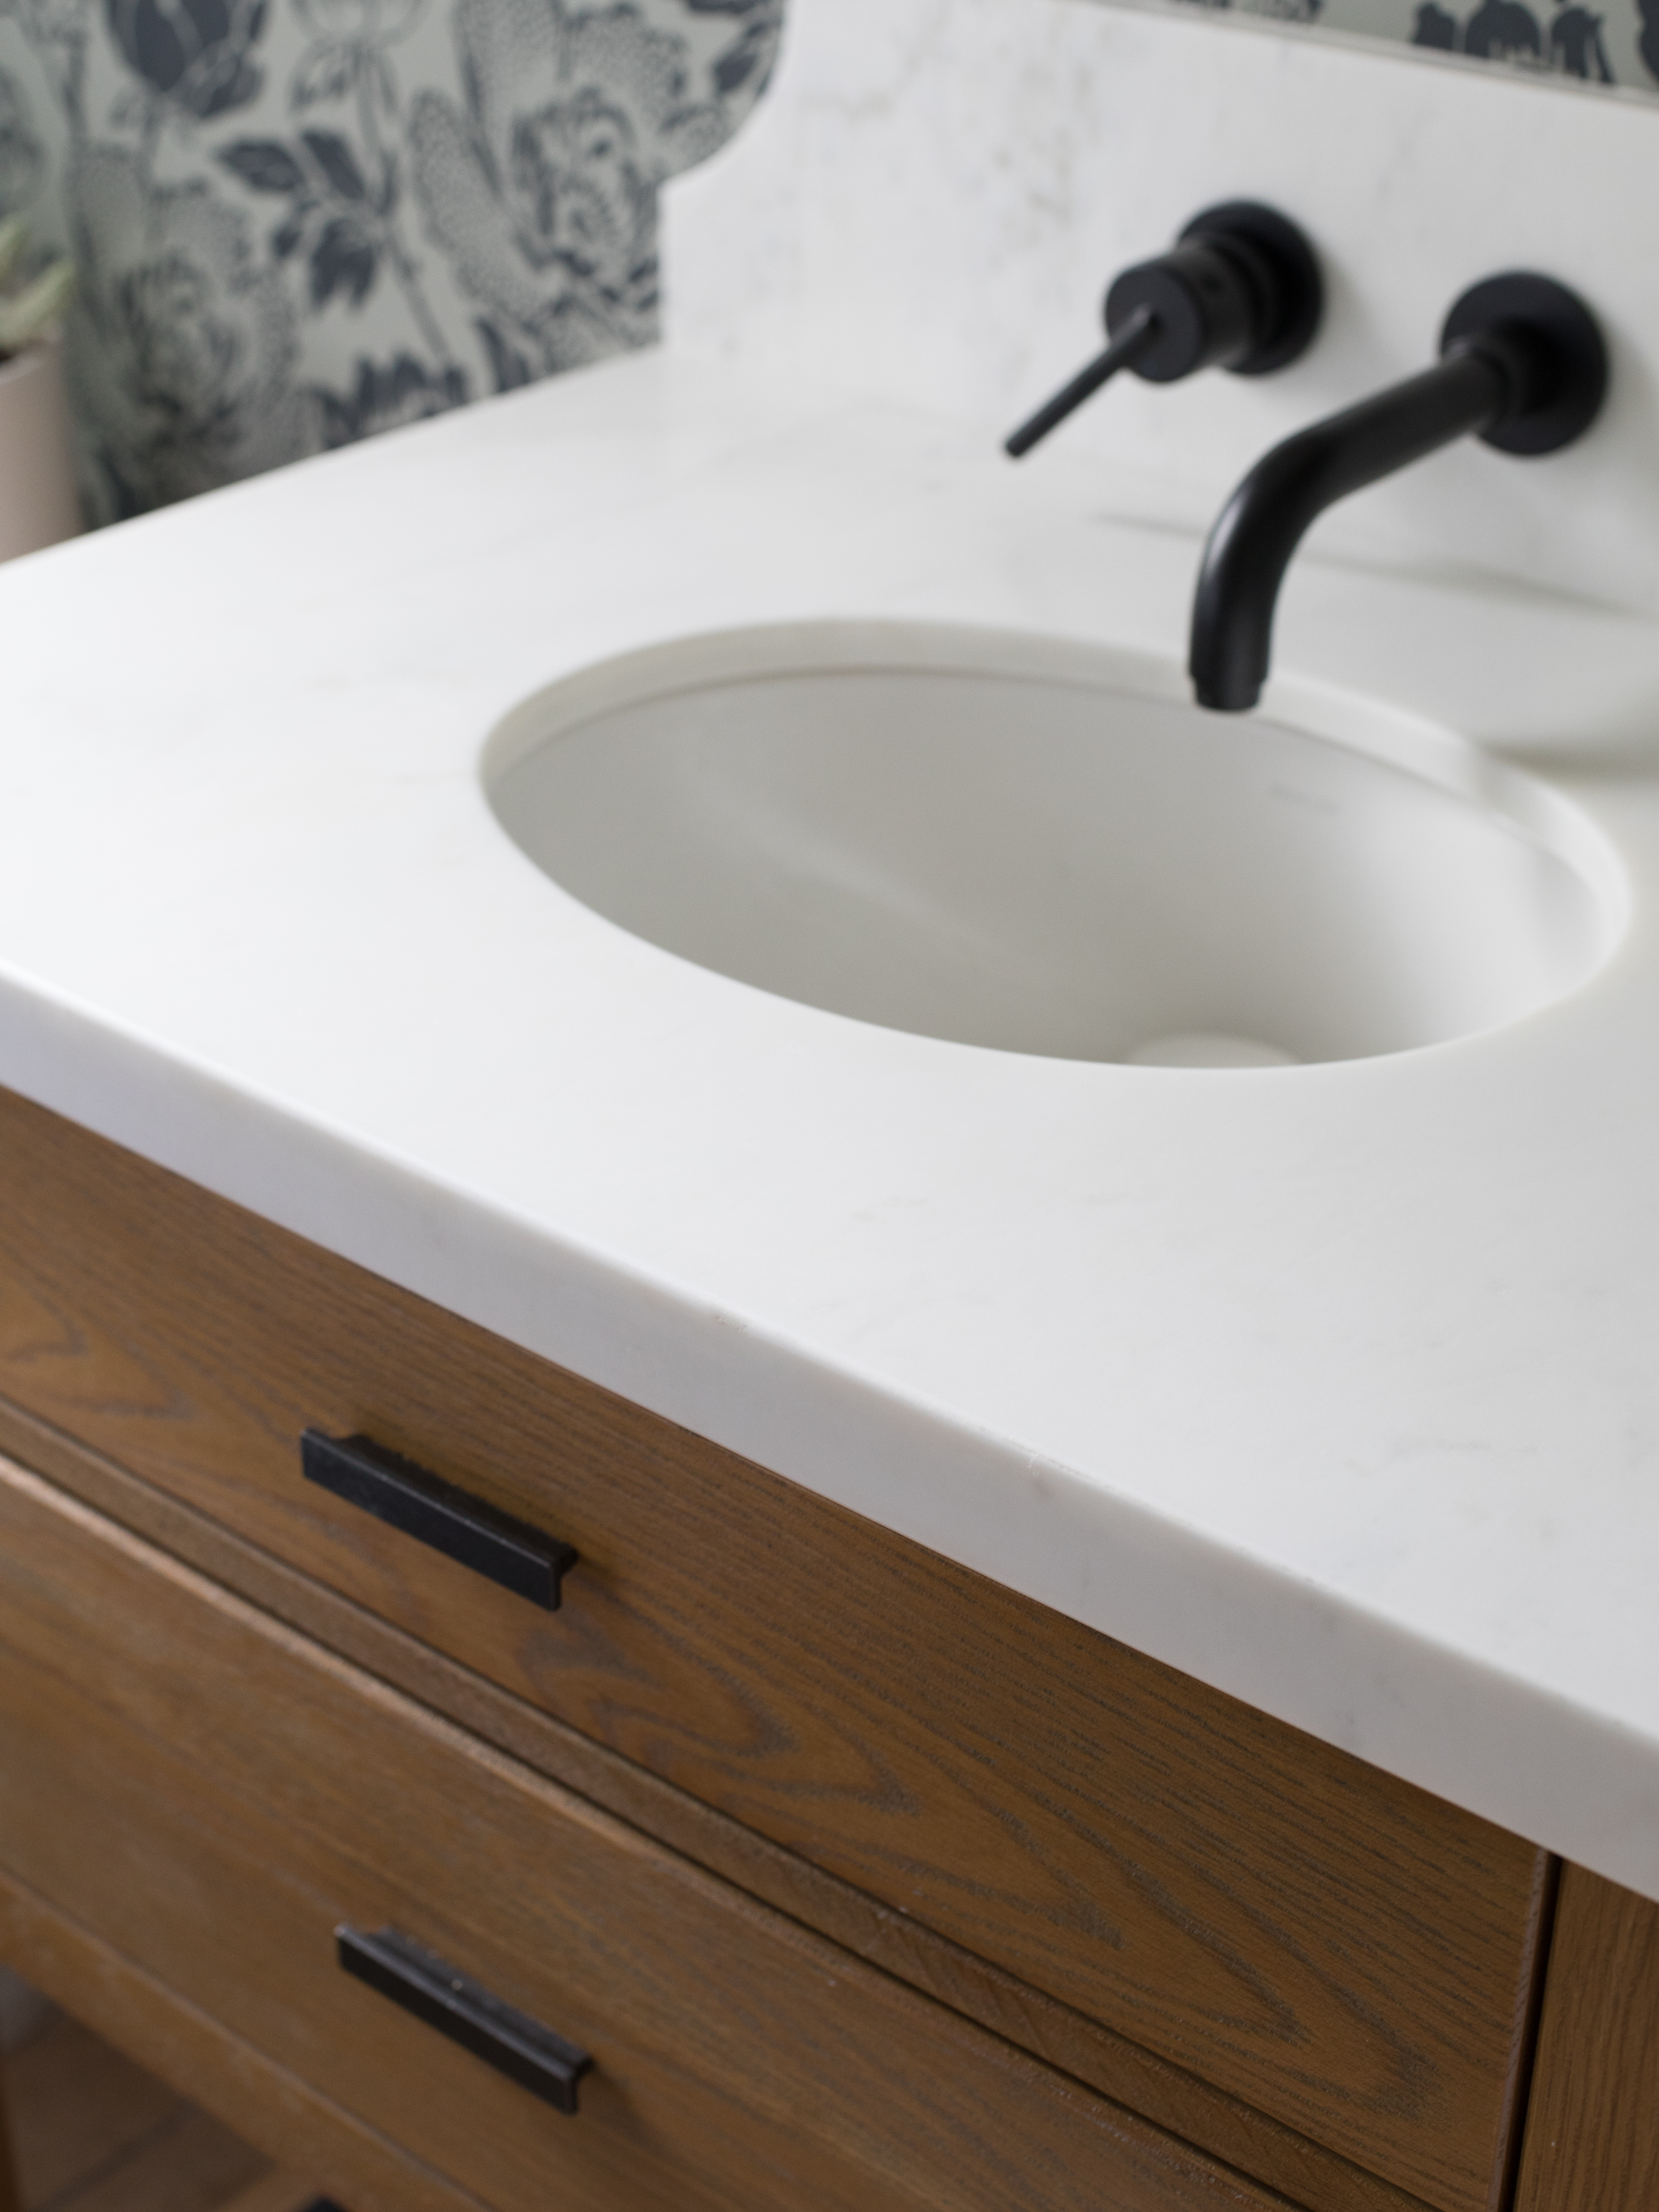
The vanity comes without a countertop, which I prefer anyway because I L.O.V.E. shopping for stone remnants. Choosing your own countertop is such an exceptional way to add a personal touch to any space. I wanted a white marble but nothing with extreme veining. Remnant shopping can be tricky, it’s like shopping the clearance rack at Target, you really never know what you’re going to find, which is kind of thrilling! I found this remnant that was just the perfect size we needed for the top and backsplash. The remnant was $180, plus $500 for fabrication and $500 for plumbing + install. Fabrication is typically the most expensive part of customizing a countertop, and we chose to go with mitered straight edges which takes a lot more precision and skill when fabricating. Our installation was a little more expensive than you’d expect because our contractor also upgraded and relocated our plumbing.
I know every home blogger says this, but I seriously couldn’t be happier with how the vanity turned out. And now for the best part! I mean, who doesn’t love a good before + after?
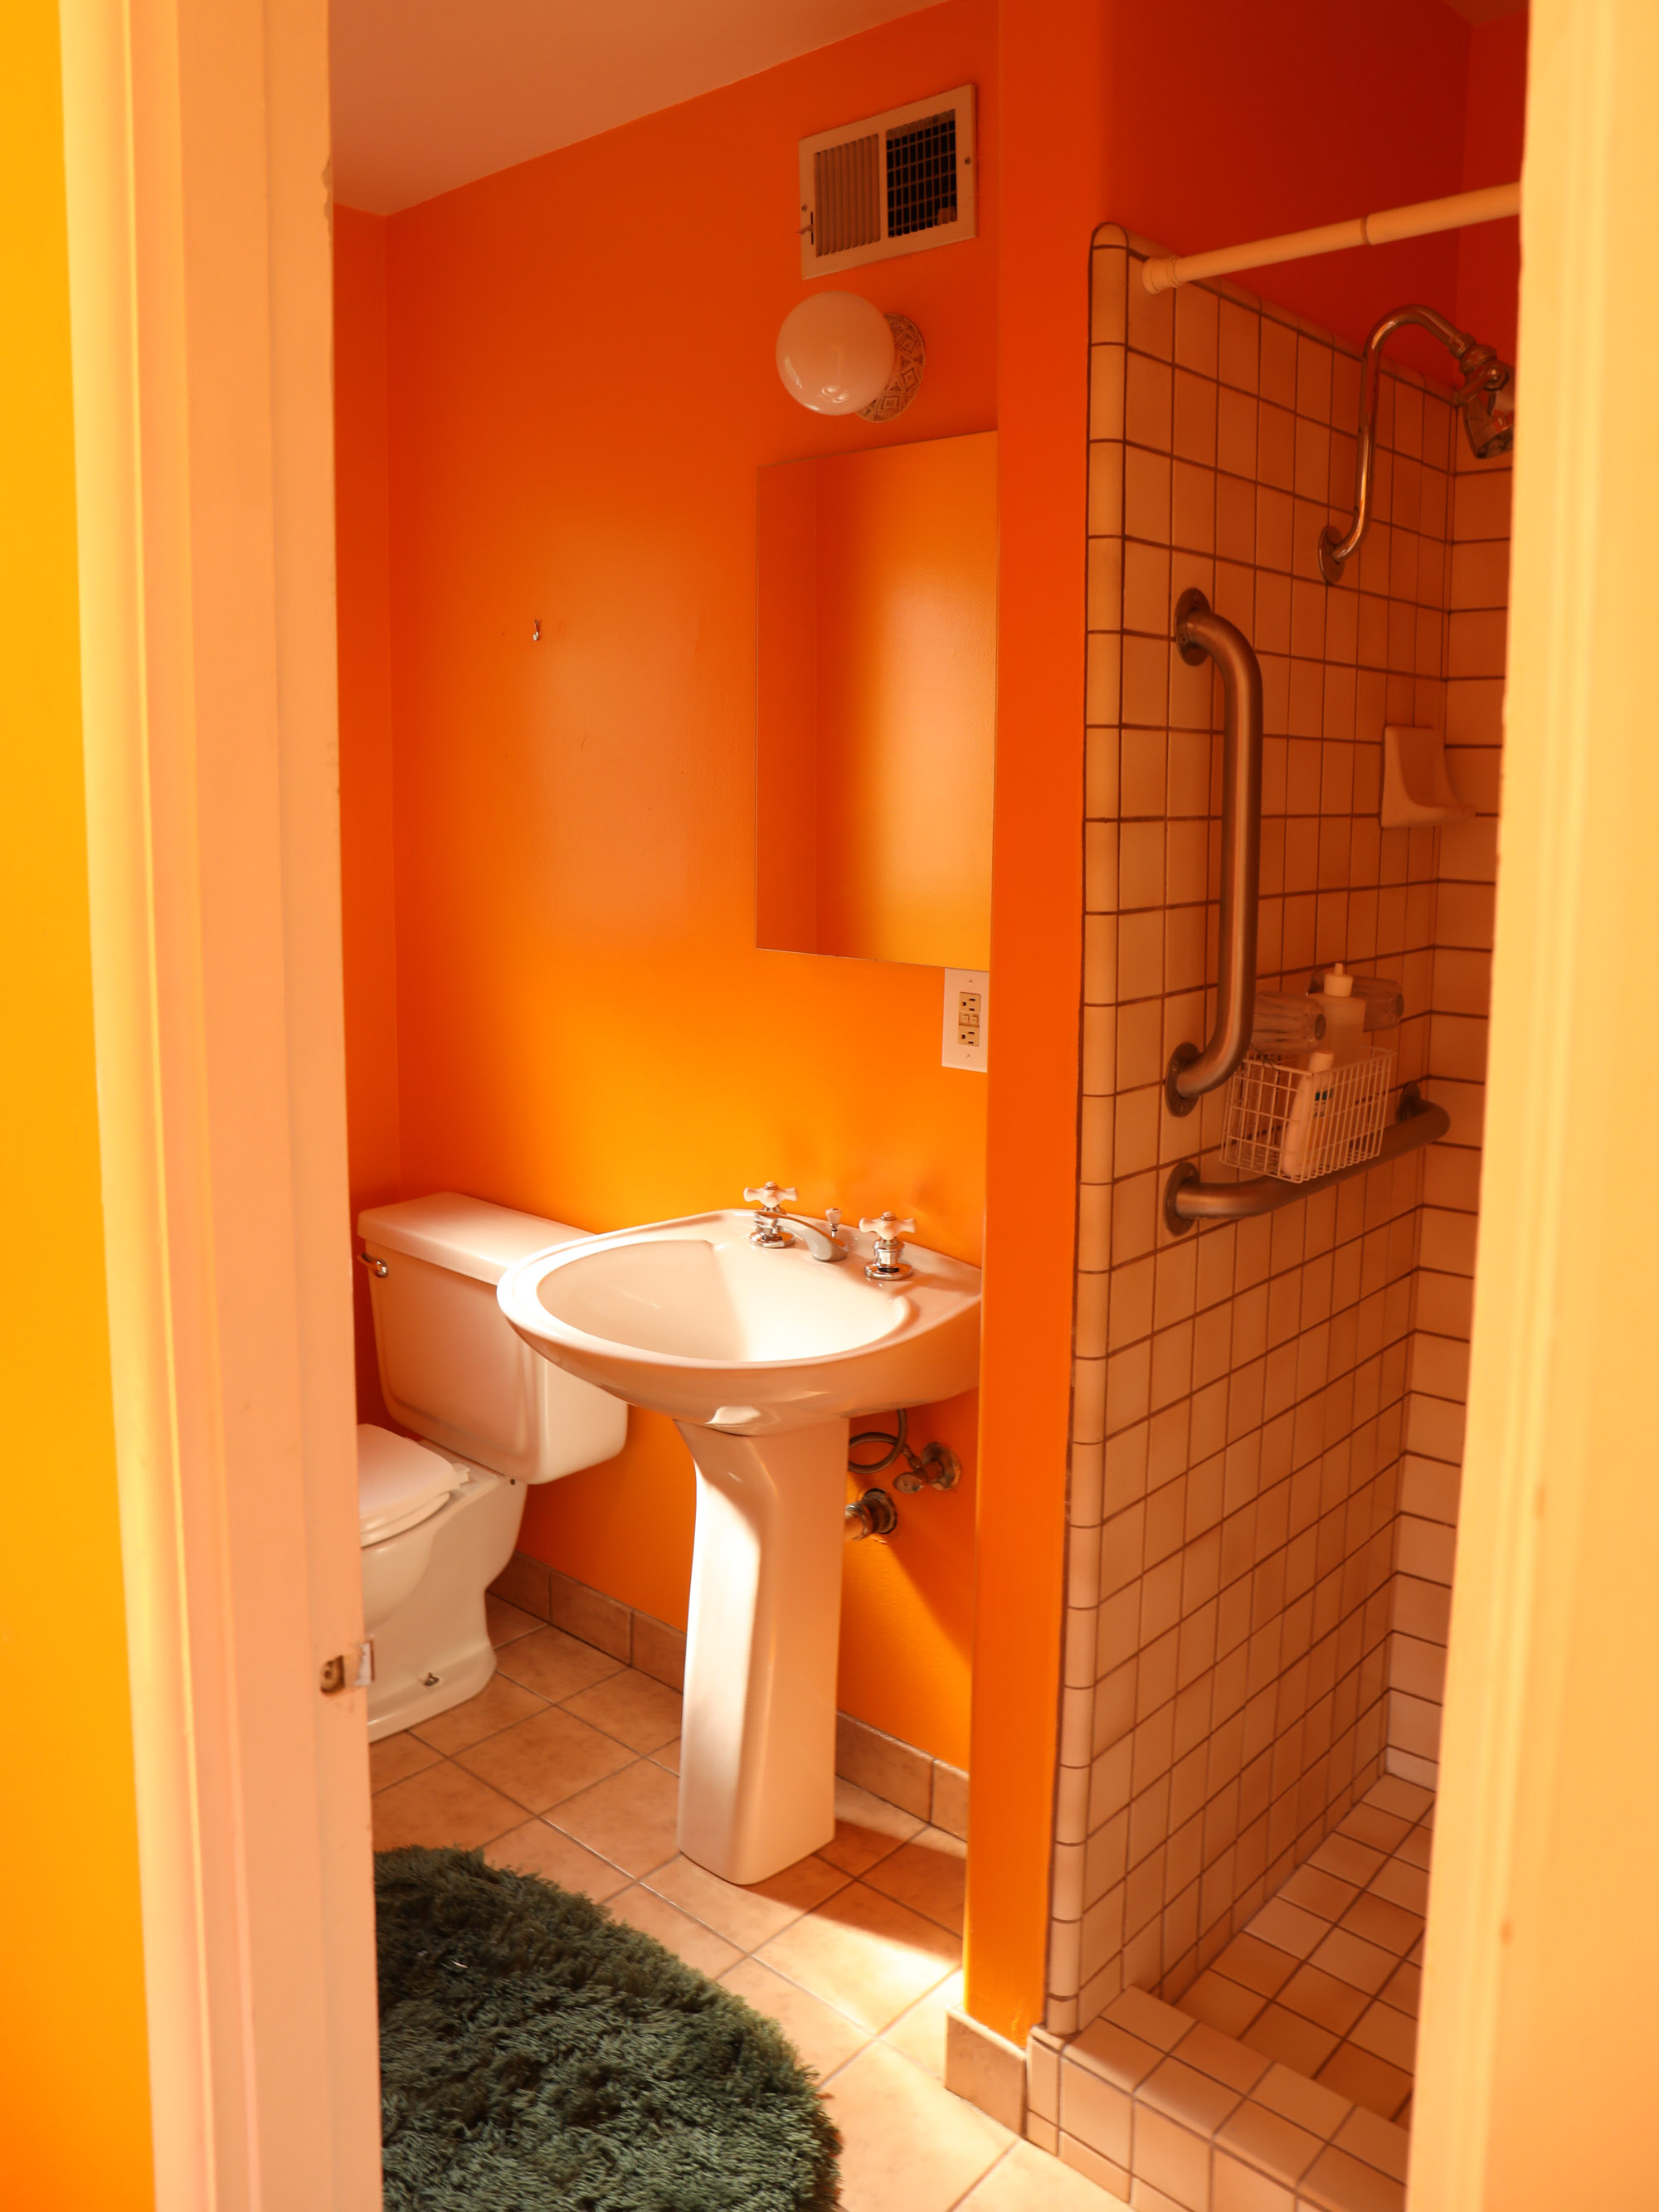
SO SATISFYING! I still can’t believe the bathroom was previously safety orange. My goodness!
Sources:
wallpaper | mirror | pendant lights | vanity | faucet | sink | matte black GFI outlet | towel bar | toilet paper holder | lever door handles
This looks SO perfect! I really like the touch that the black hardware adds to the room (and ties into the wallpaper, although that isn’t necessarily black).
One question: did you redo the shower area as well? That seems like it’d be the most expensive part of the project, and something that is holding us back in redoing our master bath $$$. We’re thinking about redoing/replacing things as we can (because some things, like a water-damaged vanity, can’t wait) and it’s nice to imagine that other people (even bloggers!) might make that decision as well.
Great question! It’s amazing what cropping a photo can do :P re-tiling the floors and shower isn’t in our budget right at the moment, our house has so many other things higher on the priority list! I think i’m going to test out tile paint and cover the yucky 70’s speckled beige tiles in the mean time. Our contractor installed the vanity in a specific manner knowing we would have to remove it once the time comes to redo the floors. Anyway, I am fully a proponent of replacing things to give a space new life or a face lift until budget permits a full reno.
Love your master bath! We’re looking to update our bathroom, too, so I’m gathering ideas and inspiration. Just beautiful! Thanks for sharing!
Of course!! thank you for the kind words!
This looks great! I love the corner detail
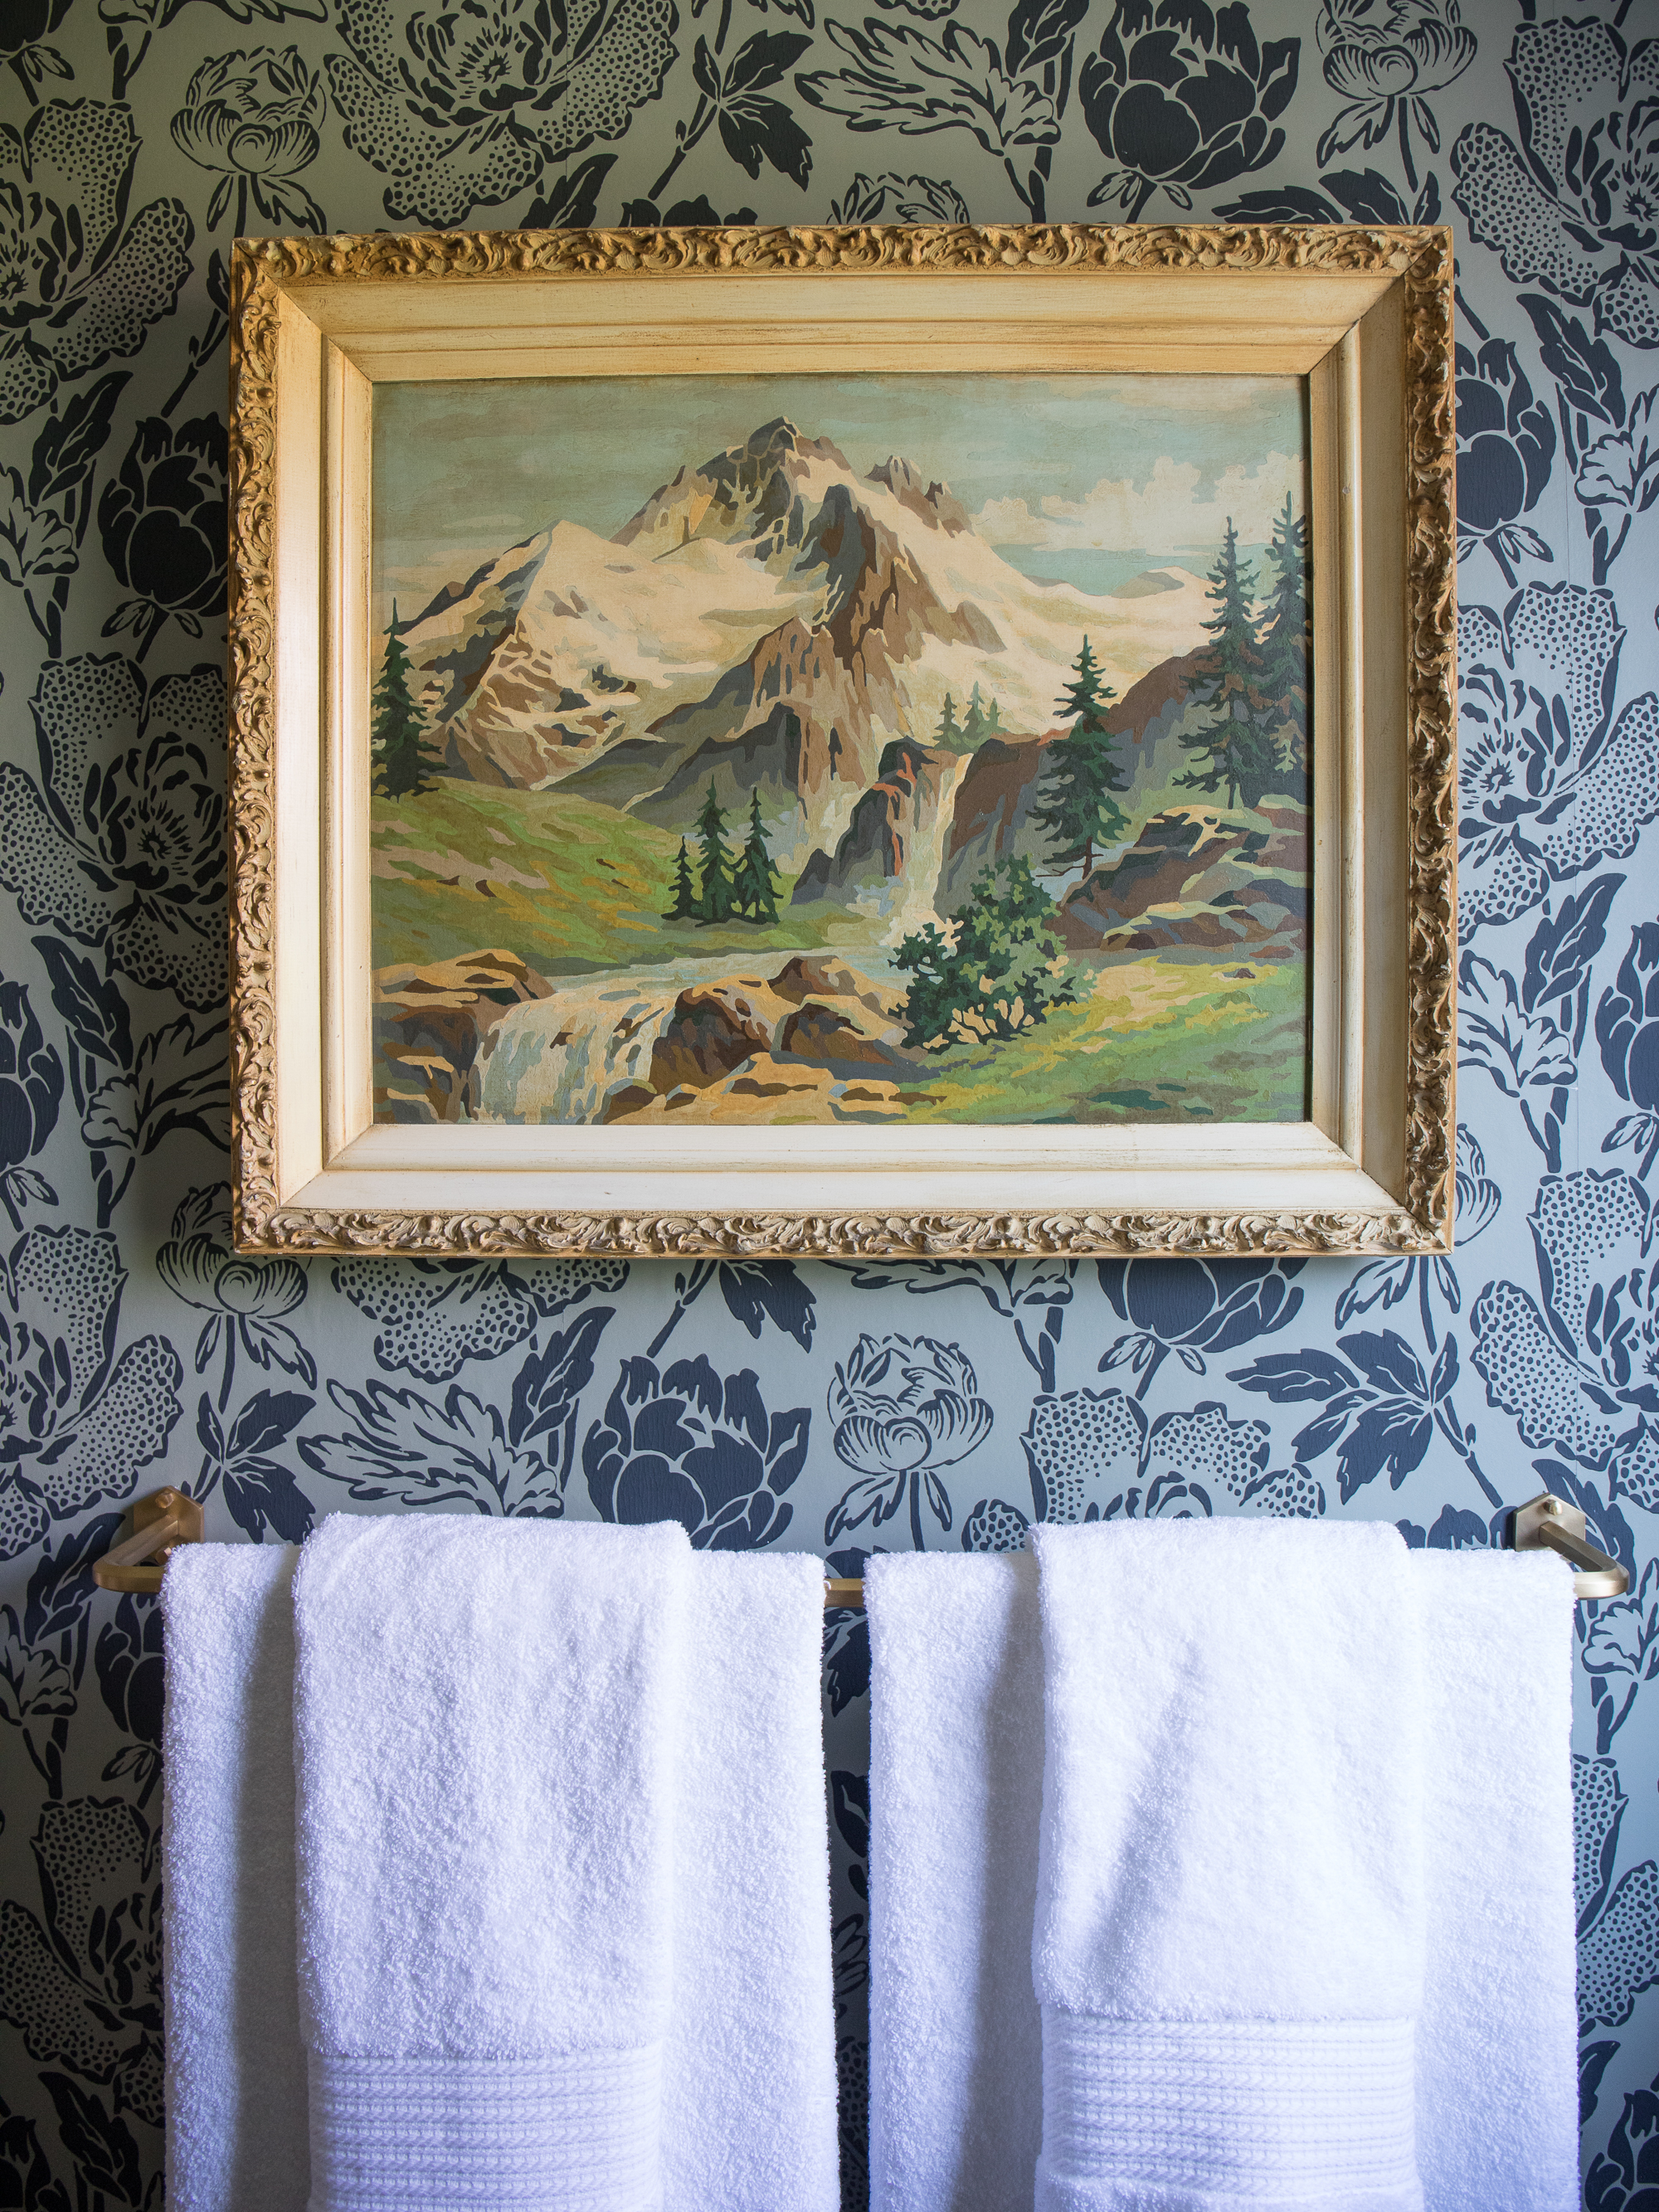
Who or where is that painting from? I love it!
It’s a vintage paint by number!
What did you end up doing about the bathroom vent?
The vent is still above the mirror, we got a matte black vent so it blends in well! when we do more significant renovation to the rest of the house we are planning to re-do all of the ducting and place vents in better locations. So for now its camouflaged better ;)
I love your style! We’re copying elements of your Besta hack, and I stumbled upon this post of yours. I noticed the first question about the tile. Not sure if you’ve done anything with it yet, but I wanted to share a hack we tried in the past. Our last house had this horrible white ceramic tile and black grout (!!???!!) and replacing it was not in our budget. My husband bought grout renew (link above) and we painted all of the grout in the whole house. It looked so much better than with the dark grout. It comes in different colors too, so you can try to match the tile color. Just wanted to share!
Beautiful job! We’re in the opposite situation from you – we’ve replaced the shower/tub, bathroom/wall tiles and are in a standstill on the rest! I’m having a hard time as the bathroom is extremely narrow so I need to find a vanity less than 18 inches deep…. which I’m finding is no easy task! I think we have to find a vintage piece to retrofit or find a woodworker to make something simple. I just want it done, but this snag has us at a standstill. If you have any ideas for someone who could make a simple custom vanity – I’m all ears! We’re in Los Angeles :)
Hey Brittany, I know this is an older post but came across you when doing a search for small powder room vanity. I just happened to have bought the same wall faucet you’ve used here and am looking for a small vanity (realized my pedestal was looking very 1995 and since we’re change floors thought I’d get rid of it). When I go to Lowe’s site your Toby vanity doesn’t come up, do you know if it’s available somewhere else? Thanks!
Good news, I found it here! https://www.wayfair.com/home-improvement/pdx/sagehill-designs-toby-30-vanity-base-hsj1317.html
If you google “Sagehill Toby Vanity” a few other retailers sell it as well. Thanks for reaching out!!!
STUNNING!! Question, did you do a side splash? I love the idea of just a clean backsplash, but not sure about the practicality because of water puddling etc. thanks for sharing!