)
)


Before beginning this project, it was a complete mystery to me how to get the shelves to look floating and seamless. I wanted this look in my home, but seriously had no idea how it was done. I’m so happy our contractor knew what to do, we’ve worked with him on nearly all our house projects and trusted that we could show him a picture (or ten!) and he would be able to execute. I’m also so thankful I was home for this project, there were many small decisions that needed to be made that really only made sense when in person, I can’t imagine having been at work trying to make decisions over the phone! What sort of decisions, you ask? Decisions like what thickness of the shelves do you want? How many shelves? Whether the shelf fronts were flush with the cabinet fronts; determining the height of the soffit, and the depth of the toe kick, etc etc. These small details need to be determined in order for a contractor to execute, the contractor won’t make these decisions himself (and you don’t want him to!). Decisions like these are the primary reason someone hires a designer.
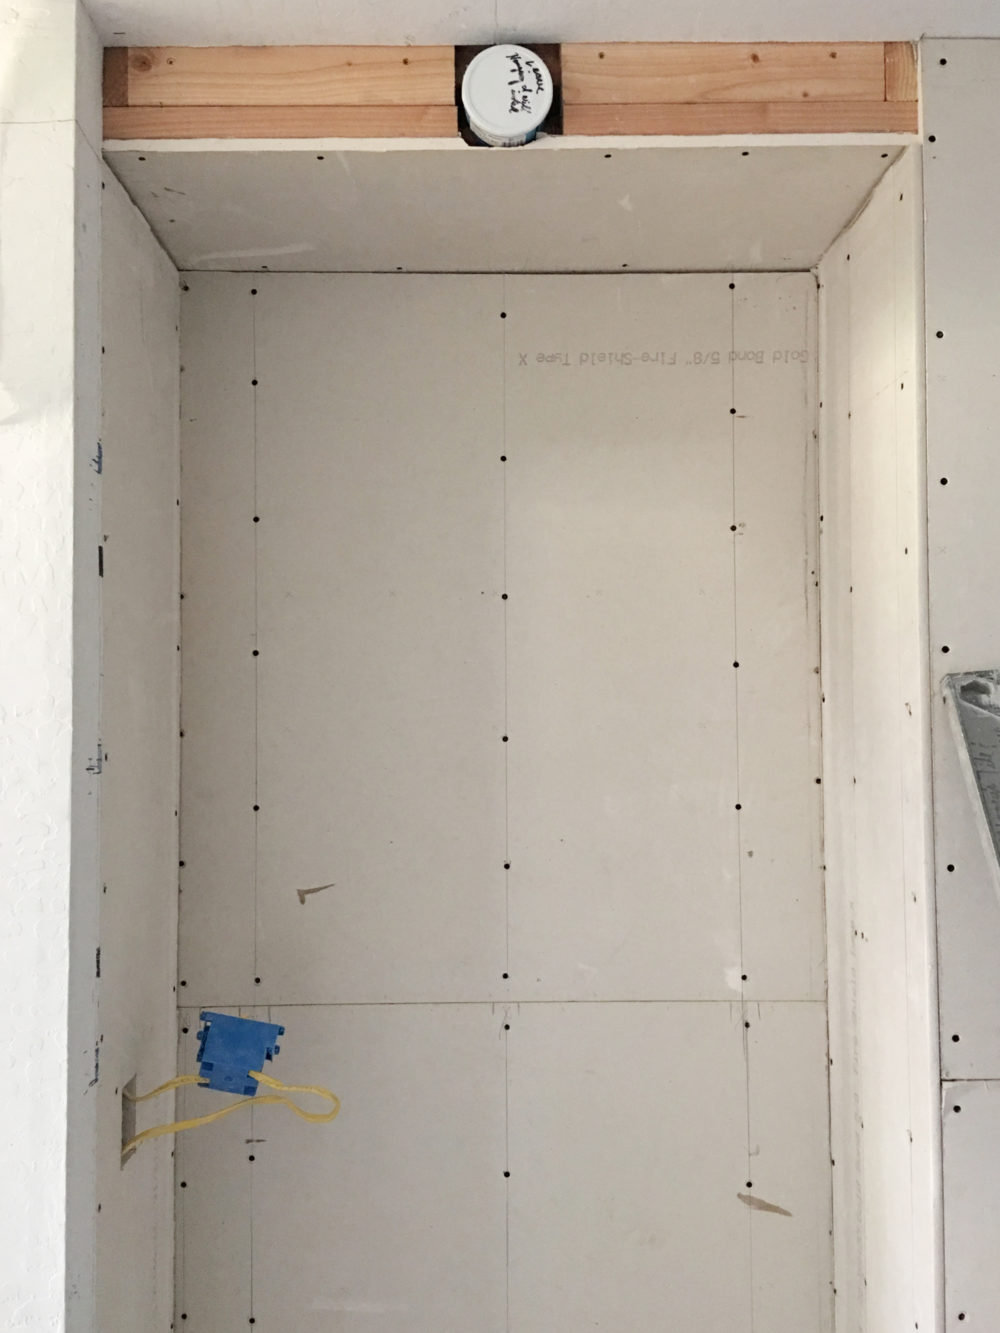
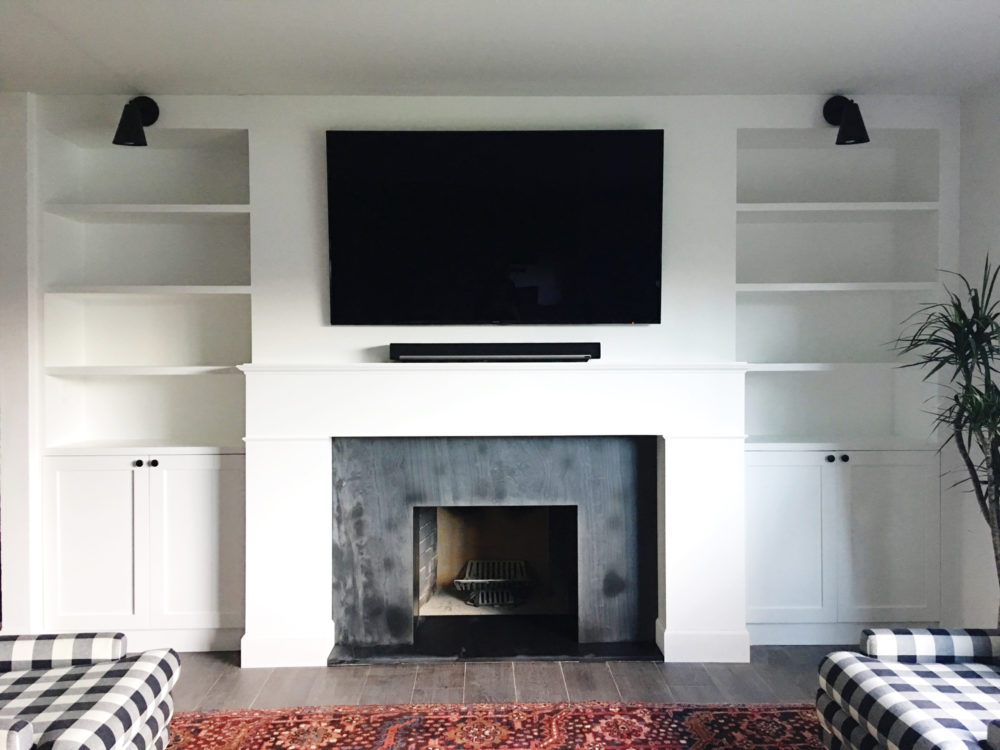
There were only a few items in this space that were absolutes: the base cabinets, the fireplace box, the sconces, and our TV. Everything you see on this wall was measured and determined based on these absolutes. Specifically, the built in shelves were completely designed around the cabinet base size, which then determined the width of the fireplace wall extension, and the soffit was determined by the sconce canopy diameter. For the base cabinets, we chose to use two IKEA SEKTION 15″ deep base cabinets. The shelves began to take shape once the drywall was completely installed.
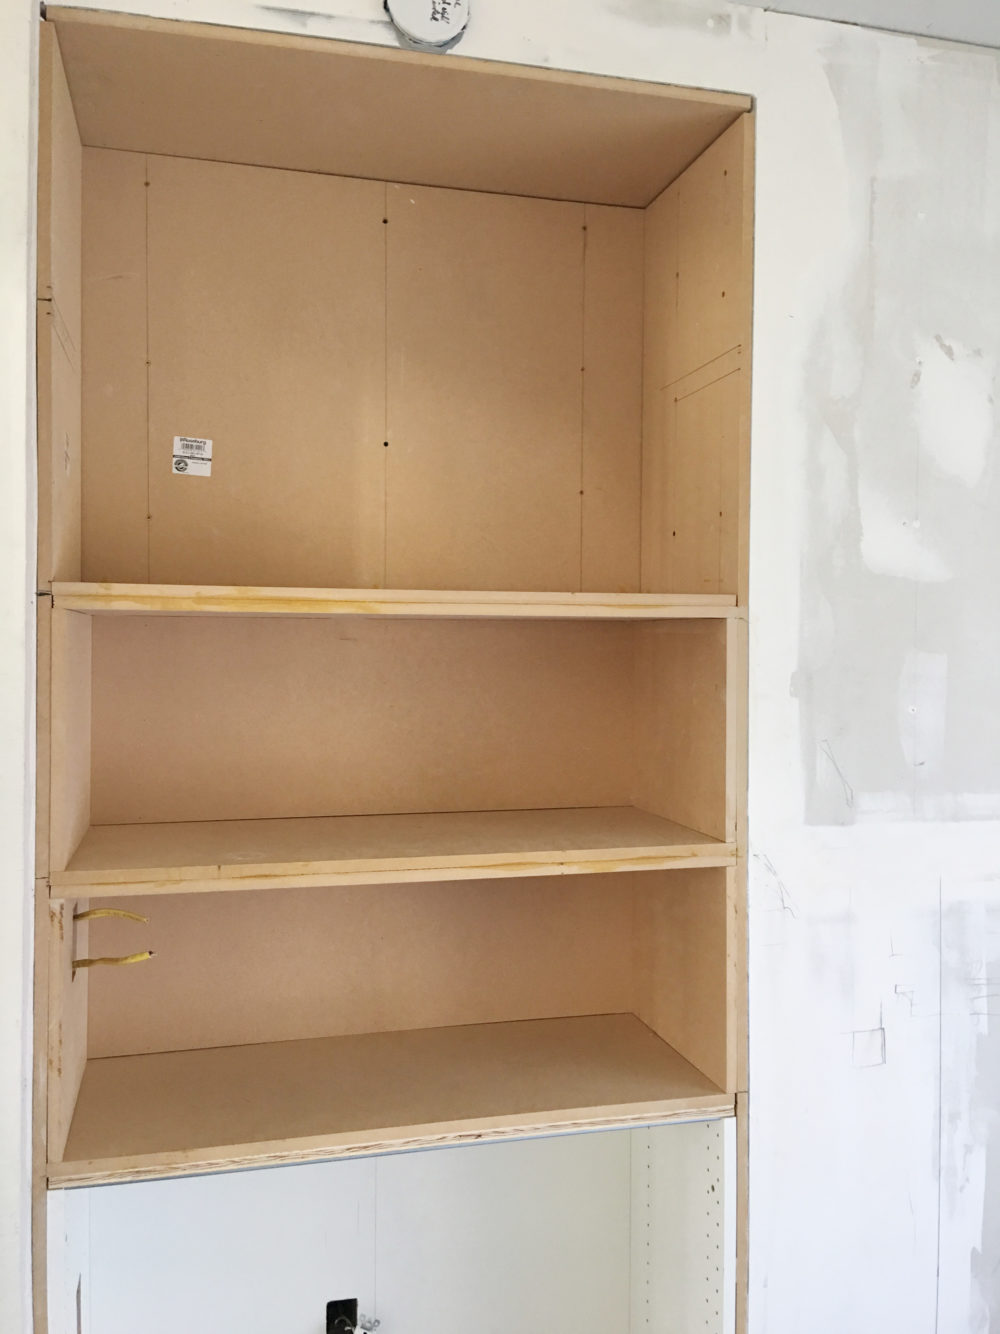
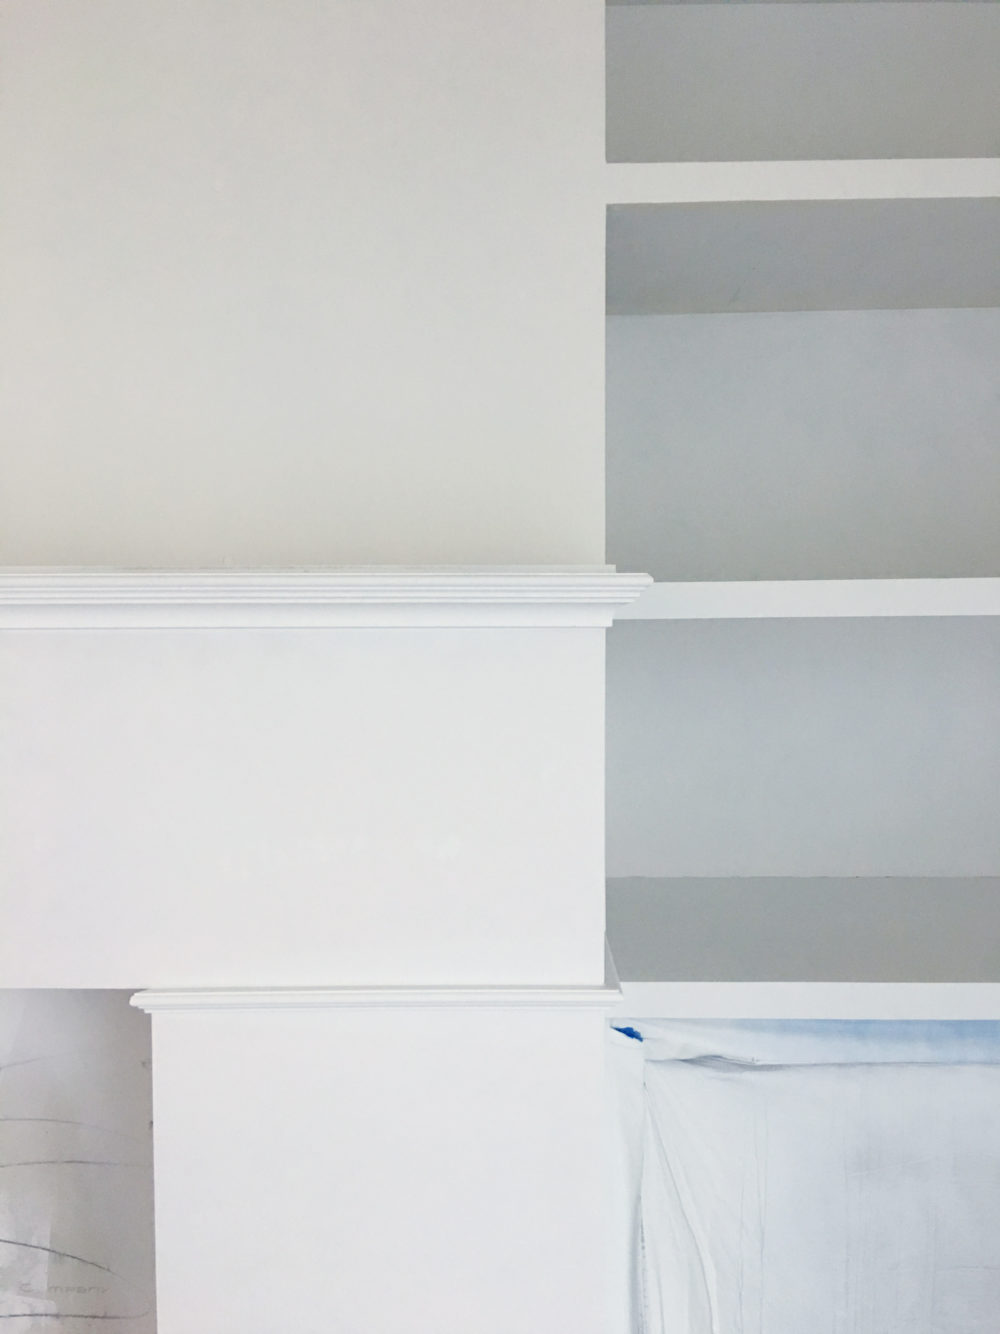
In the design I wanted the shelves to be 1.5″ thick, 1″ seemed too skinny, and 2″ seemed too thick, and 1.5″ was easy to achieve by using 2 sheets of 3/4″ MDF glued together. This picture above shows a lot about how the shelves were constructed. We placed one 3/4″ panel on each side of the cabinet/shelf walls, then, after determining the height of each shelf – we wanted 4 shelves so we took the measurement of the soffit to the base cabinet and divided by 3, then subtracted the thickness of the MDF panels… basically A LOT of math and measuring to get it right. Once that was done, we cut the side supports for each shelf, put those in place then inserted the actual shelf. Hopefully this makes sense…

Above is another image that explains a lot. Once everything was set, the seams were puddied and sanded.

The next part is crucial for that seamless look. The entire fireplace wall was covered with two sheets of the 3/4″ MDF, then the fronts of each shelf were covered with MDF as well, so that the final seam is actually on the inside of the shelf rather than the front. These seams were then puddied and sanded as well as the nail holes.

Once the surface was completely smooth, everything got 2 coats of primer and 2 coats of paint, with plenty of sanding between coats to ensure a super smooth finish.
Now, the finishing touch for these built-ins were the cabinet doors. There were two things we considered when determining the doors, first – since we have an open concept living room & kitchen, we wanted the style of the doors to be cohesive with our kitchen cabinets, which are Shaker doors. Second – we wanted them to be something we could paint ourselves, so that the entire wall was the same paint. If we chose doors from IKEA, we could not paint them, nor would they match our kitchen doors.
This is why we chose to use Semihandmade! I’ve ogled for years over Semihandmade’s products, and the gorgeous spaces other folks have created with their cabinet doors. It’s so genius of them to offer high end door fronts for IKEA’s less expensive cabinet bases. We chose to use the DIY Shaker door front, it comes as an unfinished maple + MDF door, perfect to customize with your own paint! In the DIY option, also offer stain grade doors – so smart!!! They have a wide selection of all different styles of door fronts, most already finished for you to attach and go! Definitely order some samples if you’re thinking of a similar project!
I don’t own the proper painting tools or space to have painted them myself, so we sent these doors to our painter to get sprayed, which wasn’t too expensive since we only had a few doors to do. I think we paid $400 to get our pantry doors and these doors sprayed with two finish coats.
During the planning phase of this project, I shared our plans with Semihandmade and they were so generous to want to partner with us, but have you know we were already planning to use their products in this project.
We’ve also been getting a lot of questions about the soapstone we used on the fireplace. We’re still in the process of oiling it etc, once we get the finished look we want we will share more on this! If you have any questions leave them in the comments below!

Wow, this looks amazing. What a fabulous transformation.
Thanks so much for all the information! We are in the process of adding a fireplace and built-ins right now, and I wouldn’t have thought to apply the MDF to the entire thing. It’s so smooth and lovely! Off to Home Depot I go!
I am so stoked!! This couldn’t have come at a bettie time for me!! The detailed photos of the steps and the little things we don’t think about before launching into a project were so very helpful. You’ve undoubtably saved lots of others so many headaches. Your finished project is beautiful!!
Love your fireplace and built ins! We’re building something similar and we have 8 foot ceilings. We currently have 3 shelves planned with 18.5 inches height for each shelf, but we’re concerned it’s too much height. Do you remember the height of each of your shelves? Did you have 8 foot ceilings too? Thanks!!
Looks awesome. What is the natural stone around the fireplace box?
Gorgeous combination of modern, clean lines, and warm function. Was the mantle custom built or purchased?
It was custom!
Beautiful results! How far apart are your shelves, top of one to bottom of the one above it? And how wide are the shelves, inside wall to inside wall. We are in the midst of a similar project!
Where are the black sconces from?
Used your posts on this renovation as the guide for our bookshelf/fireplace surround rebuild. Sooo happy with the results! THANK YOU
https://photos.app.goo.gl/kiQg6qwhZVp1A9k76