You long time readers out there know, this back yard didn’t start off this way. It was a deserted, lifeless plot of dirt. Legend has it the tenants renting the home from the original owners before we bought it used to frequently light bon fires and burn garbage. Super classy stuff it sounds. Here she looks on the day we bought the house:
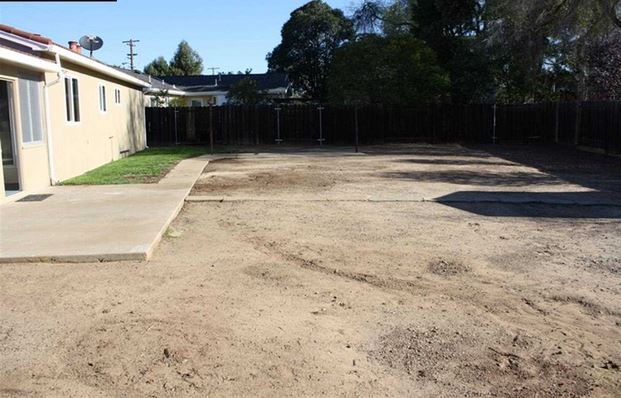
We lived for a year with our backyard like this. Imagine having a yard twice the size of your house, and just pretending it didn’t exist. Last spring we just decided to go for it, called a recommended landscaper and got to work almost immediately.
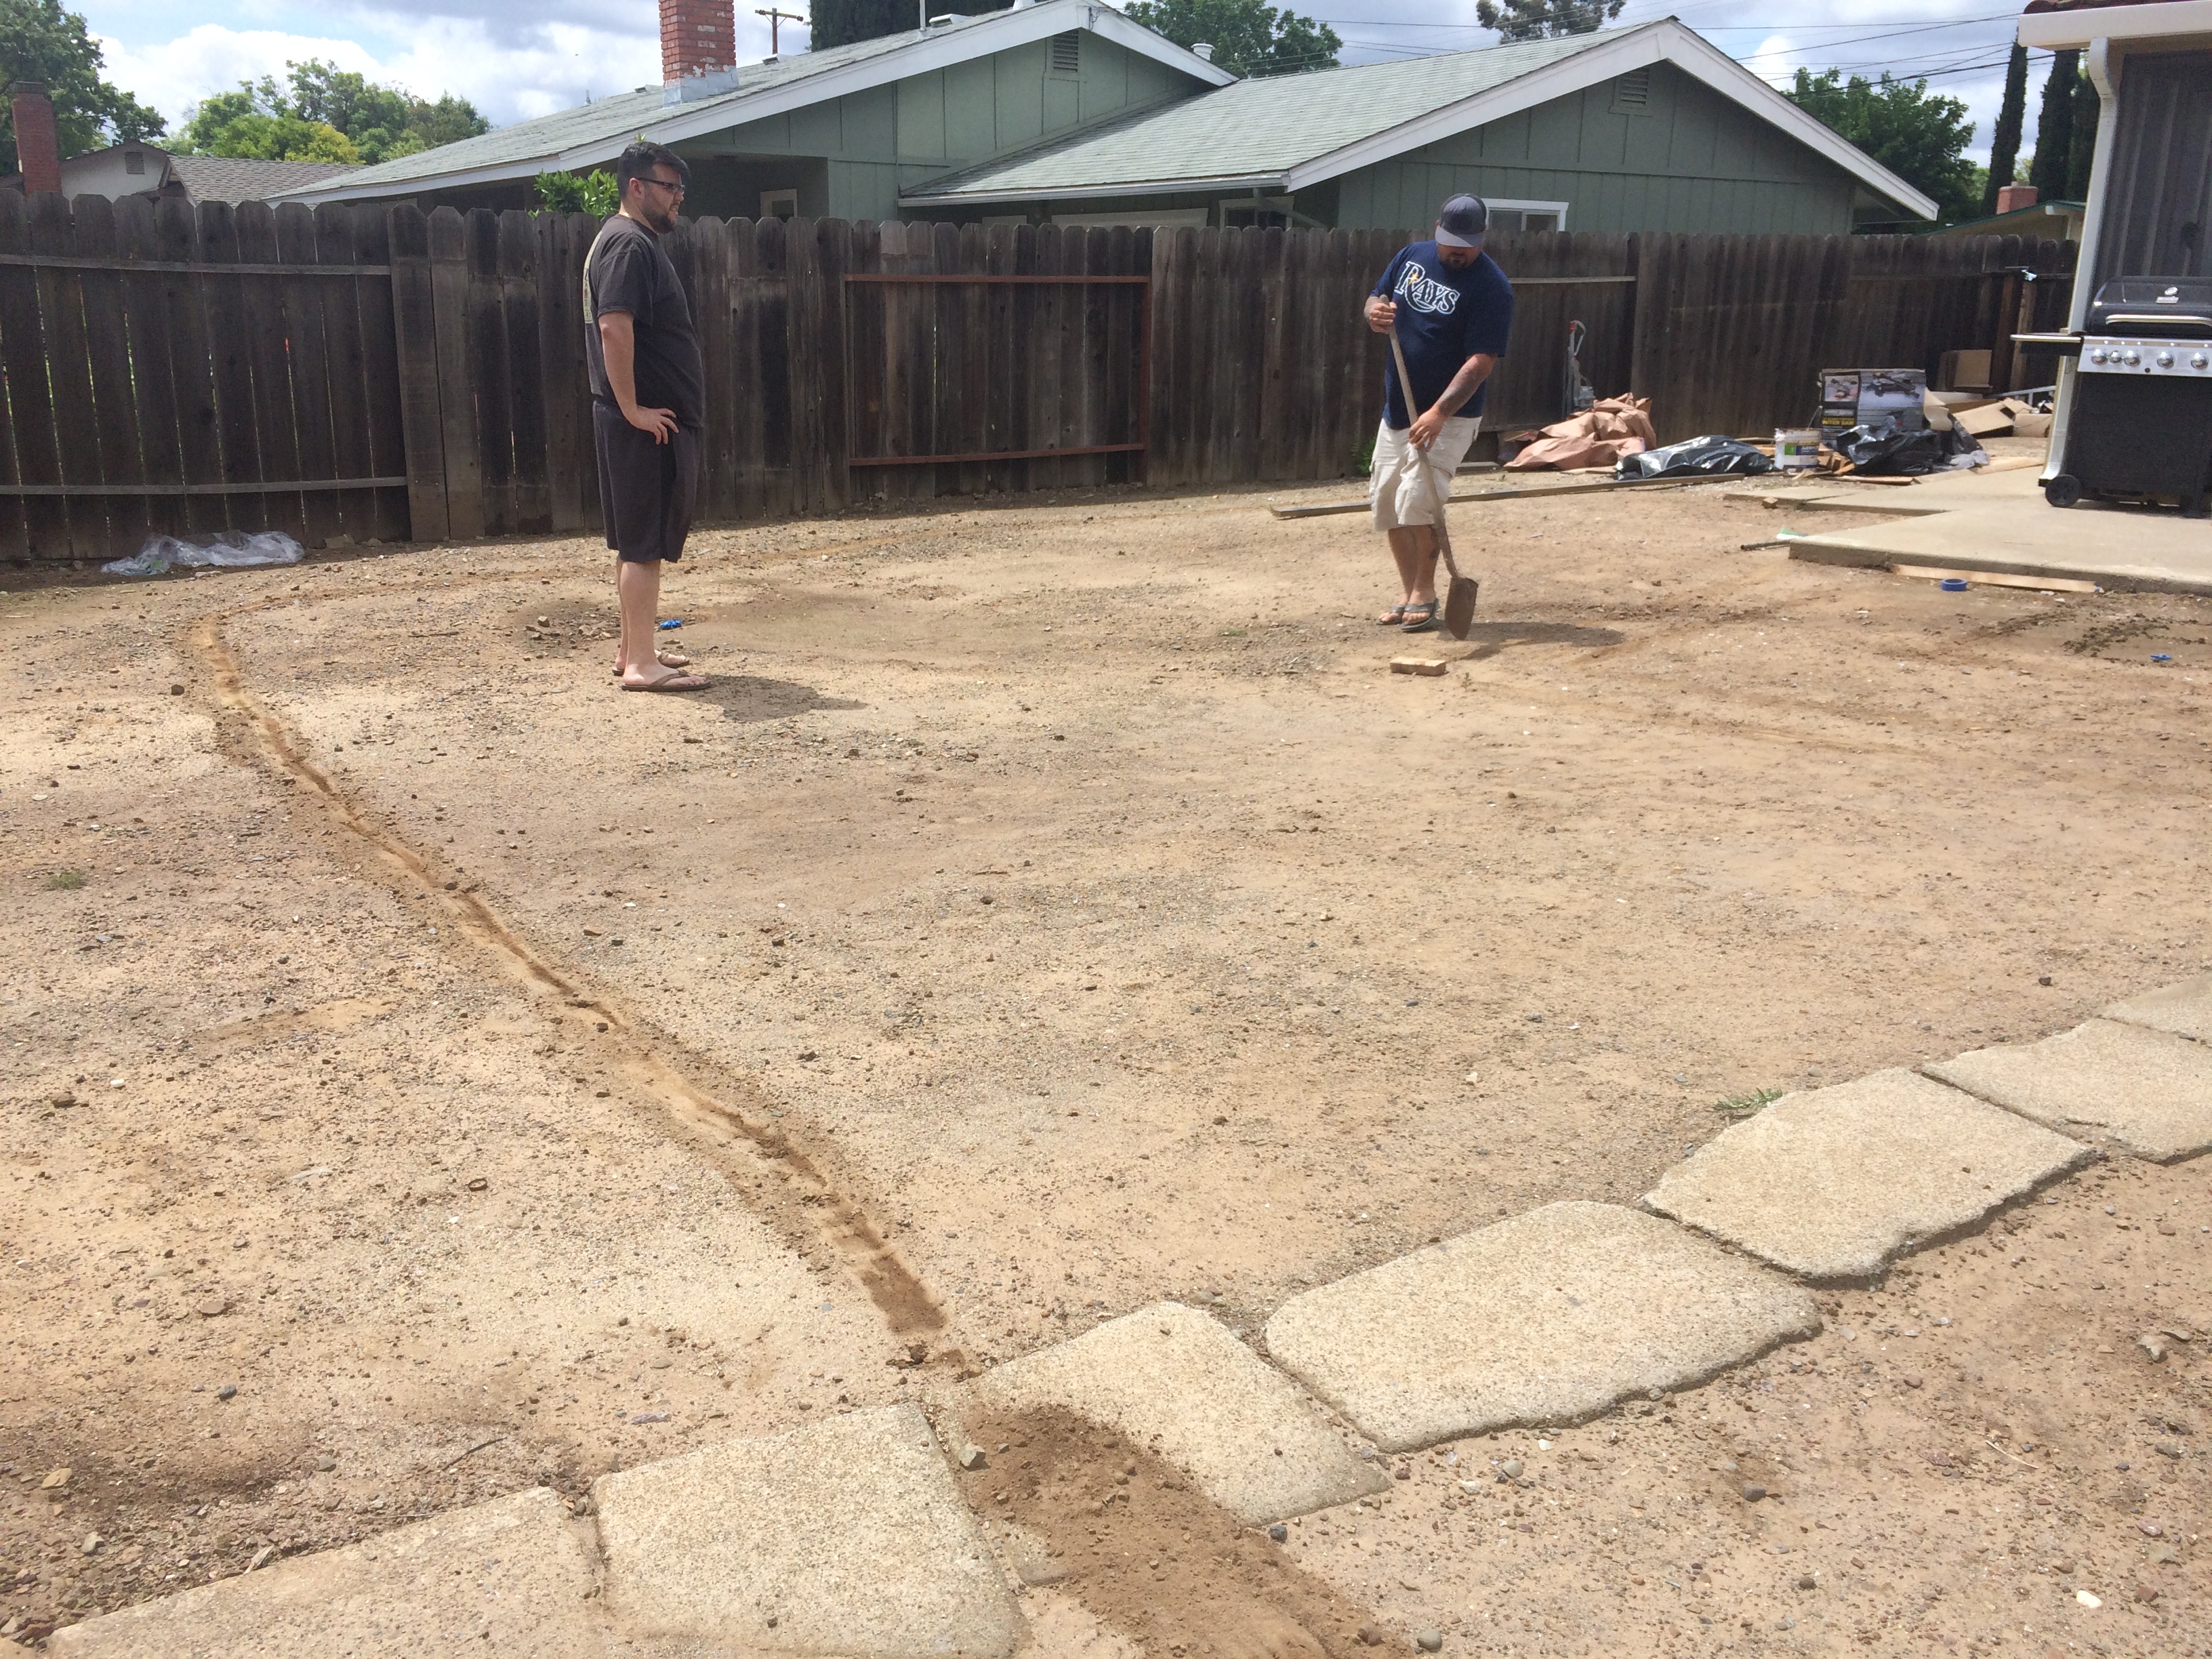
The landscaper, who is actually more of a hardscape kinda guy, came over and we got to brainstorming, drawing in the dirt helped get the scale of the spaces we would need. We tried our best to turn our dream backyard into something that we could afford, I whipped up this super classy professional CAD drawing (haha yeah right, graph paper and colored pencil it was!) and transferred our ideas to paper.
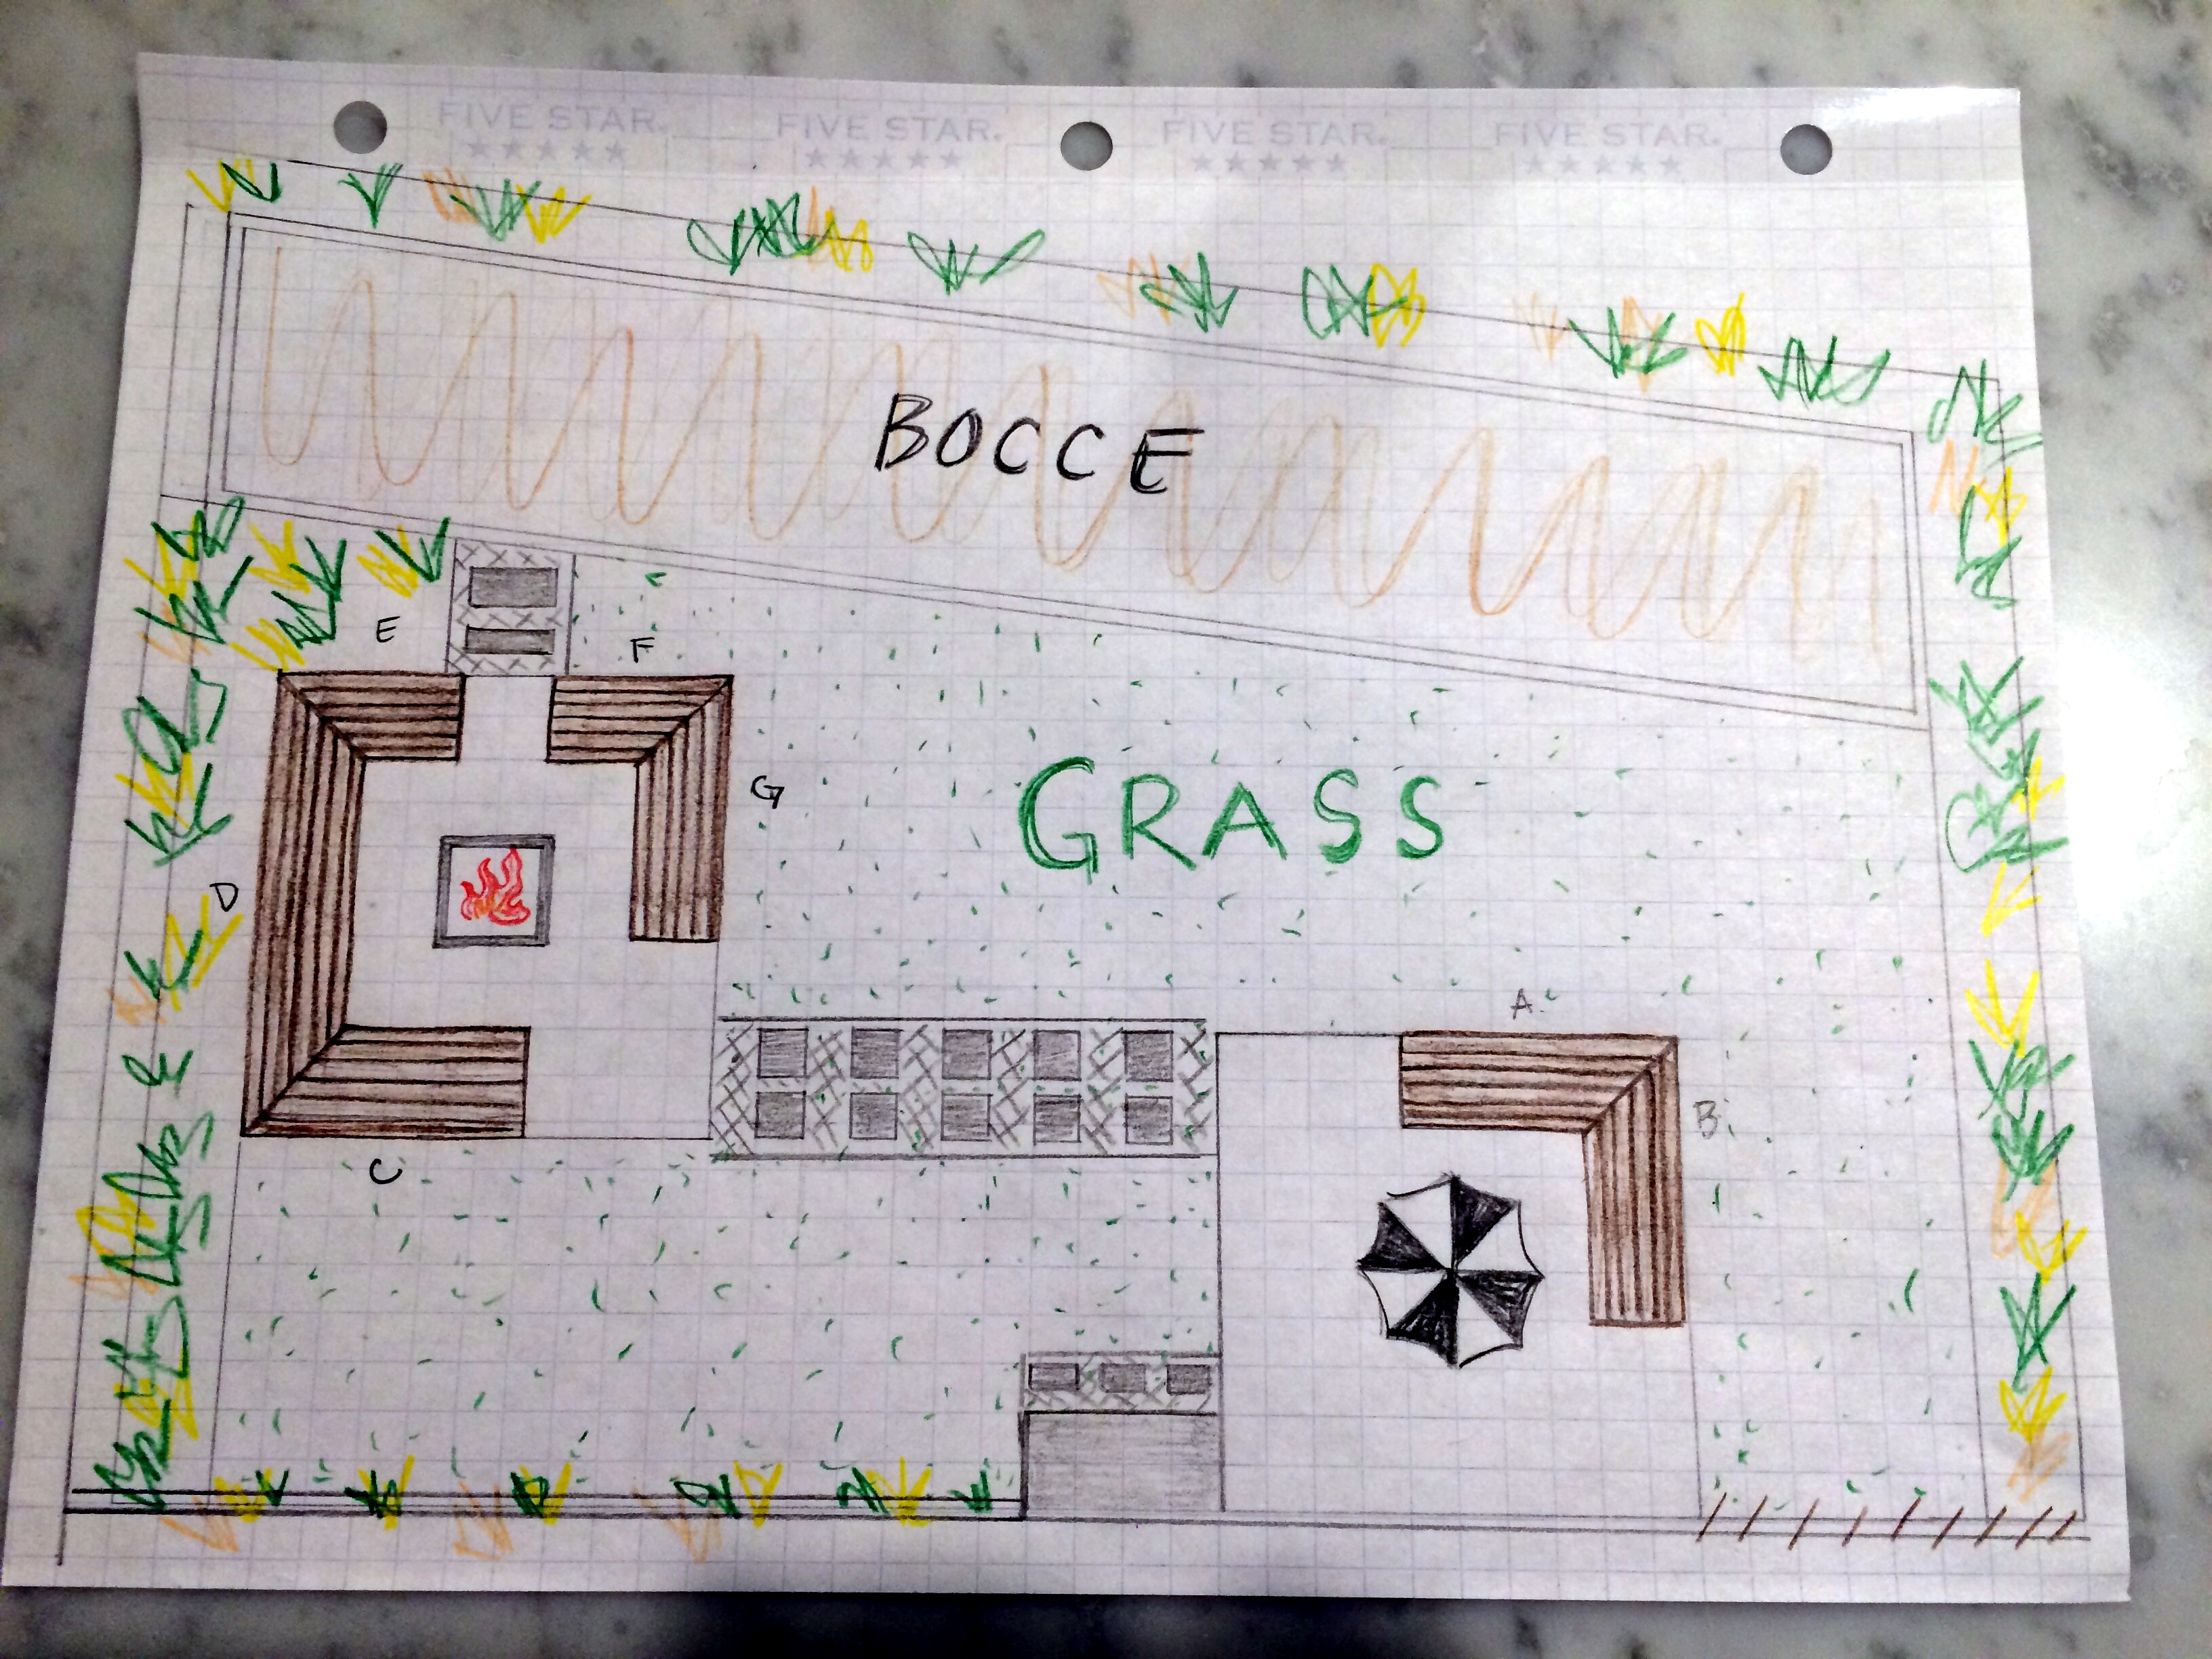
You might think the bocce court was a splurge, but actually it’s drainage in disguise! Our backyard sloped downward and to an angle pretty significantly. We needed to level it all out to accommodate our own drainage, otherwise we would drain right into our neighbors yards. Digging a rock filled trench was the answer, which we topped with compacted decomposed granite and framed out with 2″x12″s, therefore creating the perfect bocce court! Anyway, I’m getting ahead of myself. Let’s start from day one.
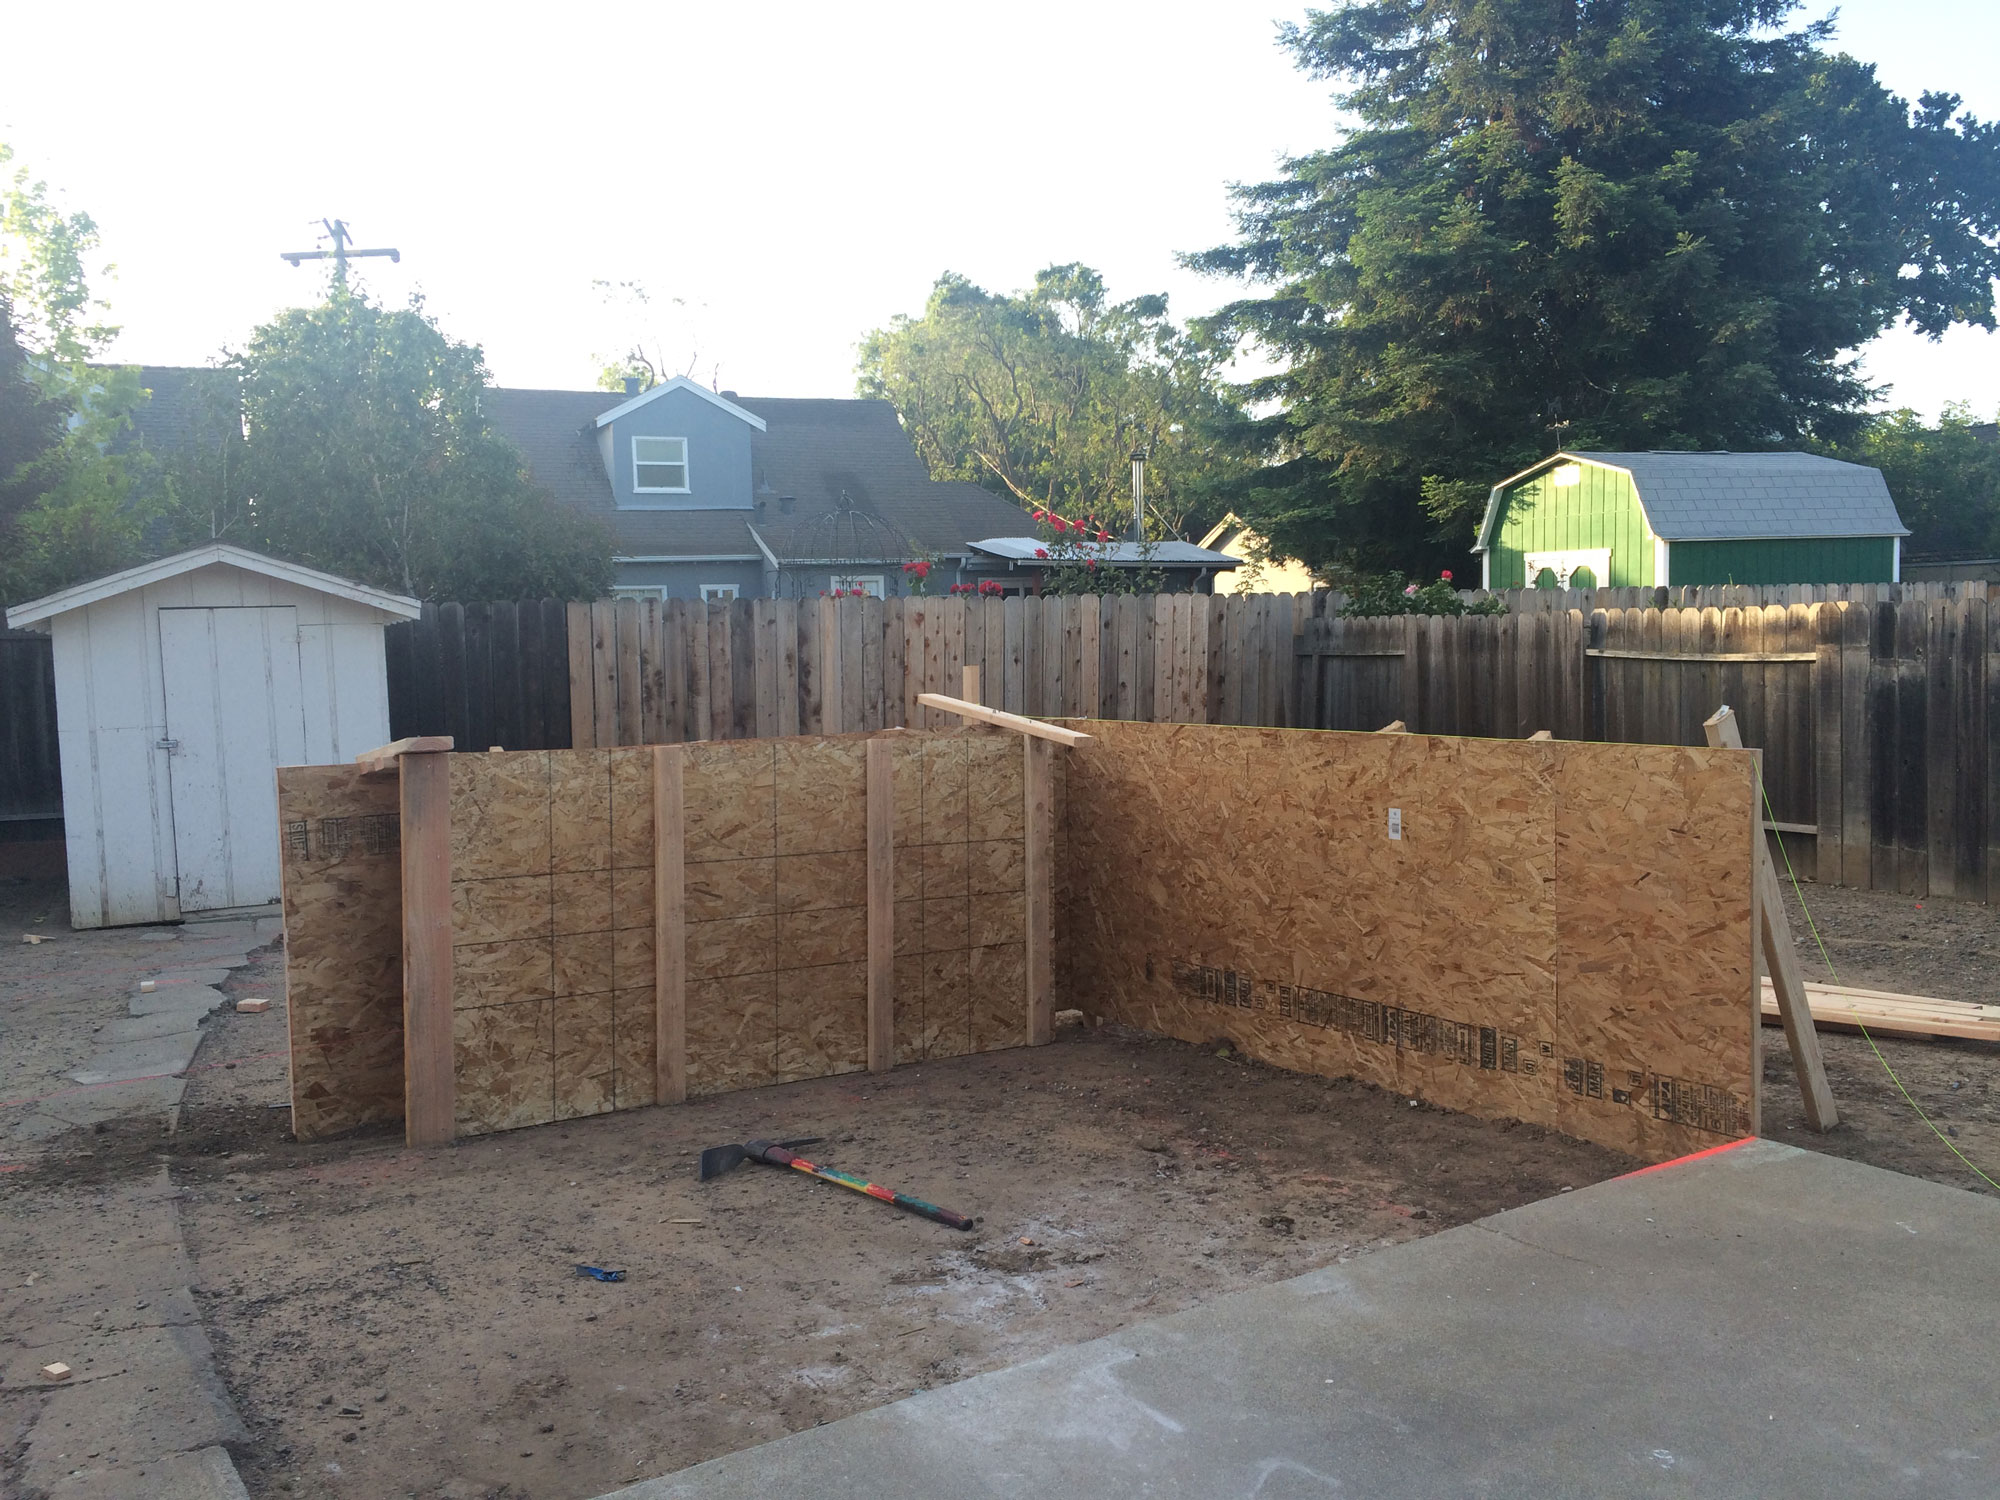
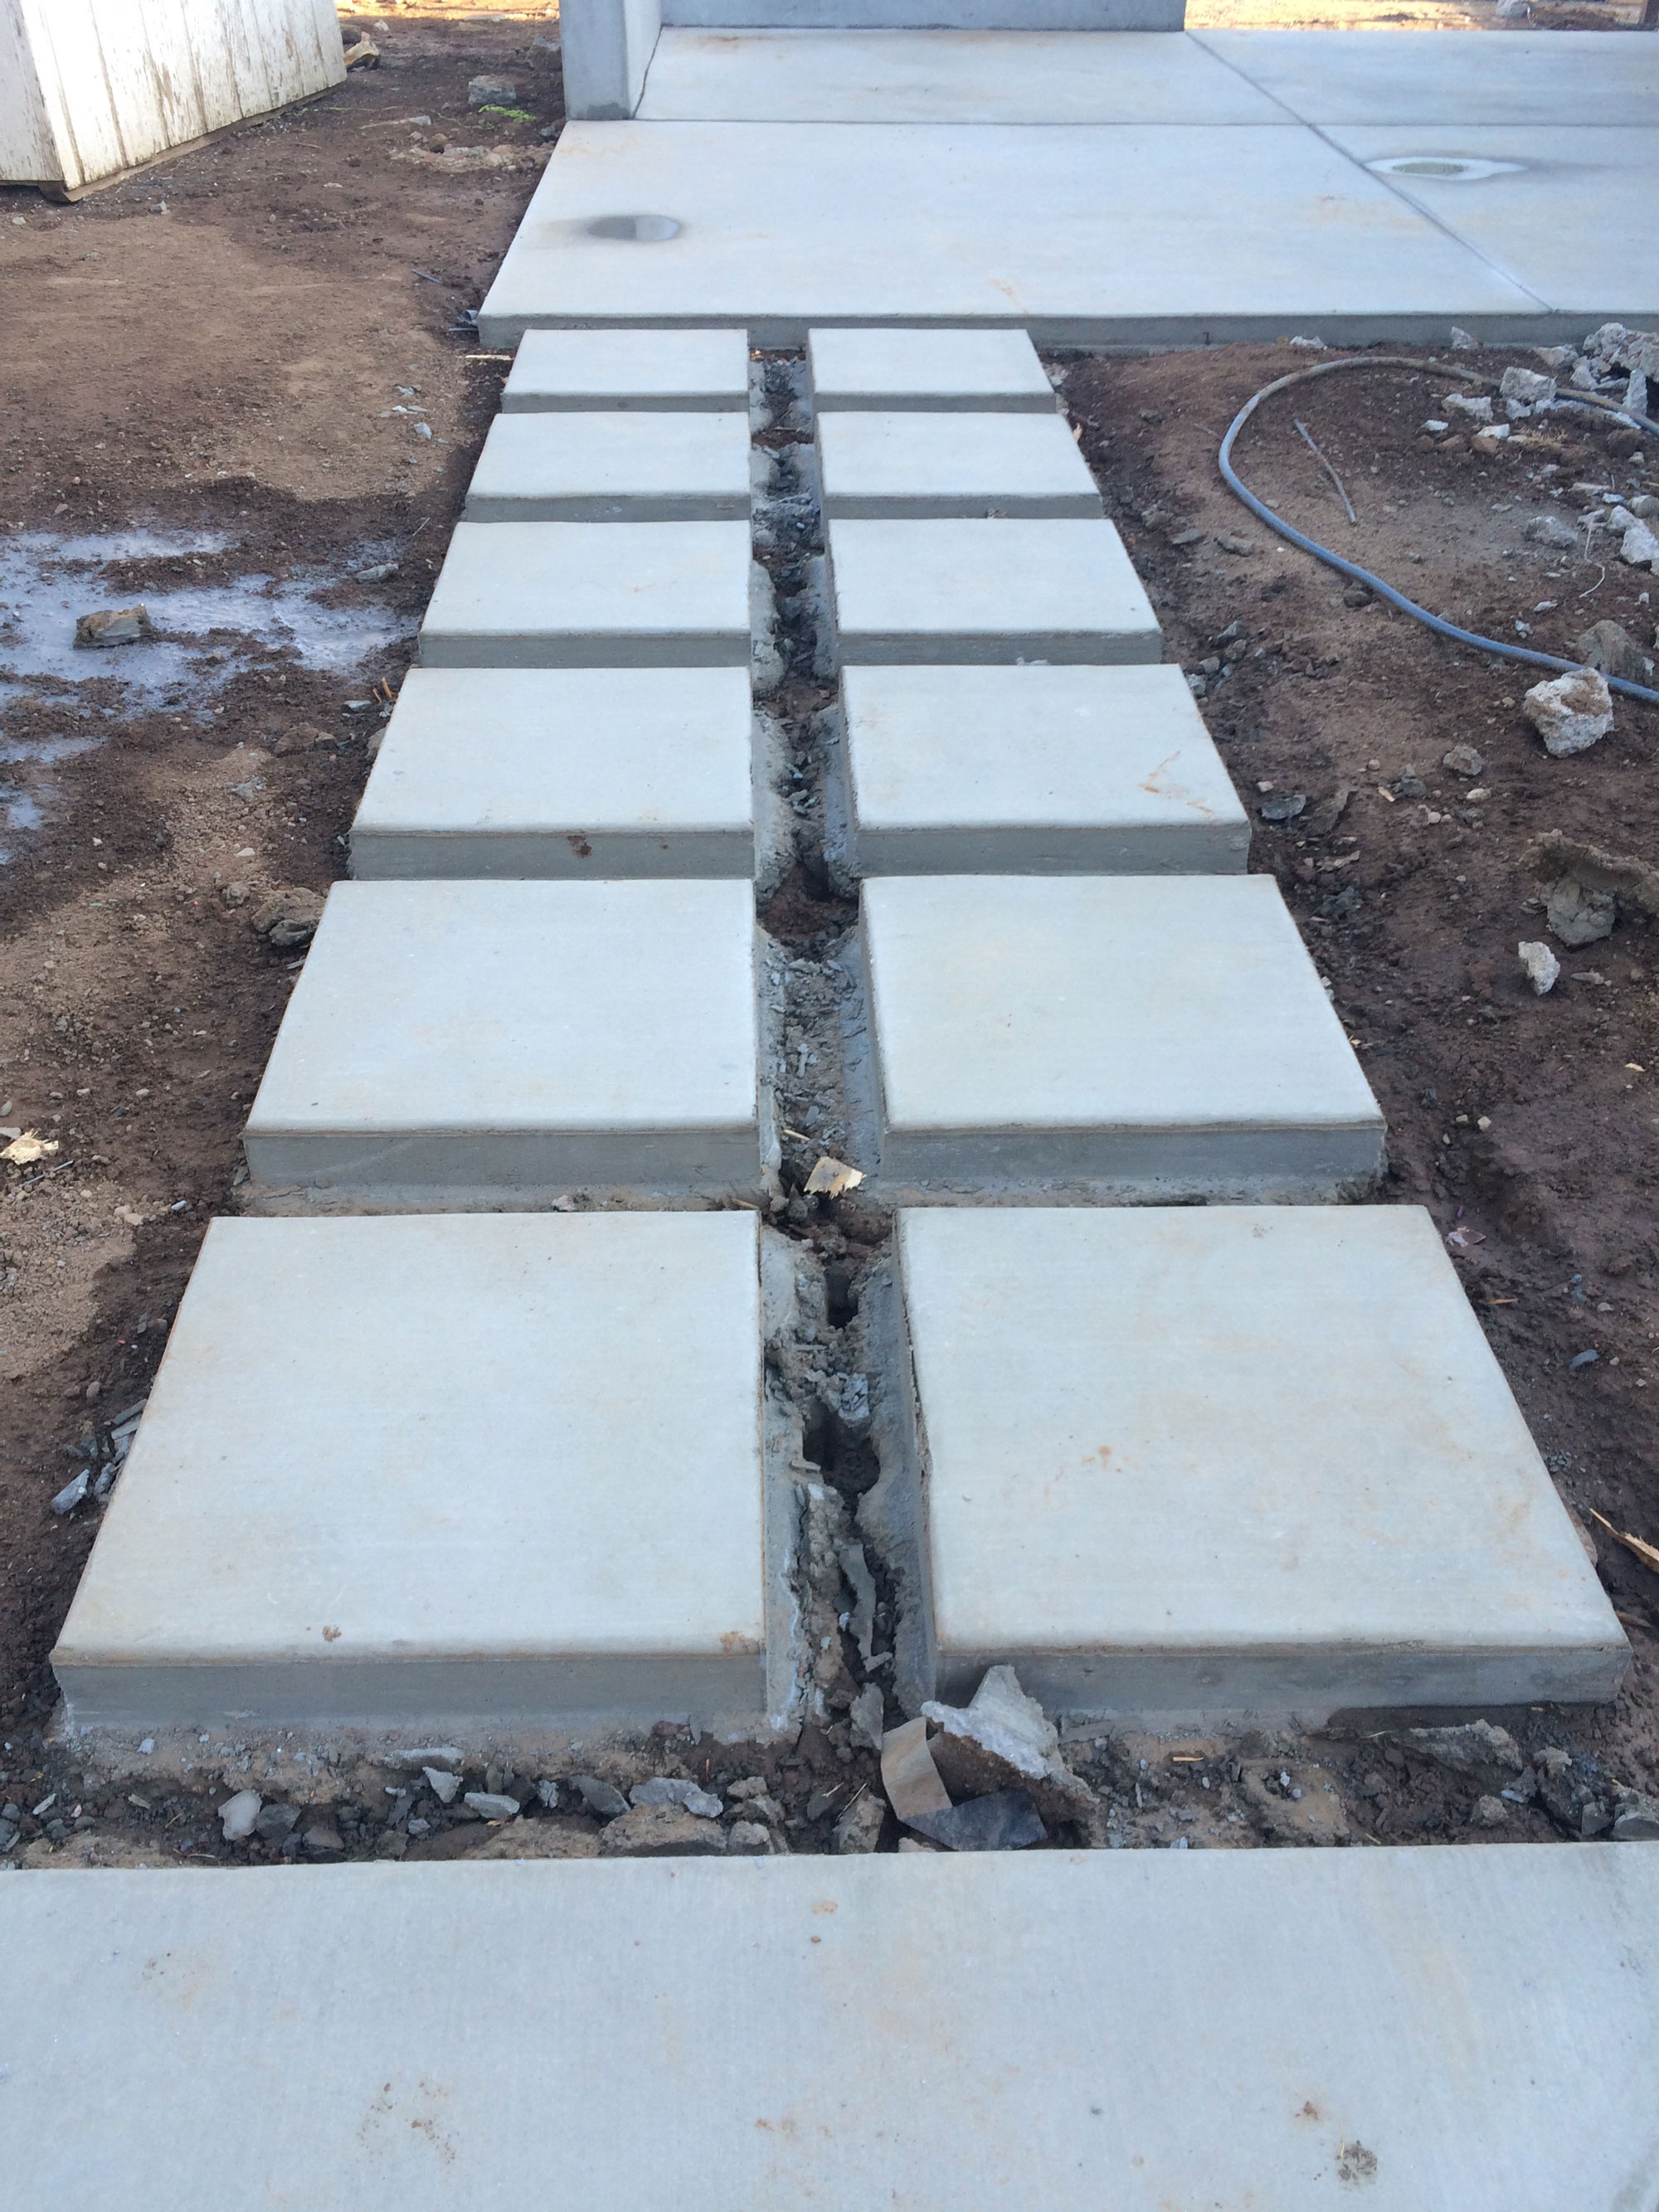
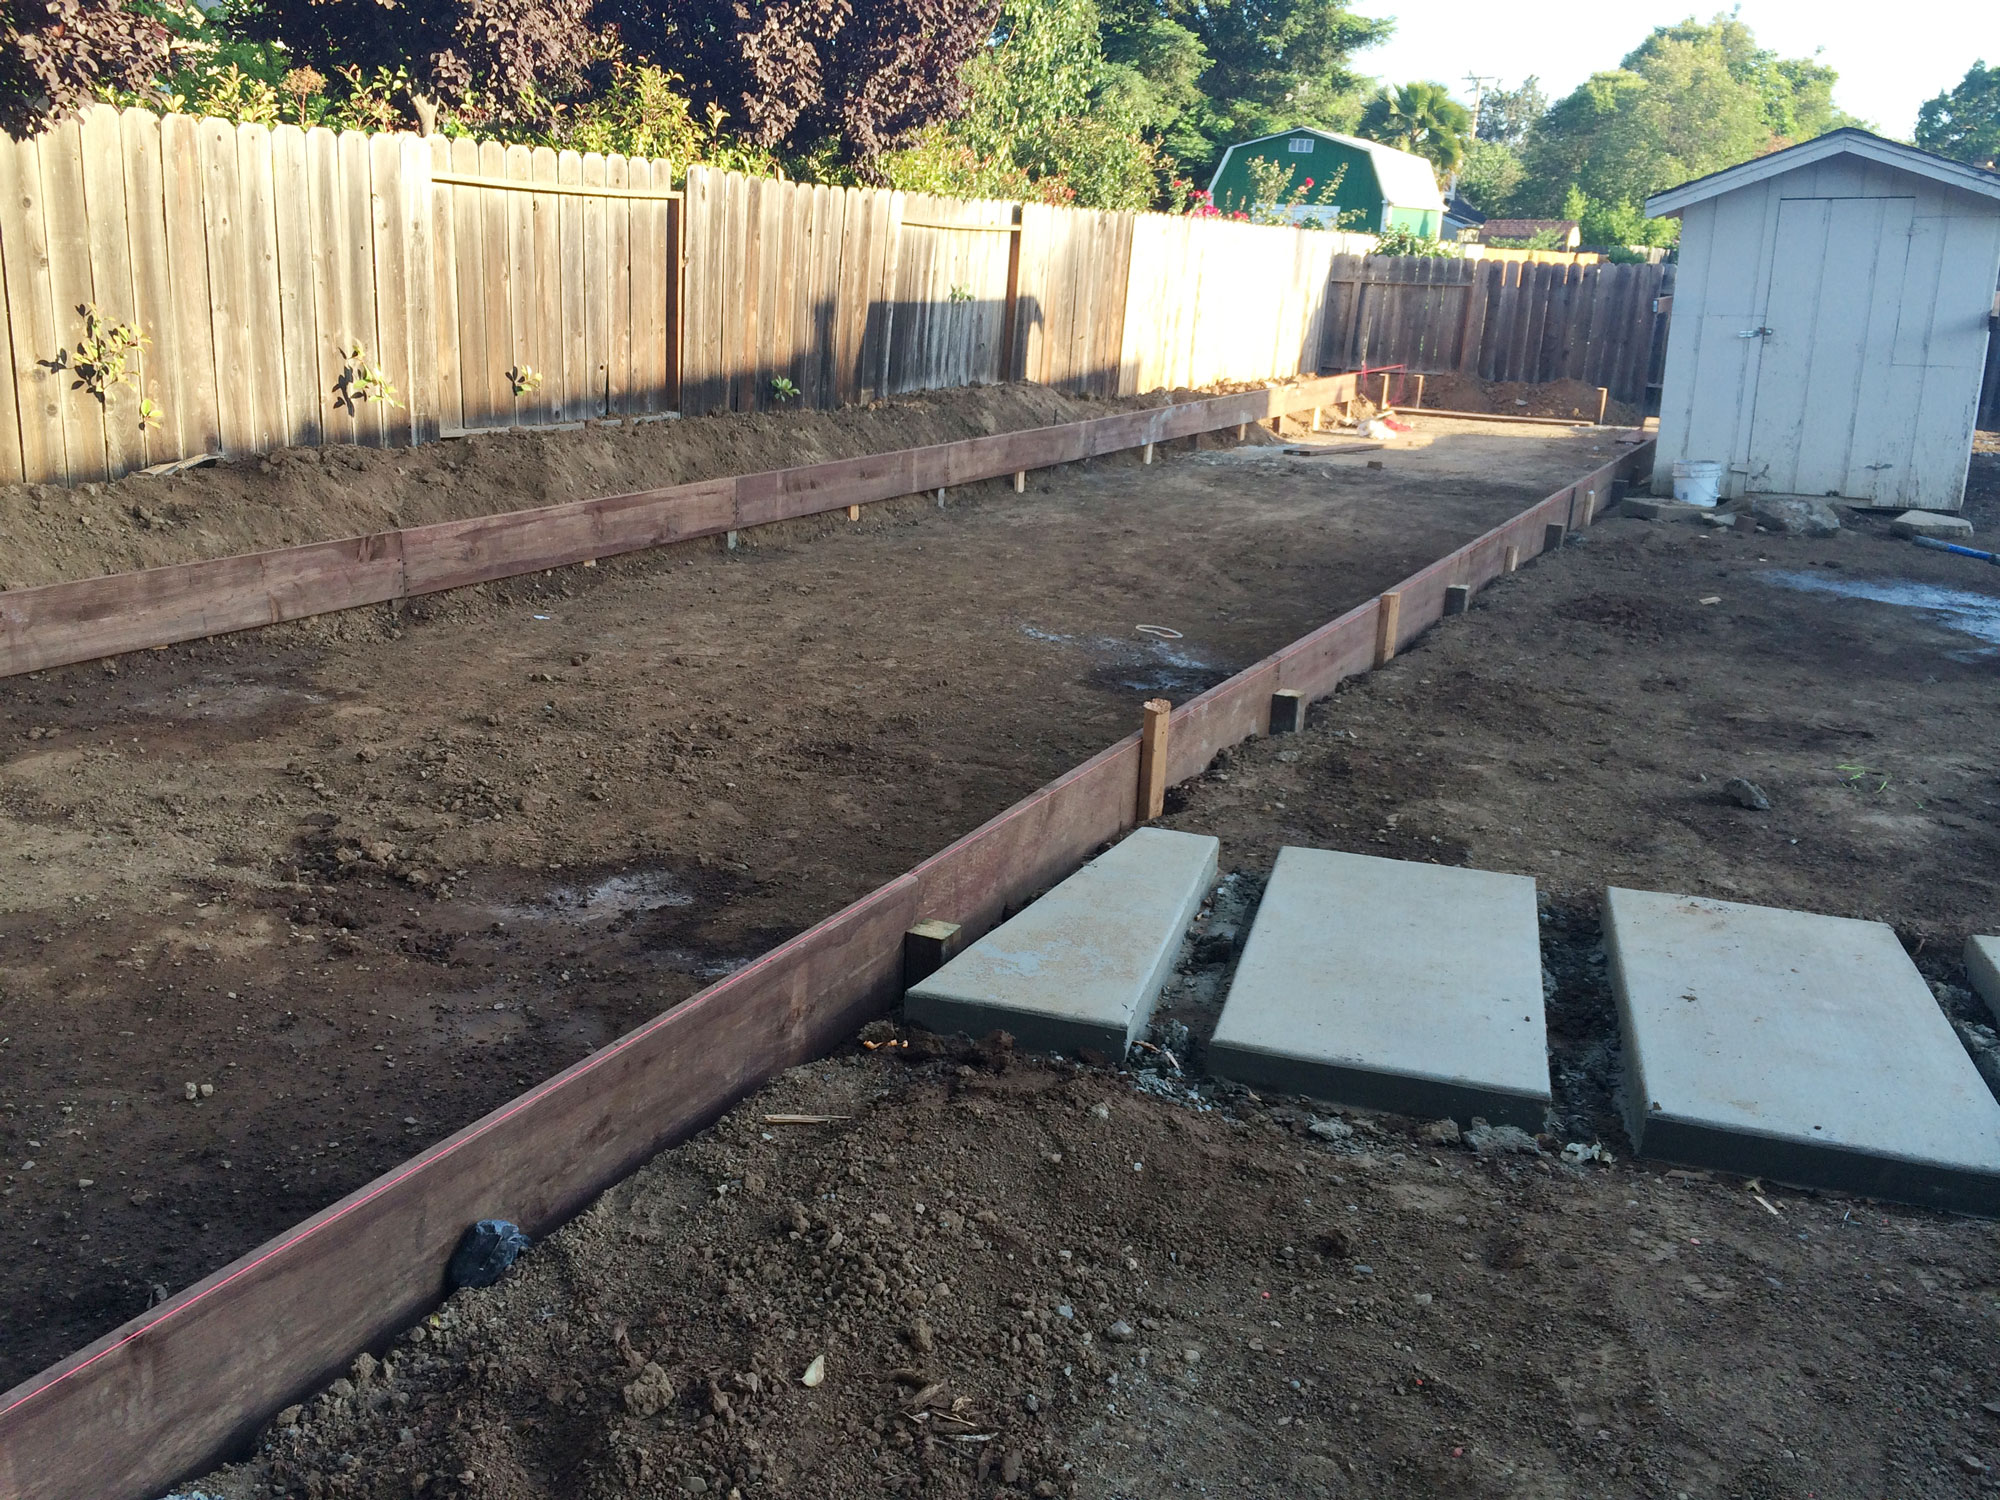
Day one, the team arrived and started framing out the patio benches and the 2’x2′ pathway. They then poured rough concrete over rebar and into the frames. While the concrete set, half the team spent the following couple days jackhammering out the old concrete, while the other half started leveling out the yard, framing the patios & pathway, and digging out the bocce.
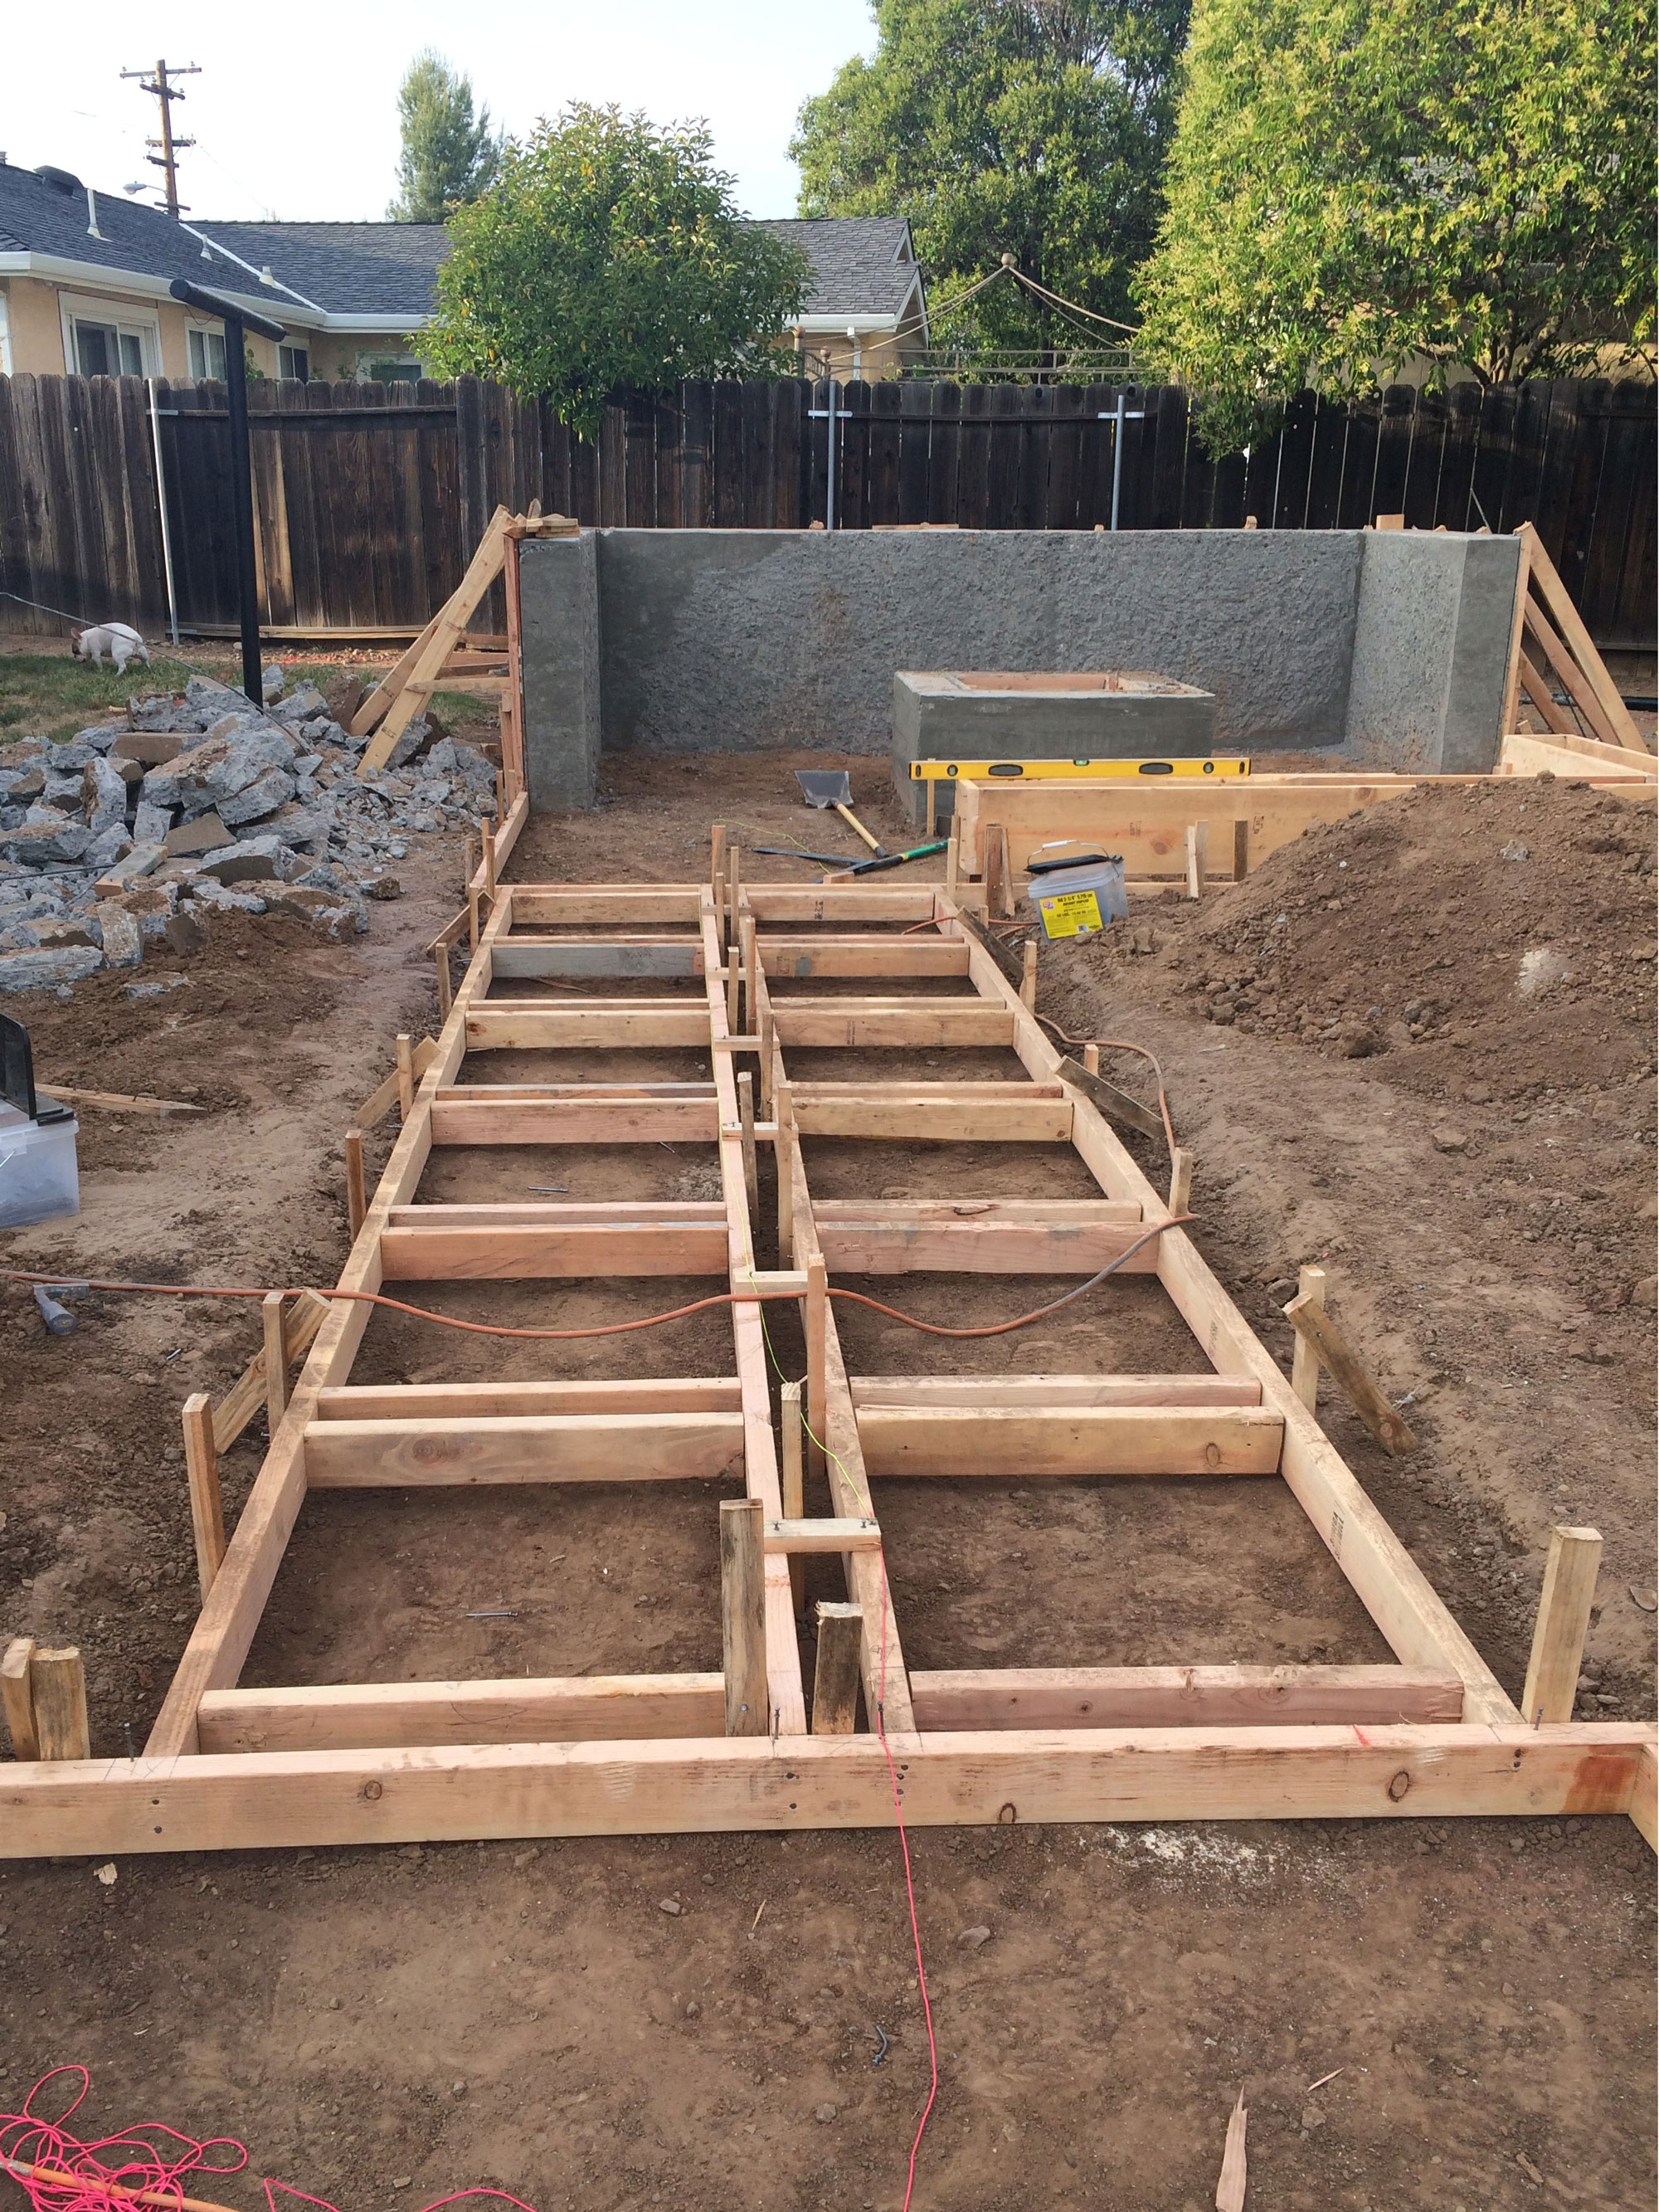
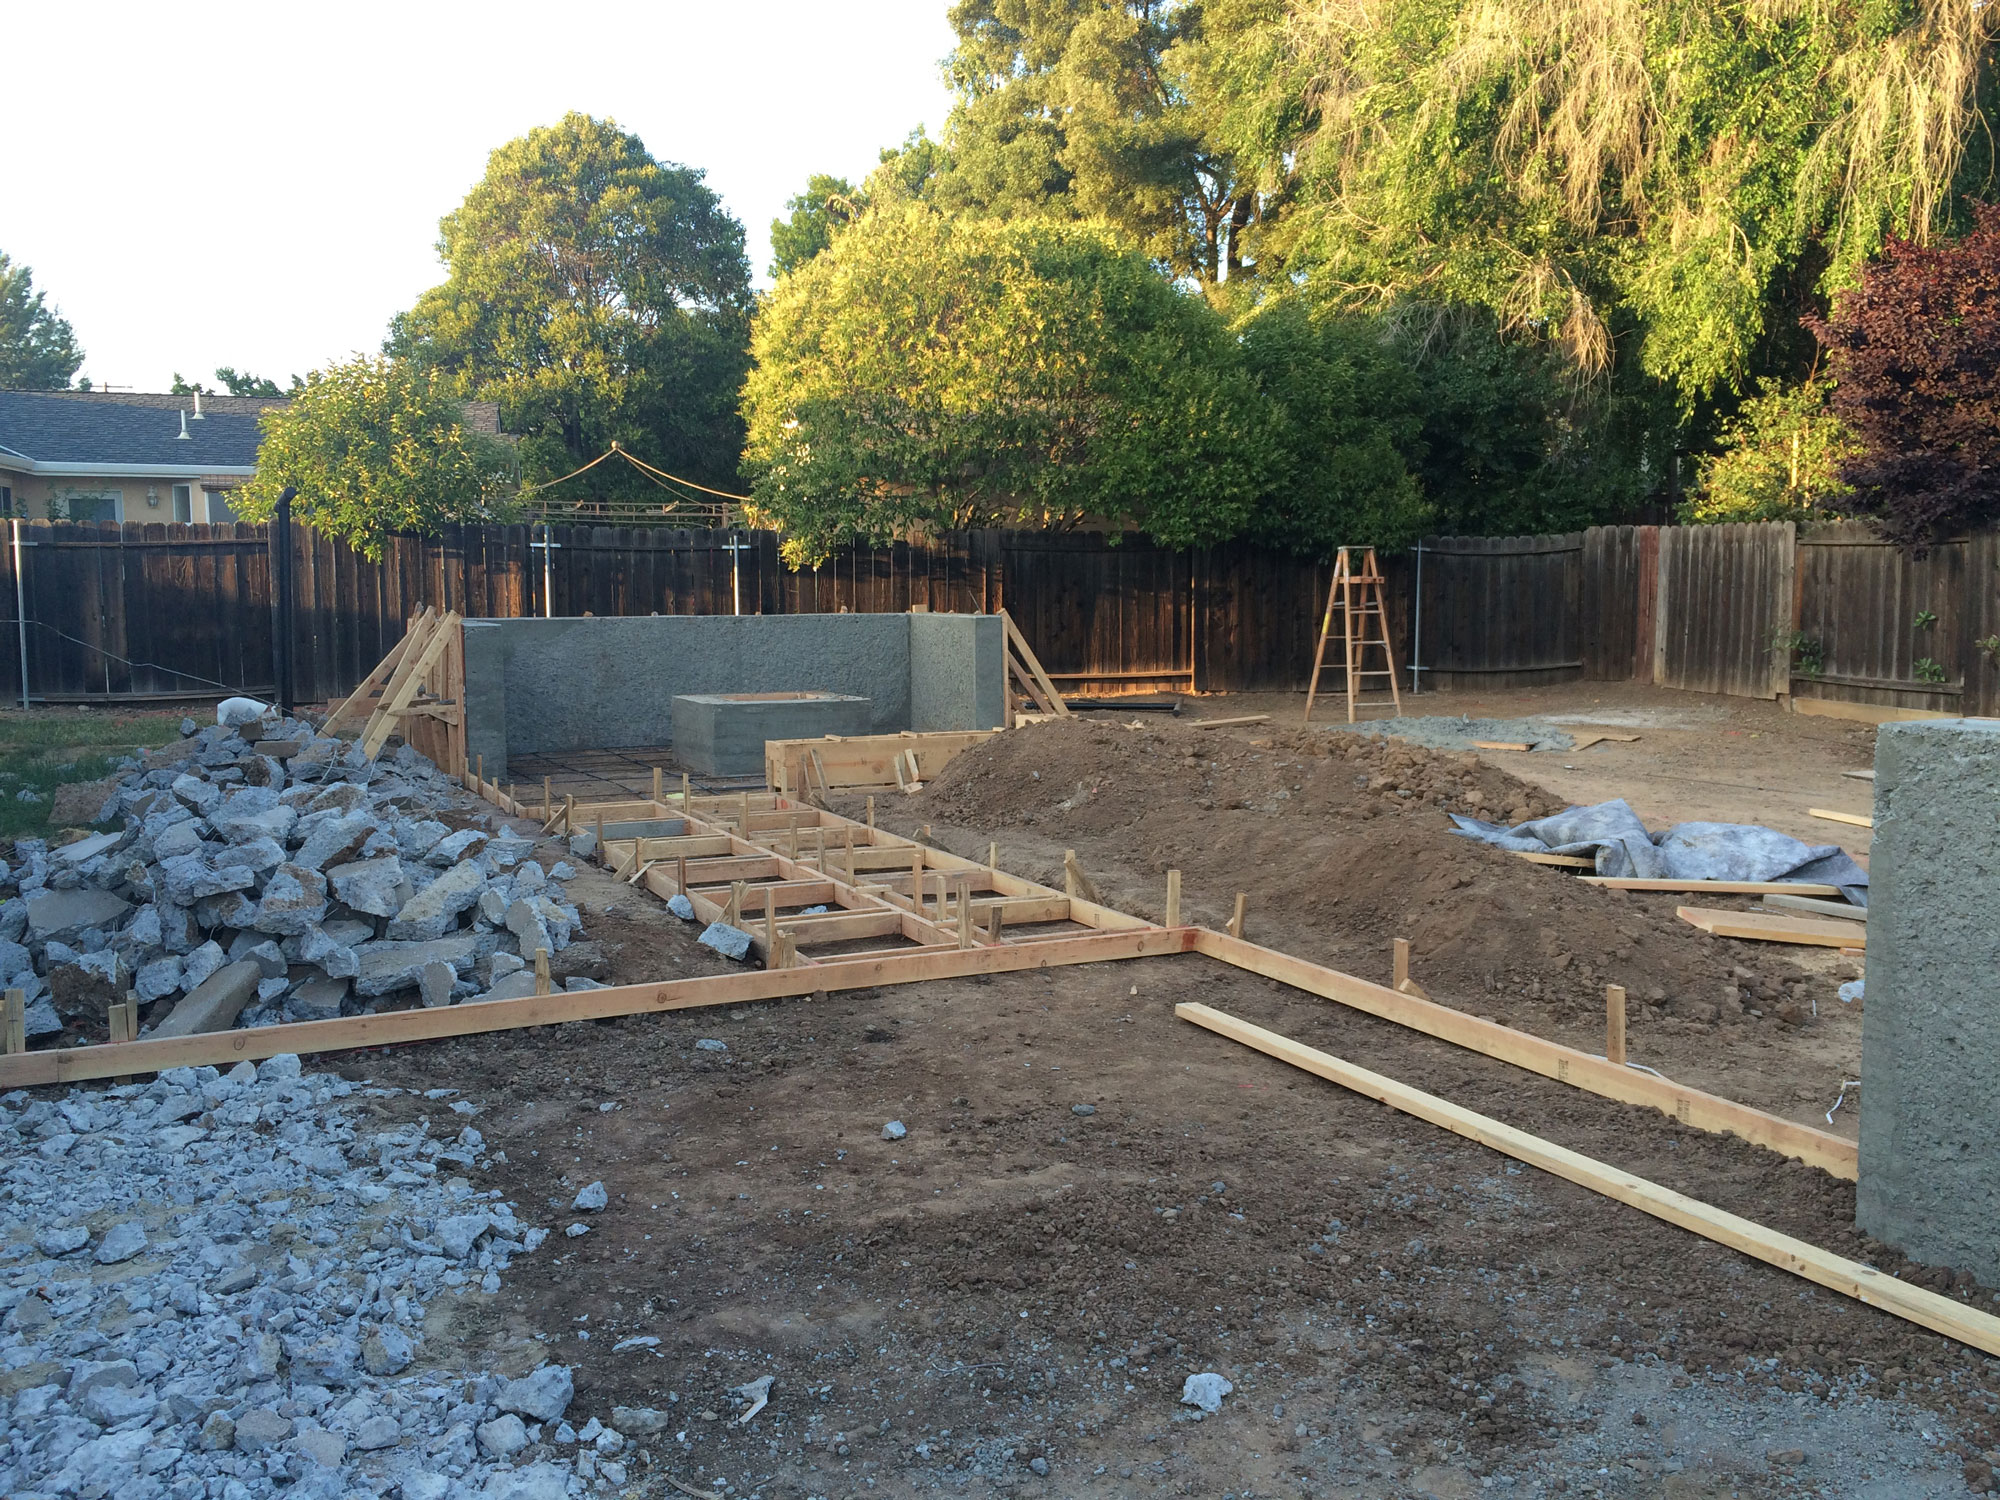
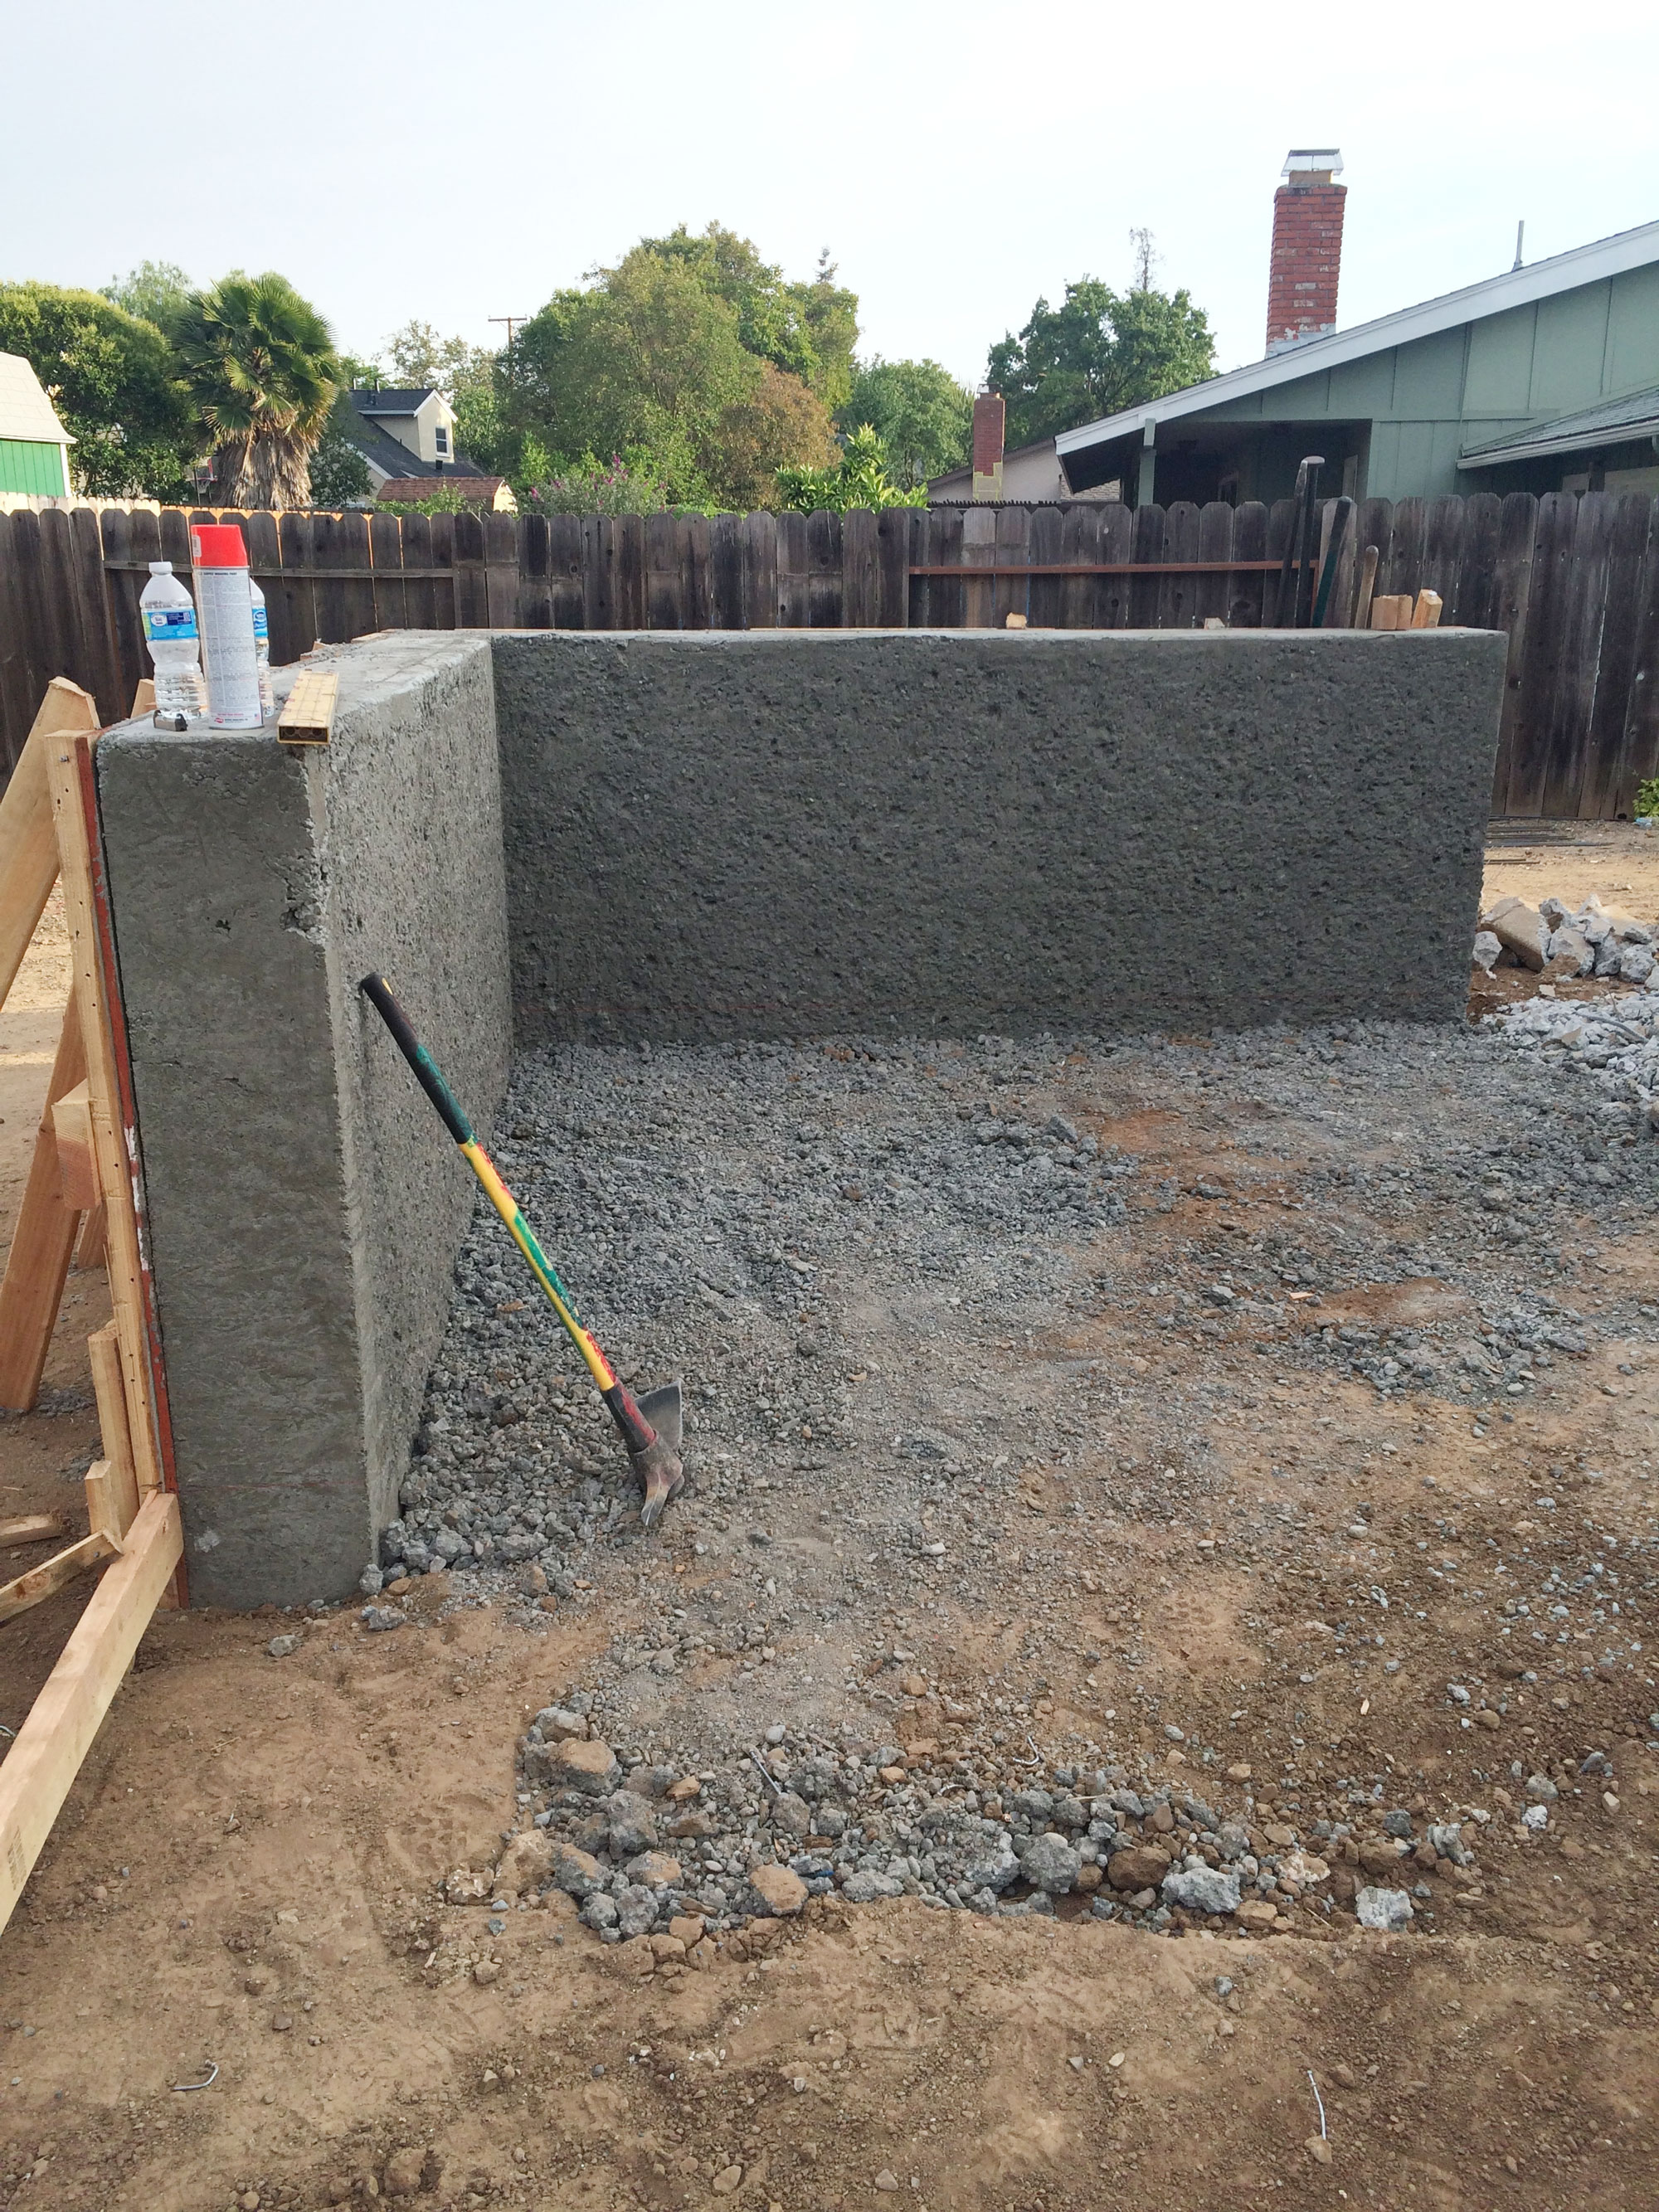
A couple days later after the patios & pathway were completely framed, the cement truck arrived (which I missed and didn’t get a photo of) and the finish concrete was poured in place and over the top of the rough framed out bench walls.
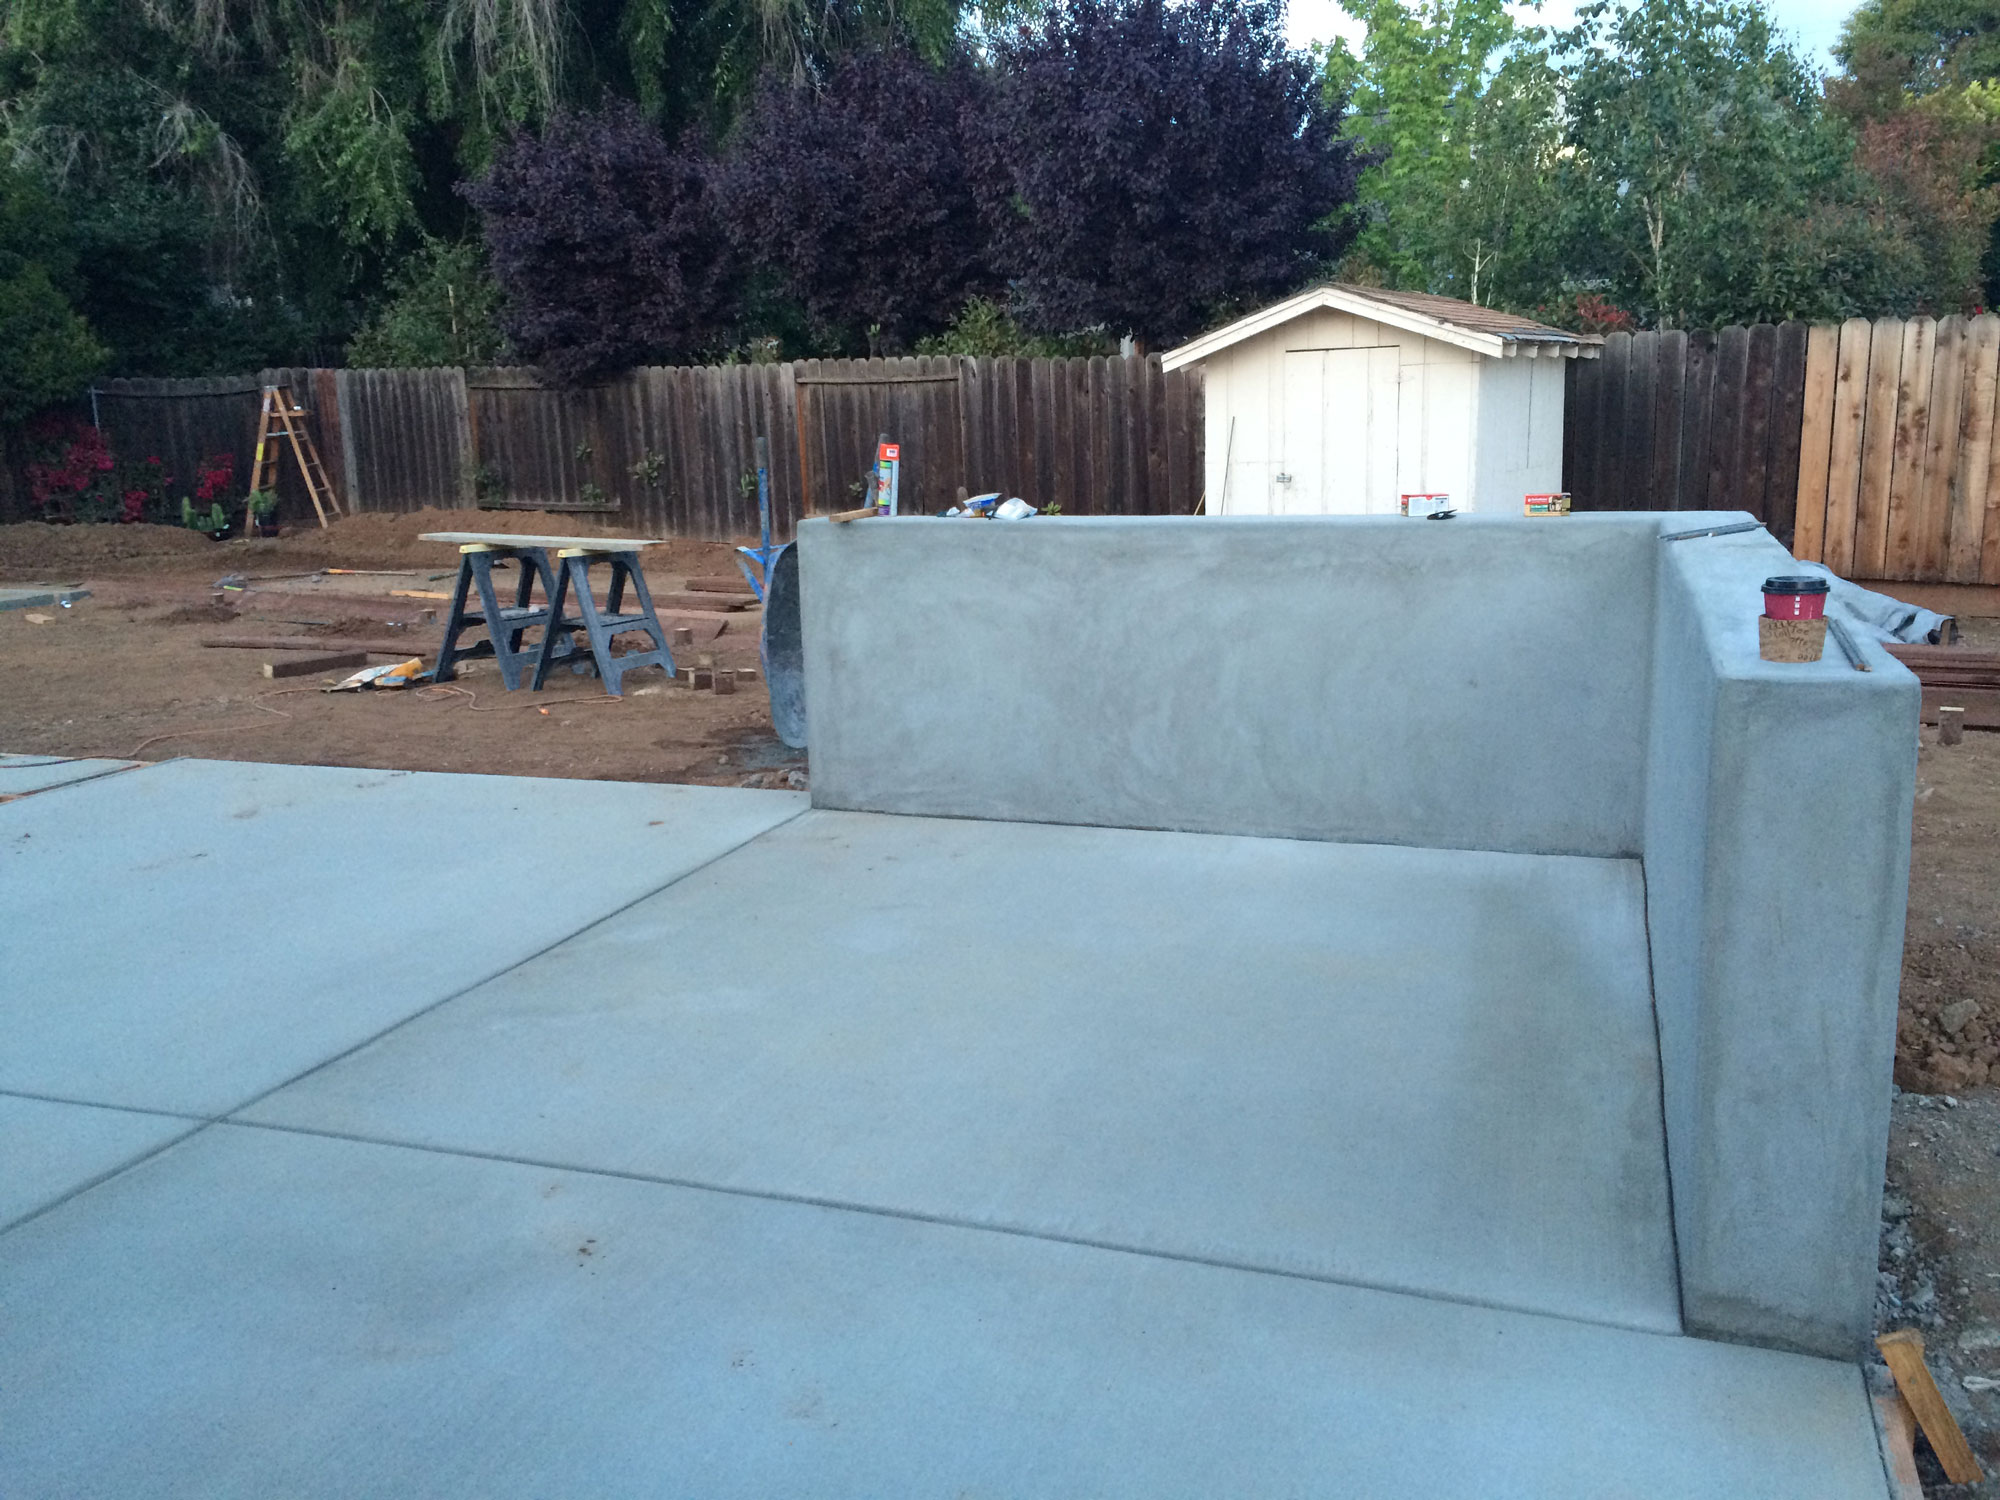
I originally wanted the bocce court to be framed out in concrete as well, but pouring concrete is EXPENSIVE and wasn’t in our budget. The bocce was framed out with treated lumber.
A few guys started on the floating benches. There were only a few things that didn’t go according to plan, the floating benches were one of them. I was super meticulous about in the design, and having the benches 100% “floating” was a must. What you see below was not the final design. I came home to find those 4″x4″ chunks of lumber sitting under the bench seats – not pretty!
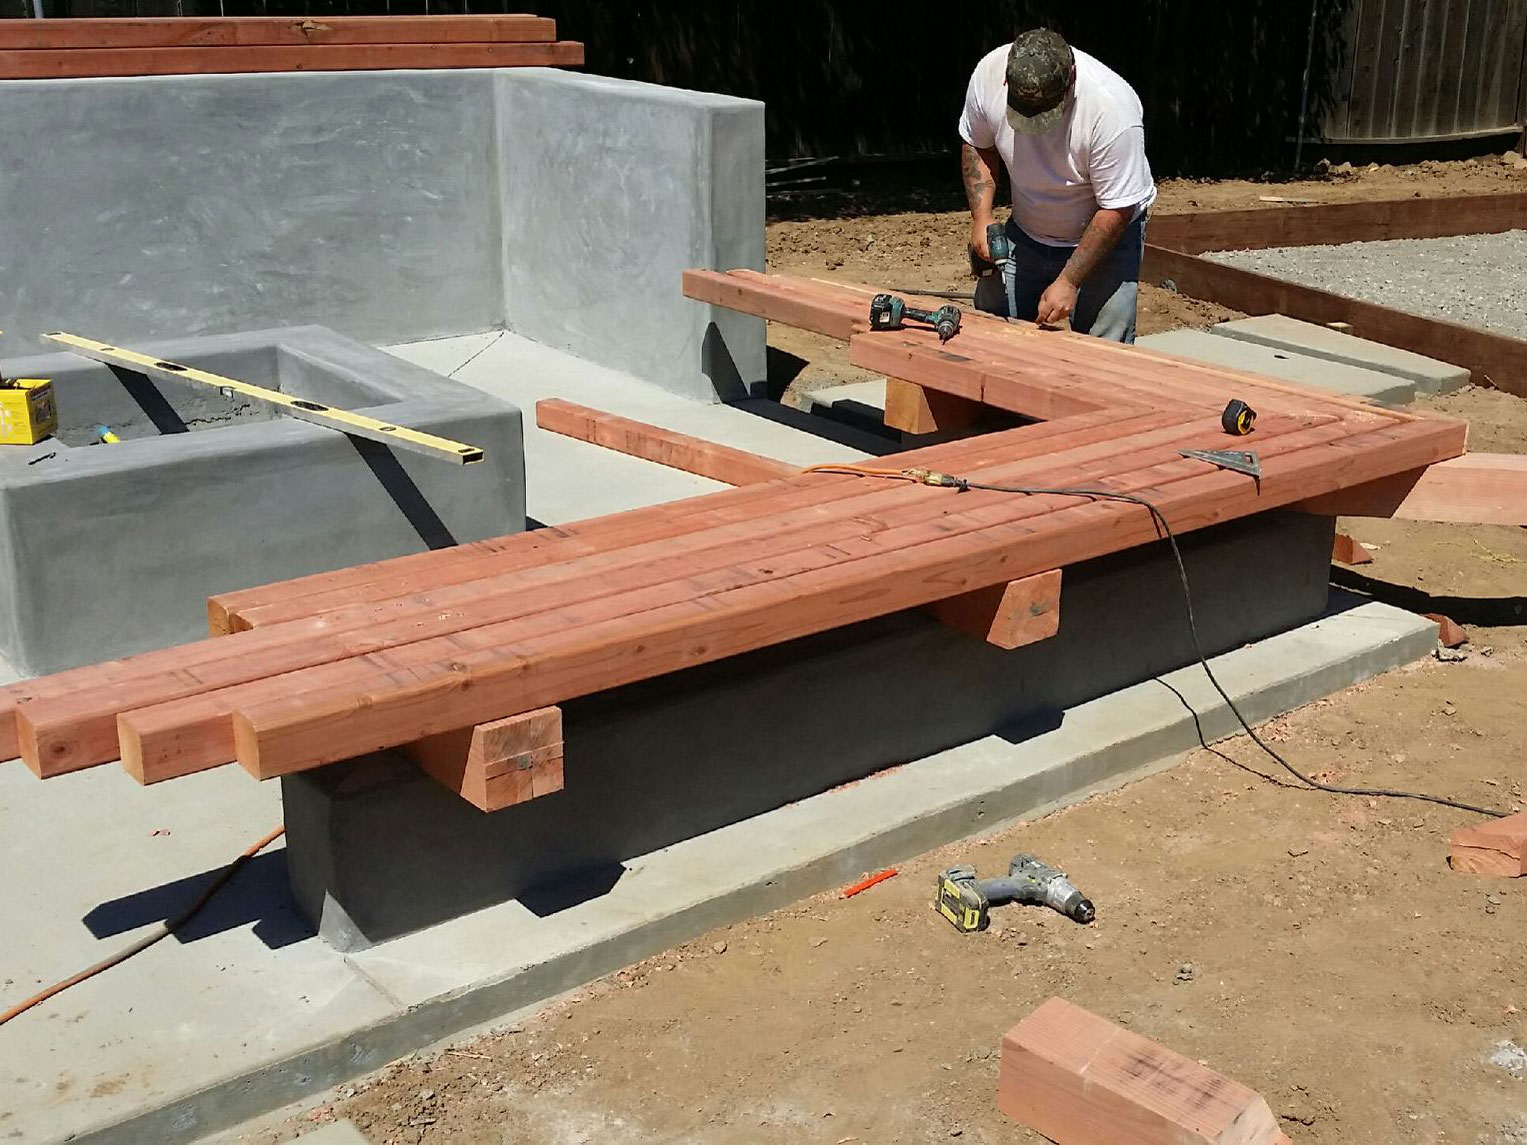
To some, it may not look bad, but this wasn’t in the original plan. We discussed metal brackets, and felt the landscaper was skimping because we were behind schedule. We called our contractor who worked on our floors & bathroom, and asked if he could help find a solution before the situation got worse. Luckily, he had a buddy who specializes in welding and metal work.
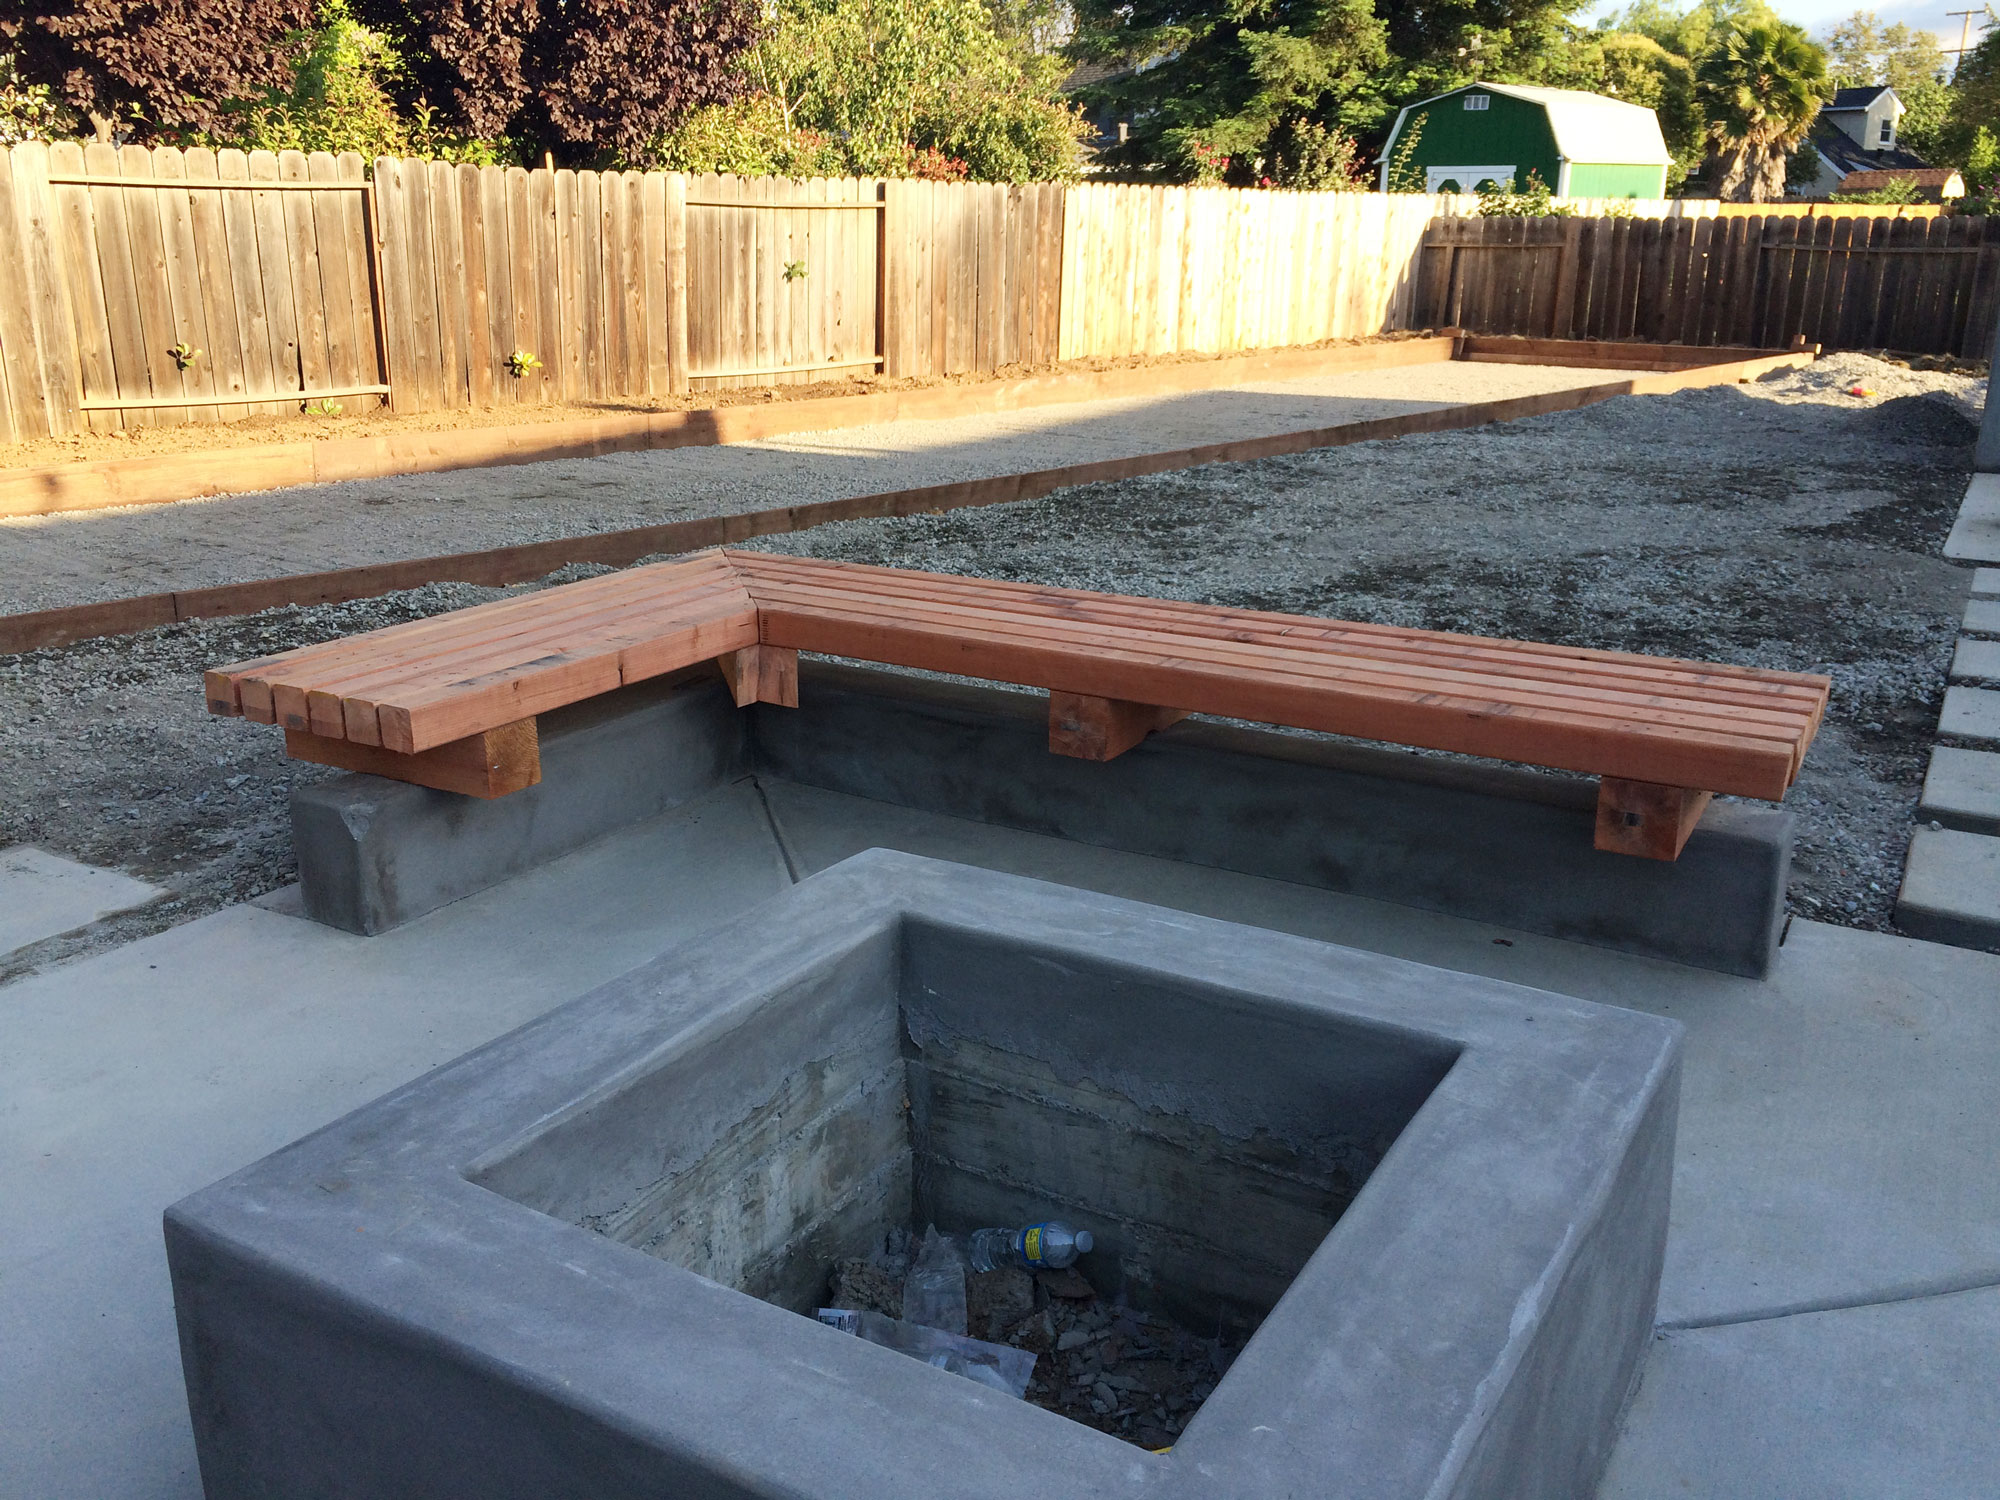
Gah, it still pains me to see that bench!
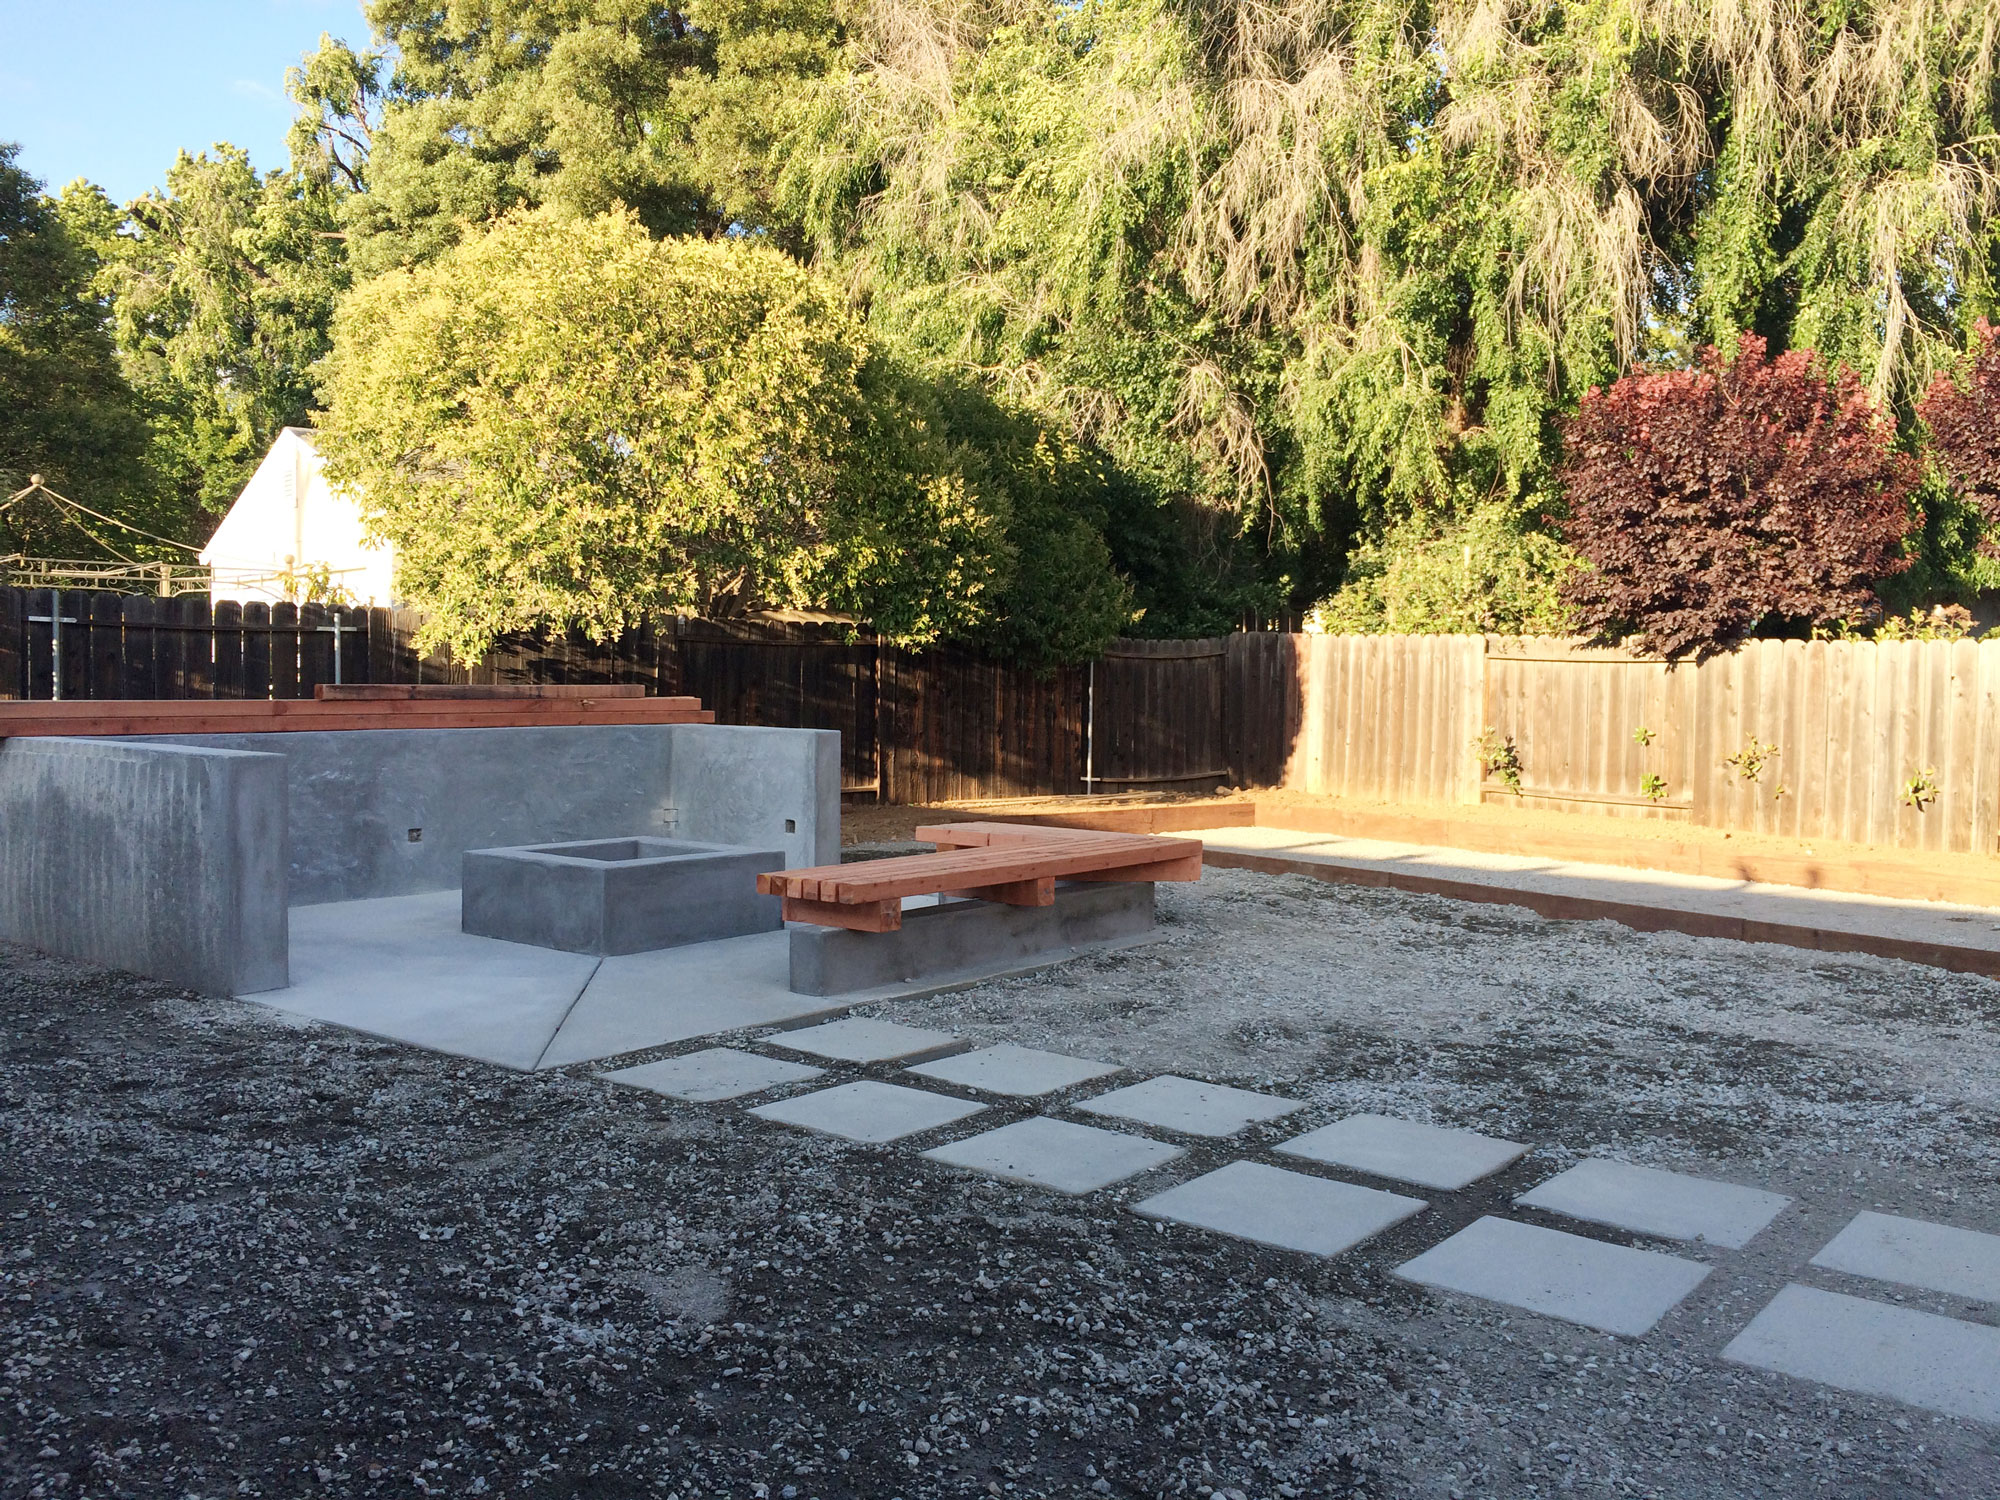
While our contractor’s metalsmith friend was making the floating brackets and supports for the benches, the landscaper’s team moved forward with the rest of the yard. Base rock was laid in preparation of turf, then a layer of decomposed granite, then the turf was laid and nailed in place with these giant railroad looking nails (sorry, no picture!). One piece of advice – if you’re thinking to lay turf, make sure the grain of the turf is all facing the same direction! Our landscapers overlooked this when cutting the turf, and now we can see the seams in some sections of the yard because the turf grain isn’t facing the same direction. It’s a small nuance, but you’ll notice it even if your friends and guests don’t.
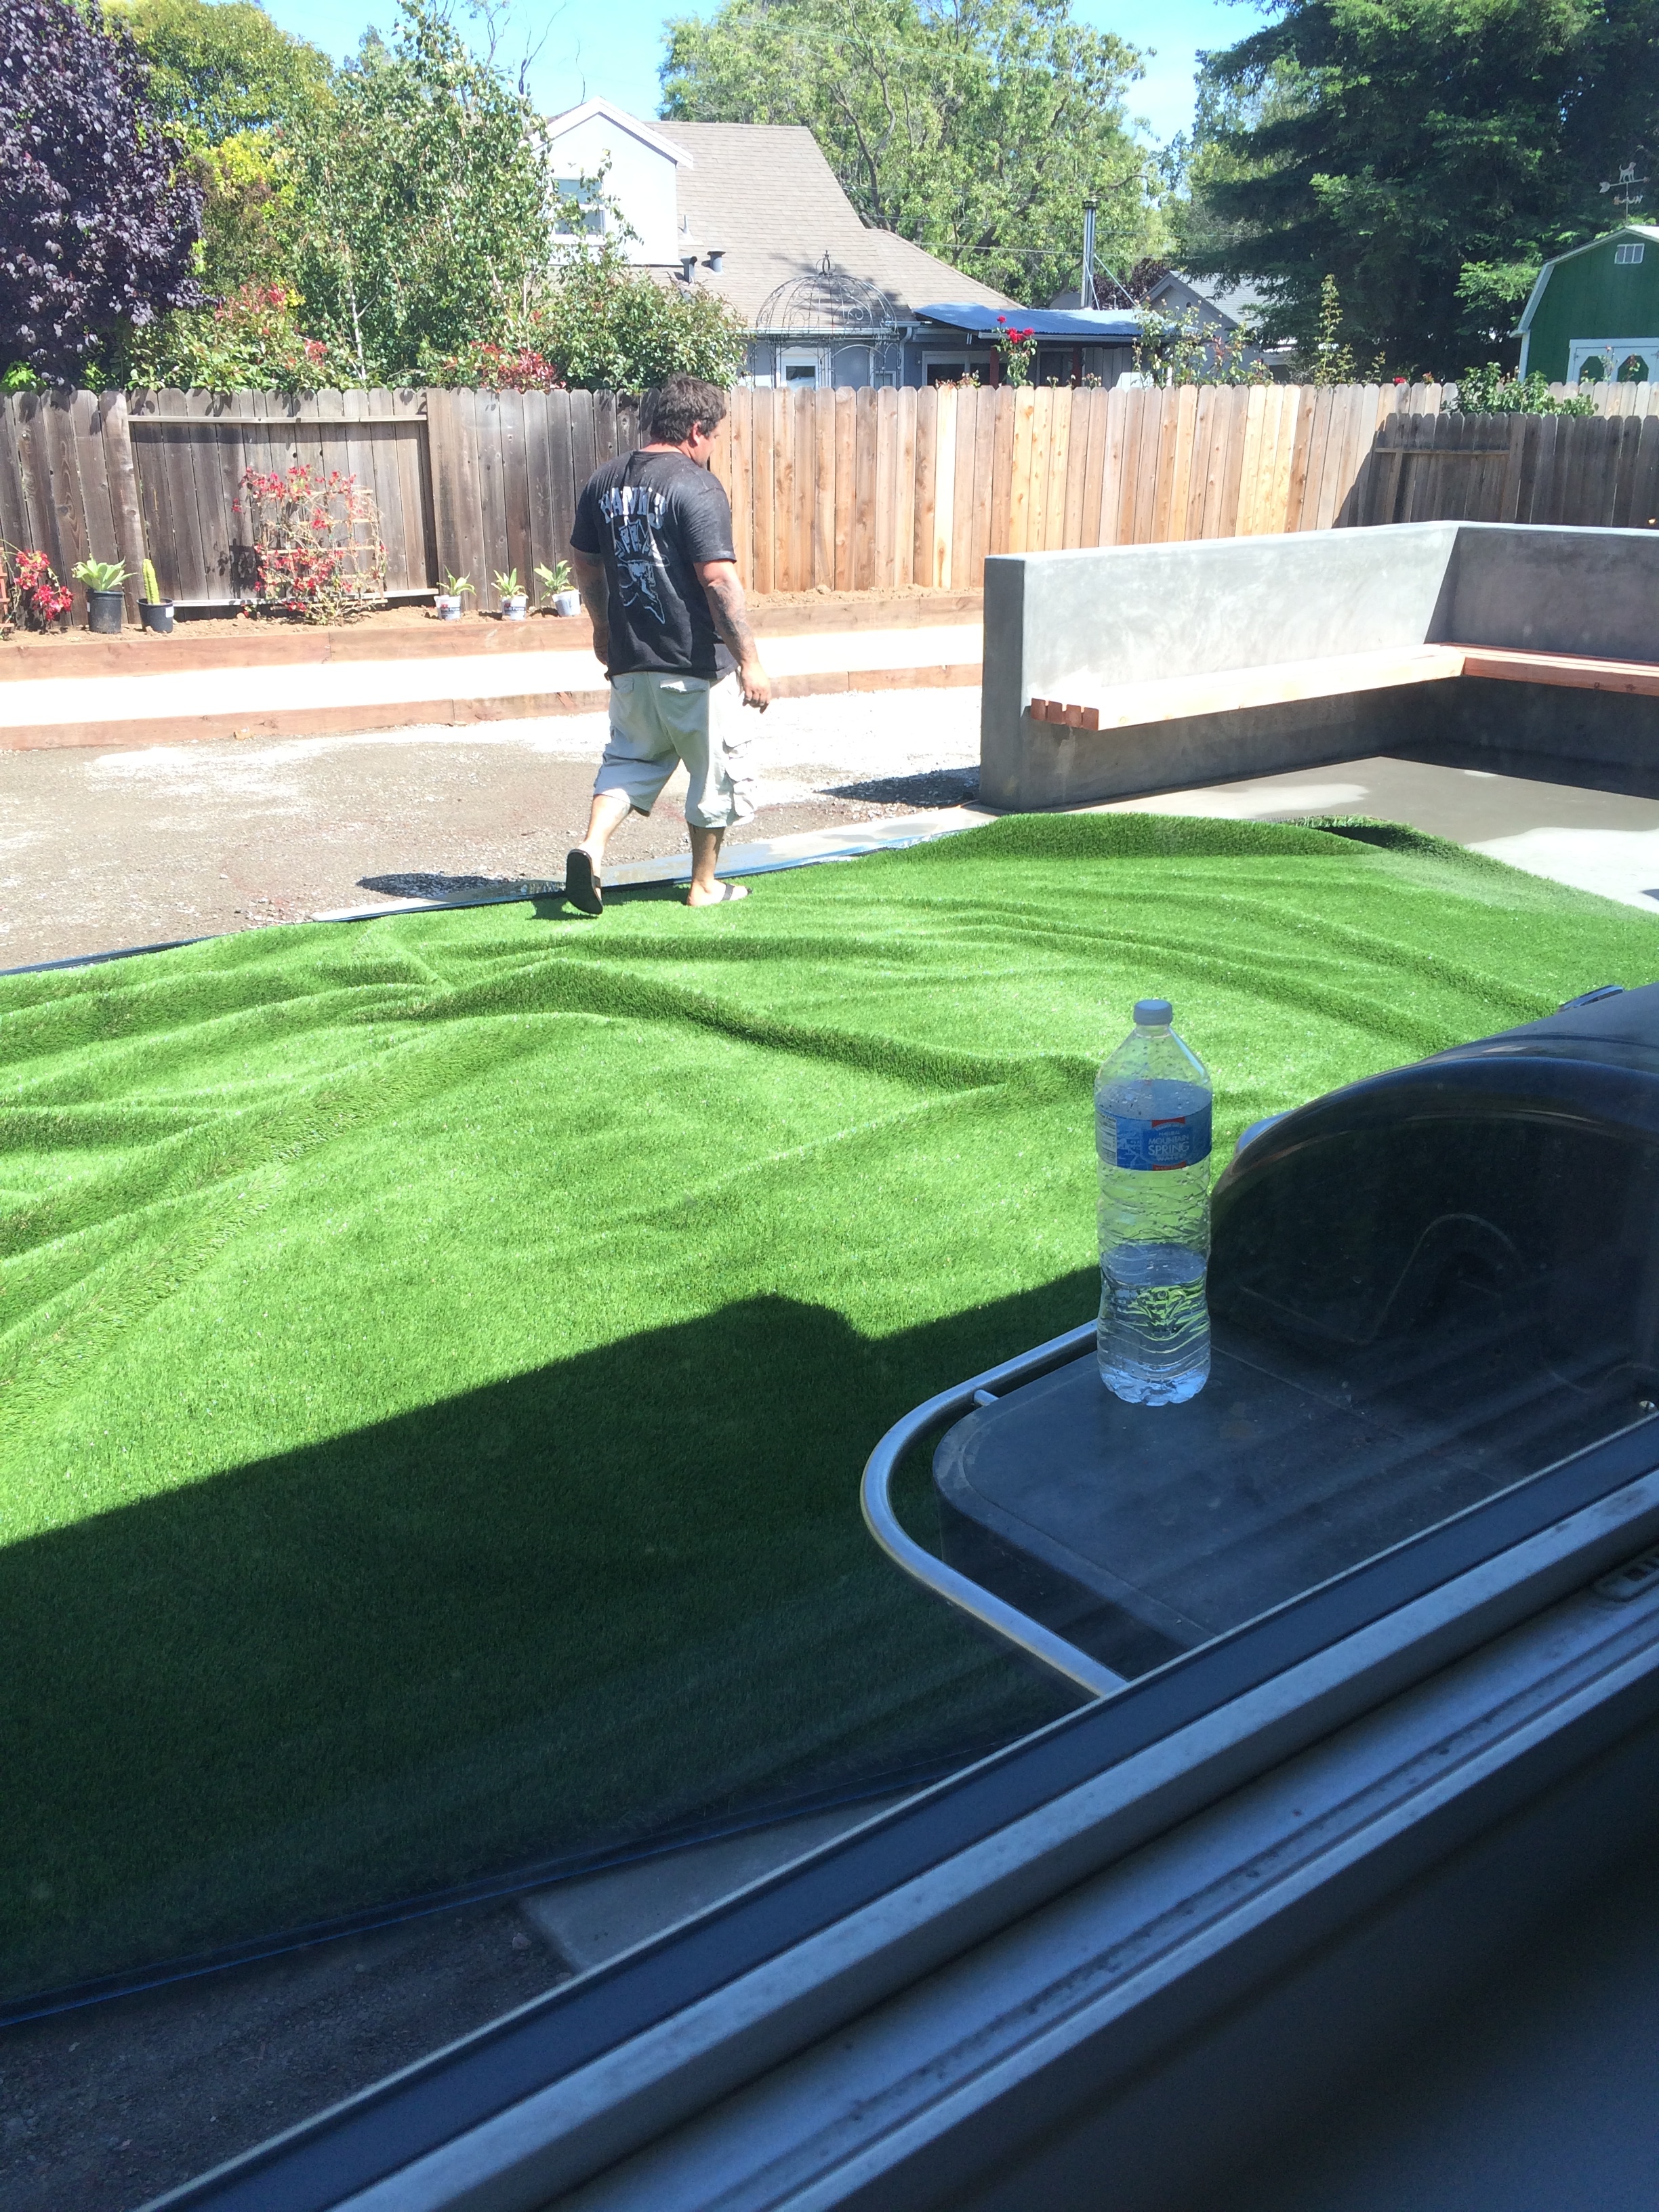
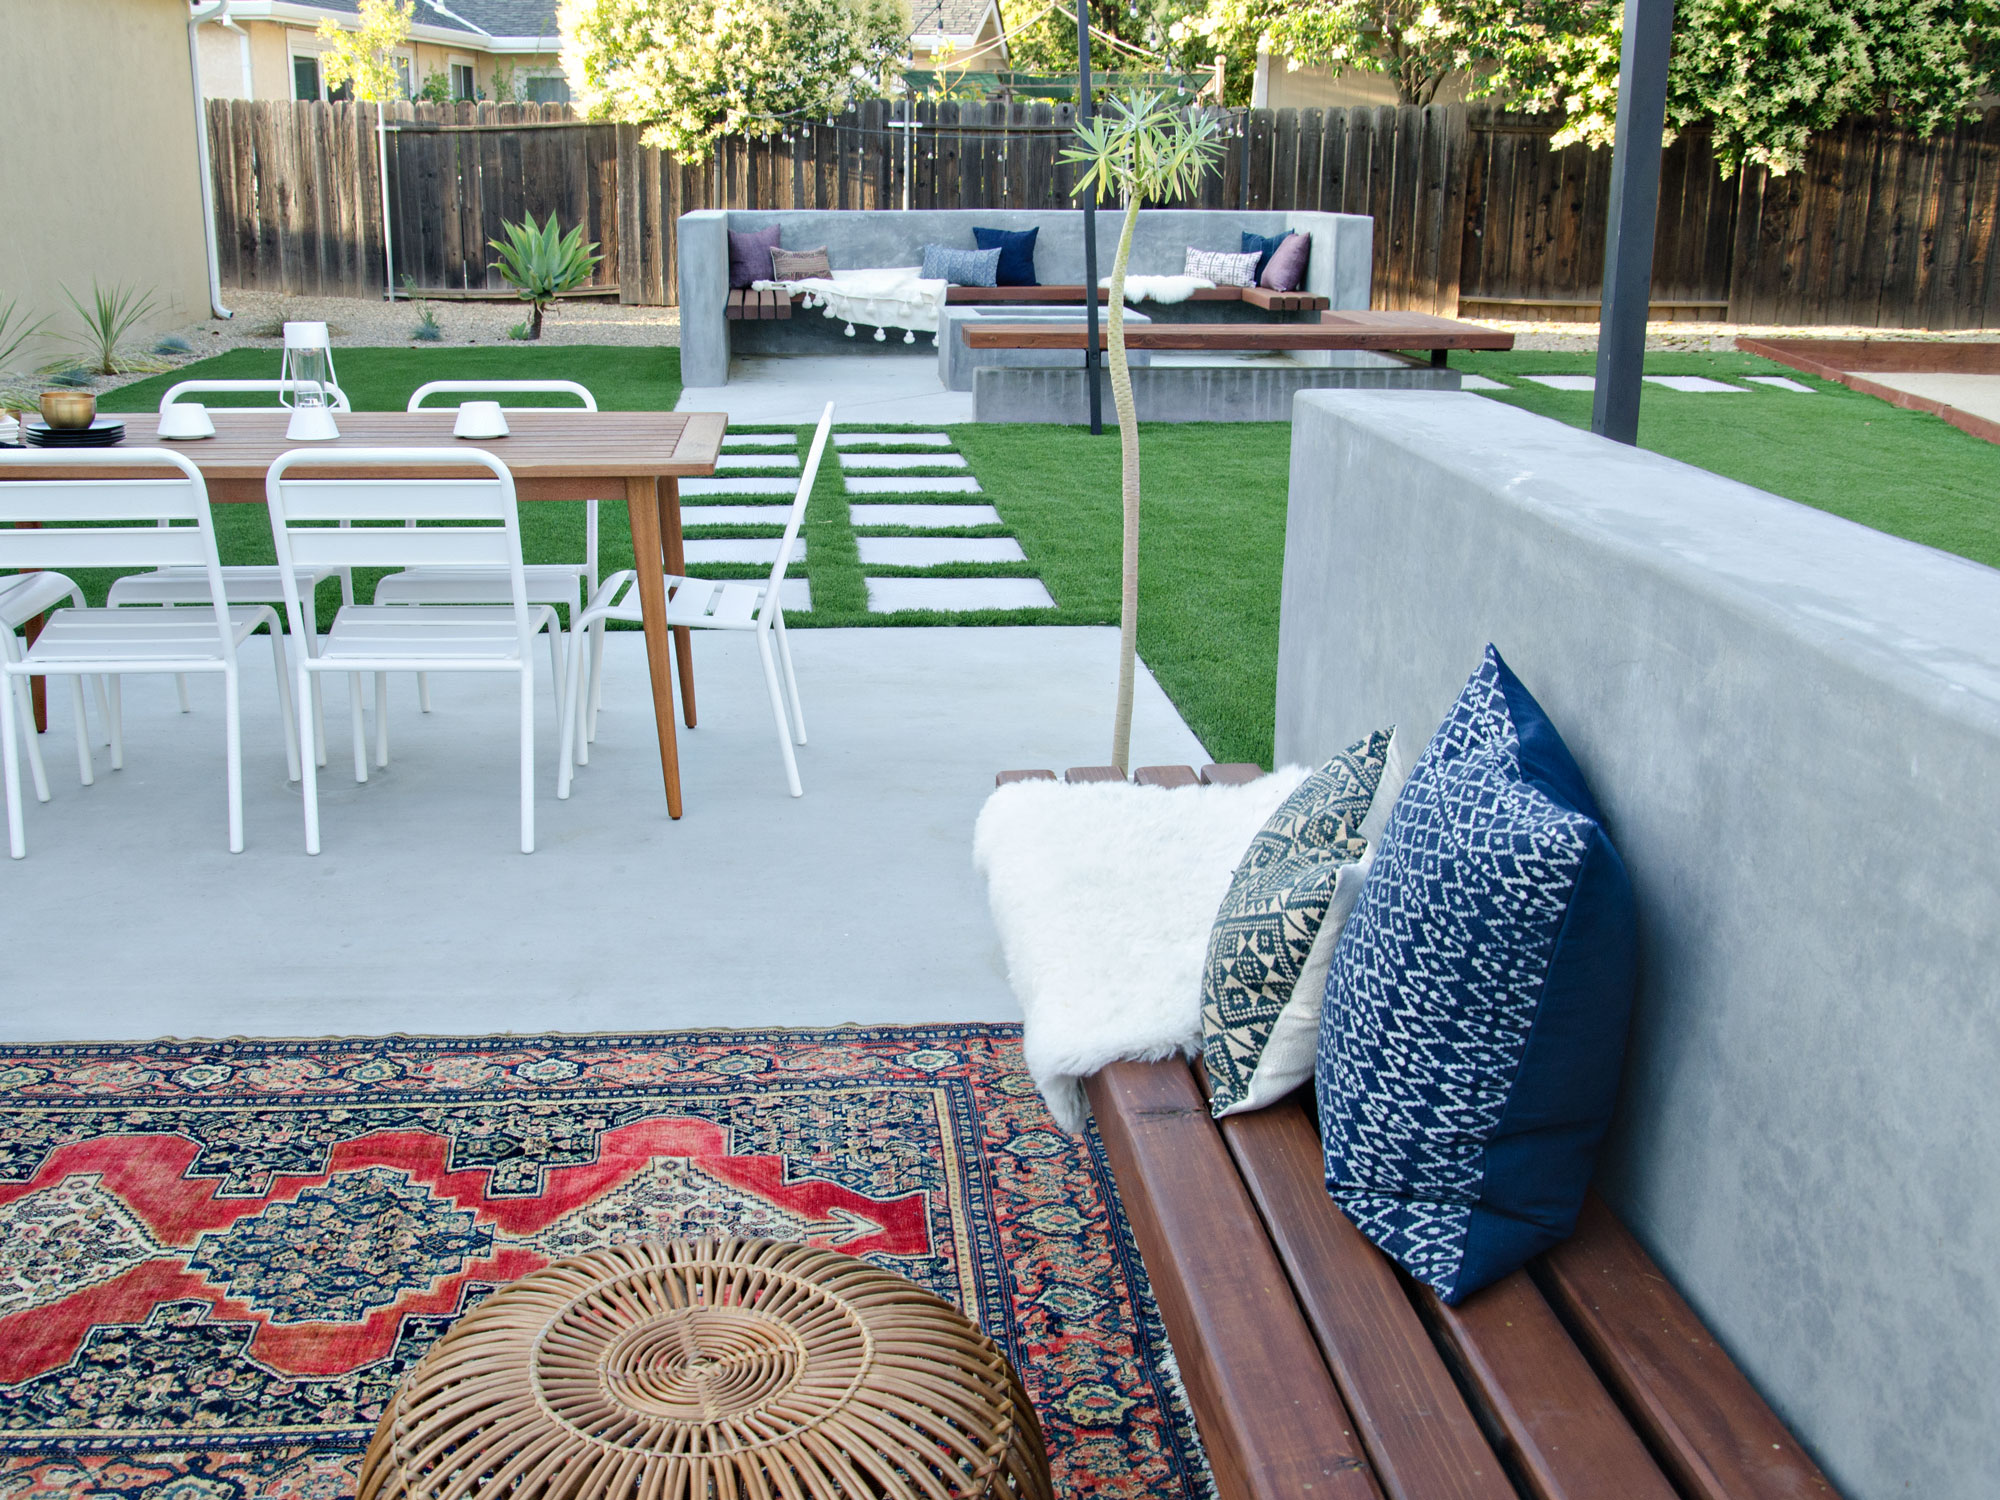
Things moved really quickly after that, I didn’t get very many photos taken. Let me explain how we fixed the floating benches. Our contractor’s metalsmith friend fabricated these brackets to lift the backless floating bench, and support all 5 pieces of lumber. The supports are so thin you can hardly notice them – this is exactly what you want for a true “floating” bench.
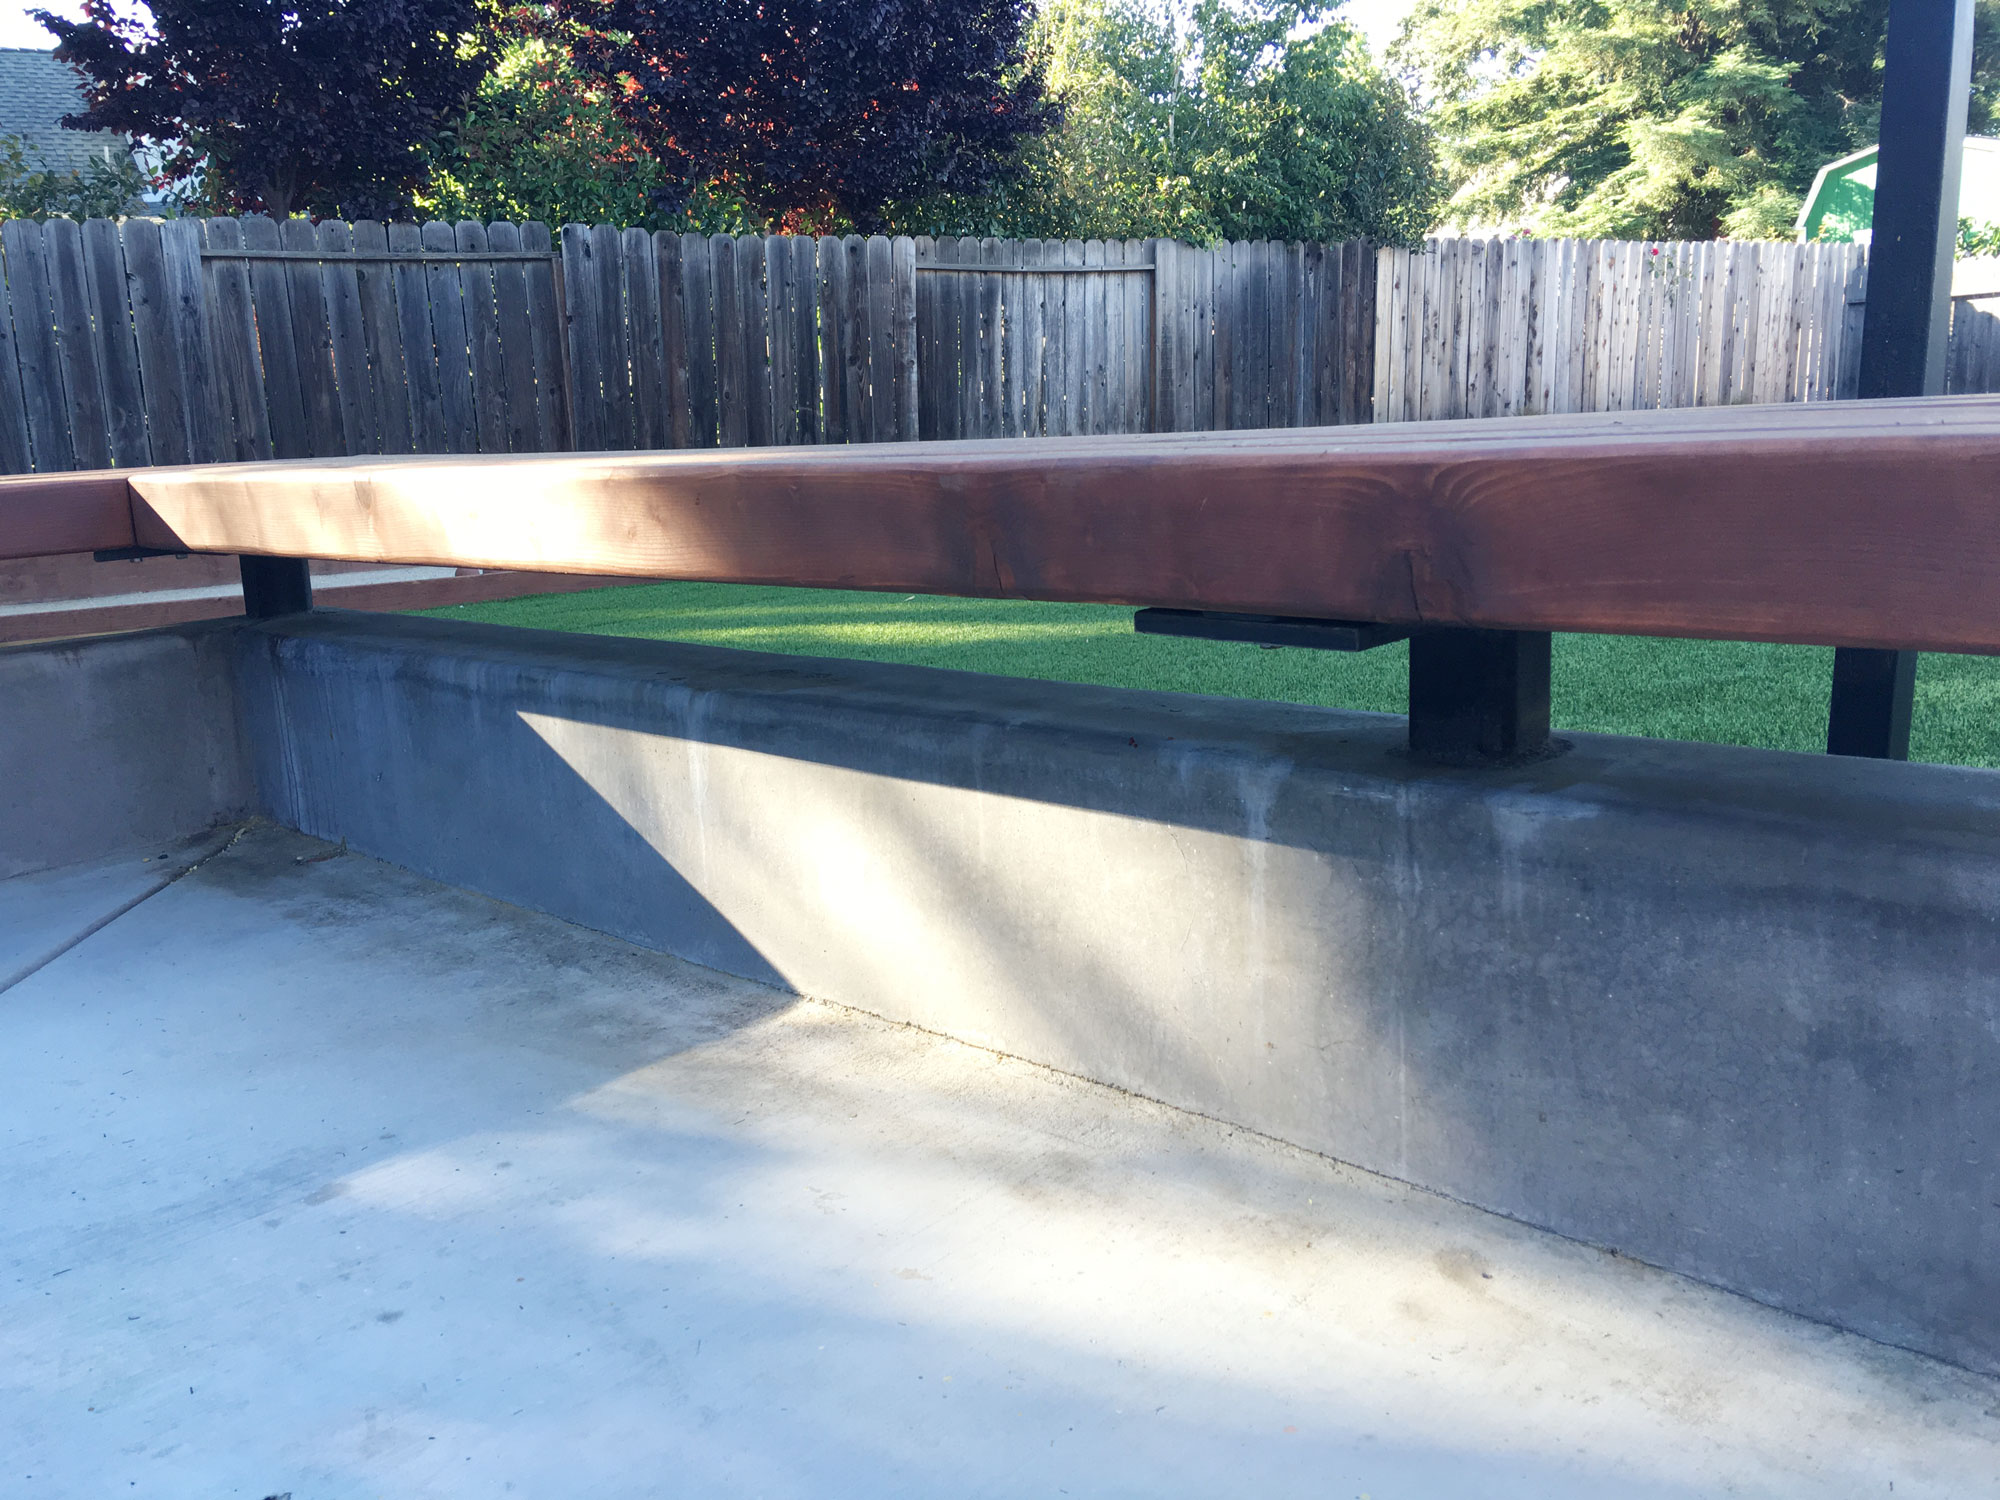
The benches against the concrete walls got a slightly different treatment. Our contractor chiseled out small holes in the concrete walls and slid an L shaped bracket through the backside and out through the front and drilled into the lumber from beneath. (Don’t mind the mess, I took this photo this morning!).
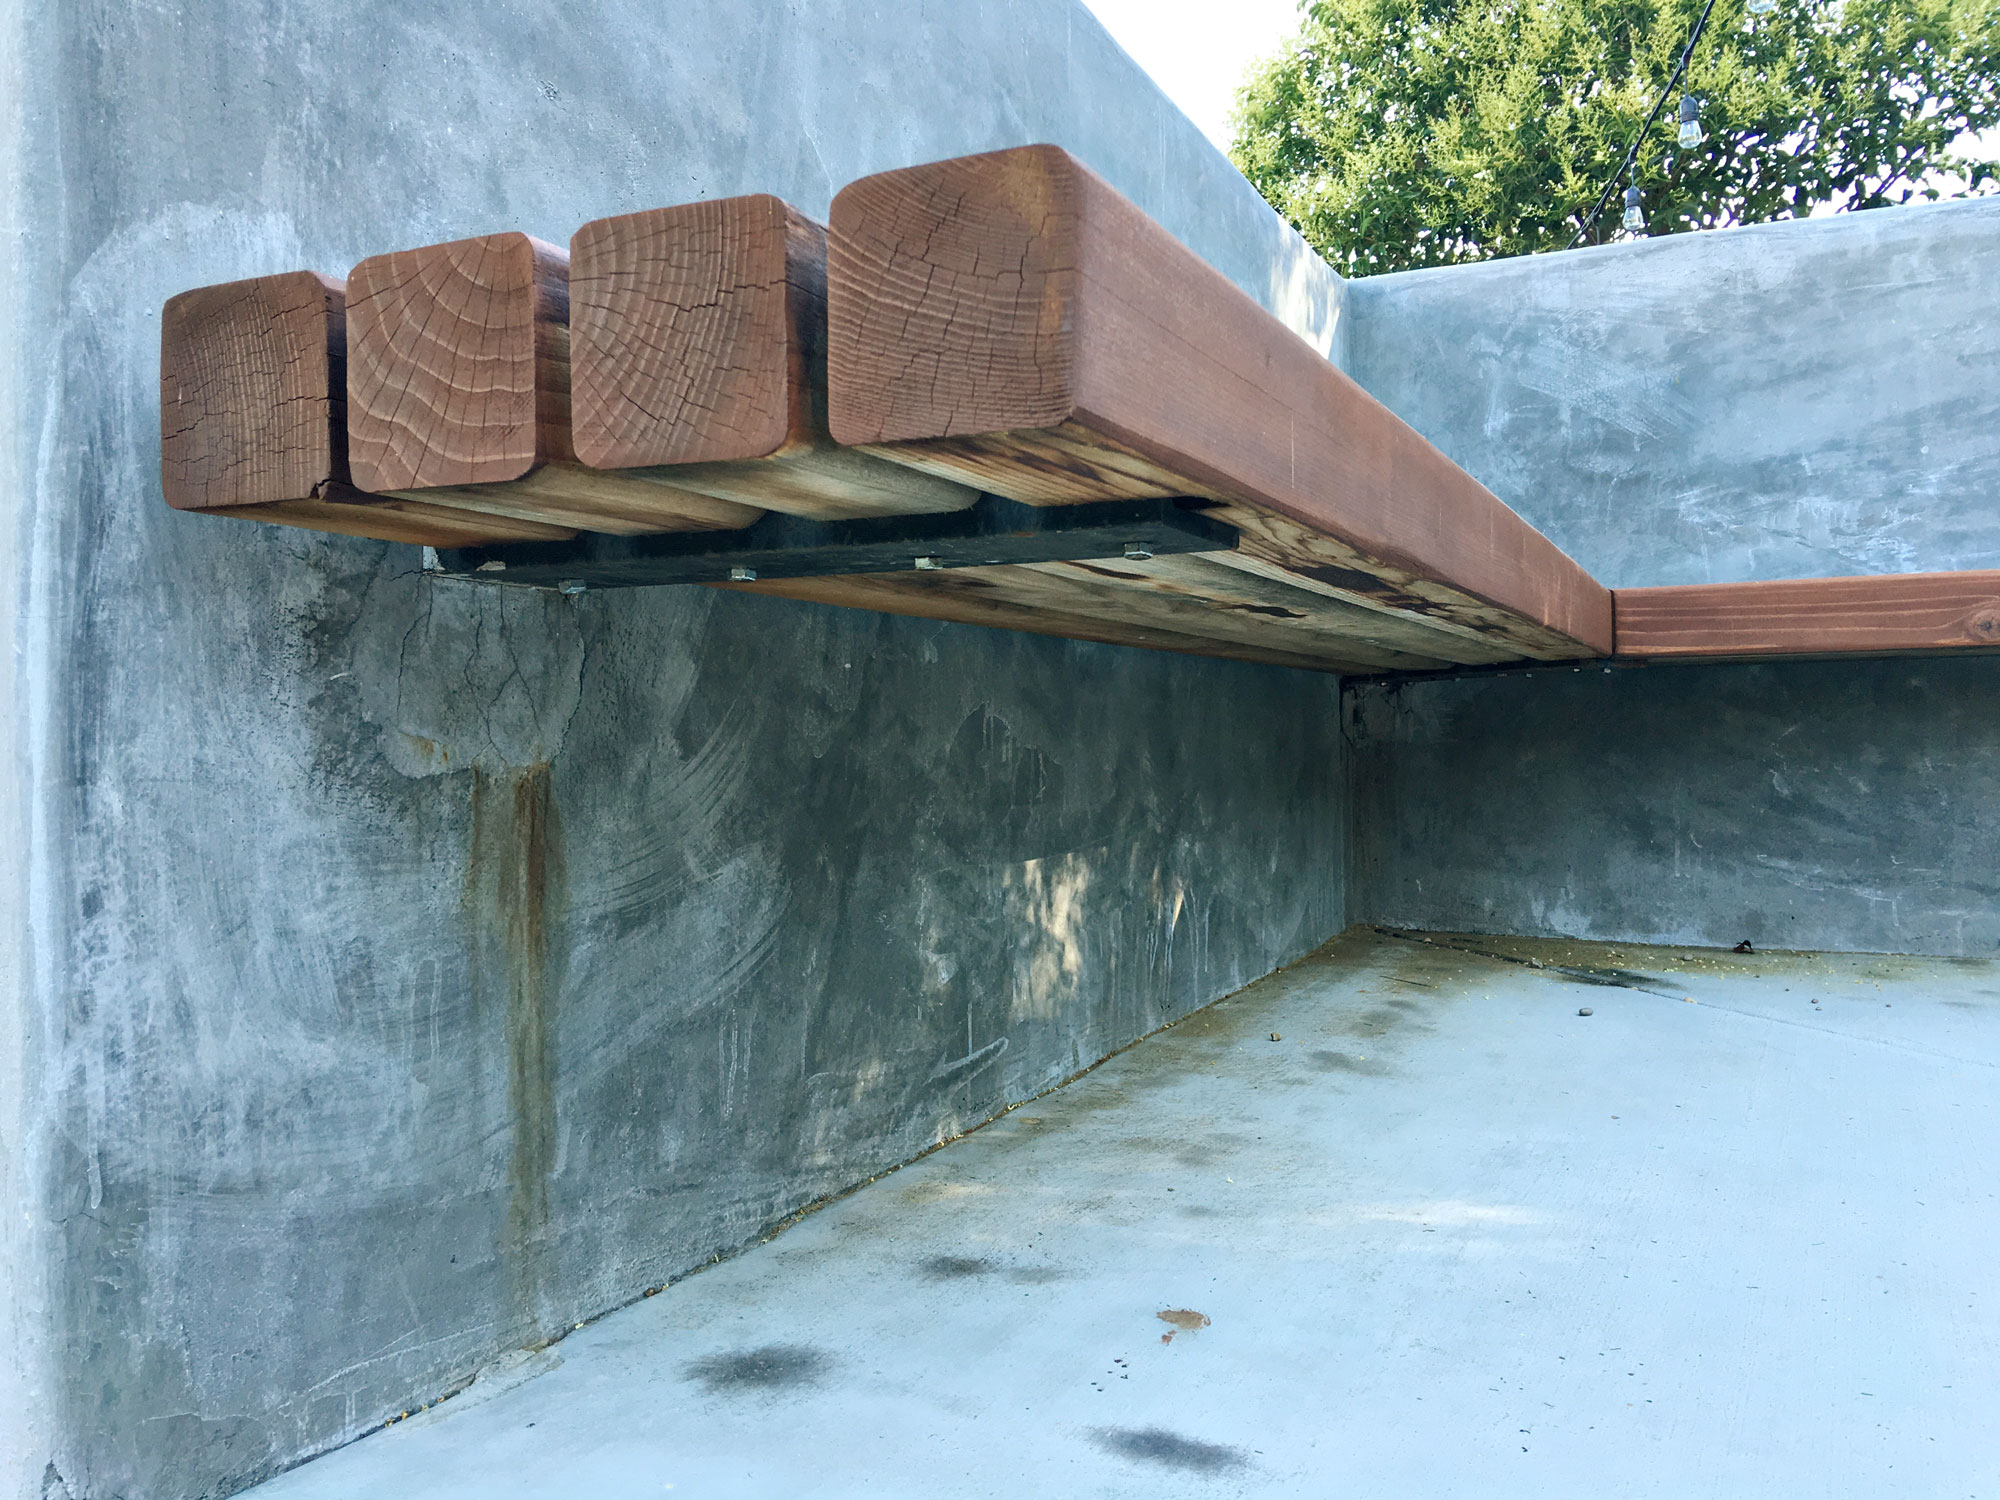
The finish concrete on the walls had to be touched up after installing these brackets. But let me tell you, it looks a thousand times better without that lumber!

You might be curious about the fire pit too. We ran a gas line to the fire pit, and filled it with lava rock. It was an added cost to run the line, but the convenience of turning on the pit with essentially the flip of a switch, over burning wood, was totally worth it.
This was a huge project completed in a very short amount of time (roughly 3 weeks) and we definitely learned a lot along the way. PS I’m hoping to dedicate a post specifically to our turf research and selection (we looked at over 15 samples!), but if there’s anything else I missed, leave your question in the comments below and I’ll answer them!
xo, Britt
)
)


Man, it’s all so good! You had a great plan from the get go and I love the result!
Thank you Gwen! It means a lot comoing from you!
Everything included, from the demo to the final hung string lights, was about $30K. I would say about half of that was the cost of the concrete framing and pouring alone. Concrete isn’t cheap!
It’s the best thing! And I’ve said the same thing!!!
Love, love, LOVE it! We’re just in the process of building a house and now looking at what we can do with the outside. When you say ‘turf’ is it actually synthetic grass or the real deal? We’re looking at artificial as it just goes to dust in the summer and yours looks amazing! Thanks! xx
That’s so exciting you’re building a house! Ours is turf, they offer so many options now, different blade heights and densities and shapes (some shaped like an S, some like a V, others like a W – I think ours is like a W). We wanted it not to be too tough to walk/sit/lay on. Definitely get as many samples as you can! there’s so many options out there
What color did you stain the floating benches?
Provincial by Varathane xoxo
Everything turned out great! My wife and I live in so cal and would like to do a scaled down version of something similar to this (since our yard is a lot smaller). Would you mind sharing who you used as your “landscape guy”?
Thanks!
Hi Brittany, Loveee your benches and pit!! Im preparing for mine to be made. I want similar floating benches and L shaped pit. What height are the benches? I mean the concrete walls and what w and thickness they are? I really appreciate it. You did AWESOME with your design, beautiful patio!
Thank you for info.
Mary Davis.
One more Q, what is the distance of firepit to the benches?
Thank you very, very much:-)
Mary.
Love it all! what brackets did you use float benches and how are they installed?
Thank you so much!
Michele
Great question! We had them made by a local welder who was a friend of our contractor. I know that doesn’t help much, but if you talk to a tradesman usually they know someone!
Hey this looks sick. Great concrete work and design. Did you guys have to go down deep for the “footing” of the concrete wall and concrete fire pit? As in below frost line and stuff? Looks like you just went on top of the graded dirt. And how were your metal brackets finished to prevent rust and stuff from weathering?
Can you post a pic of the back of the L shaped brackets holding up the floating bench?
Hi, this garden looks beautiful.
Could you please tell me the size of the L-shape steel brackets you used for the floating benches against the concrete walls.
I mean the thickness and the width.
Thank you so much in advance
That is awesome! Do you have any more info on the brackets used for the floating bench? Material, dimensions, etc.? I’ve got a guy who can weld some for me.
Truly a beautiful bit of paradise, the floating bench is gorgeous and you are so right to stick with your original vision, the result is awesome!!! thank you for sharing, i’m so inspired!!!
Lovely
I might have missed it, but did you mention the total cost of this renovation? x