My client’s kitchen renovation is coming right along! I’ve dubbed this project with a hashtag, #projectmykindakitchen, which some of you might think is lame but it’s all in good fun! Plus, it helps make this project search-friendly :) If you’re not caught up on the project I included direct links to previous posts at the bottom of this post.
I’m eager to share with you a full demo update, but its better if I show you how the planning process went down because – and for those who have gone through a reno project before already know this – it’s the planning phase that can actually cause the first of many headaches!
The first thing we did was measure the entire space. Truthfully, we probably measured the kitchen three times over throughout the whole process. I took the measurements and inputted them into a very basic (aka free) software, to start visualizing things in 2D.

We knew our overall goals were to 1) increase counter space & storage 2) make the kitchen feel larger 3) make the dining area feel connected to the kitchen 4) allow for seating for more than 2 people). Keeping these goals in mind, I started playing around with the placement of things, like the symmetry of cabinetry and which cabinets would get drawers vs doors or pulls vs knobs. Questions you didn’t initially think about usually arise during this initial planning phase, like where do we put the microwave? Or where should the oven go? If we put the oven in this wall will it block traffic? Will the oven door hit the cabinets on the opposite wall if we put it over here? Do we want a hidden hood vent or a fancy one? Luckily for them, this is why they hired me! To guide them to the best layout and design for the kitchen they will have for years to come.
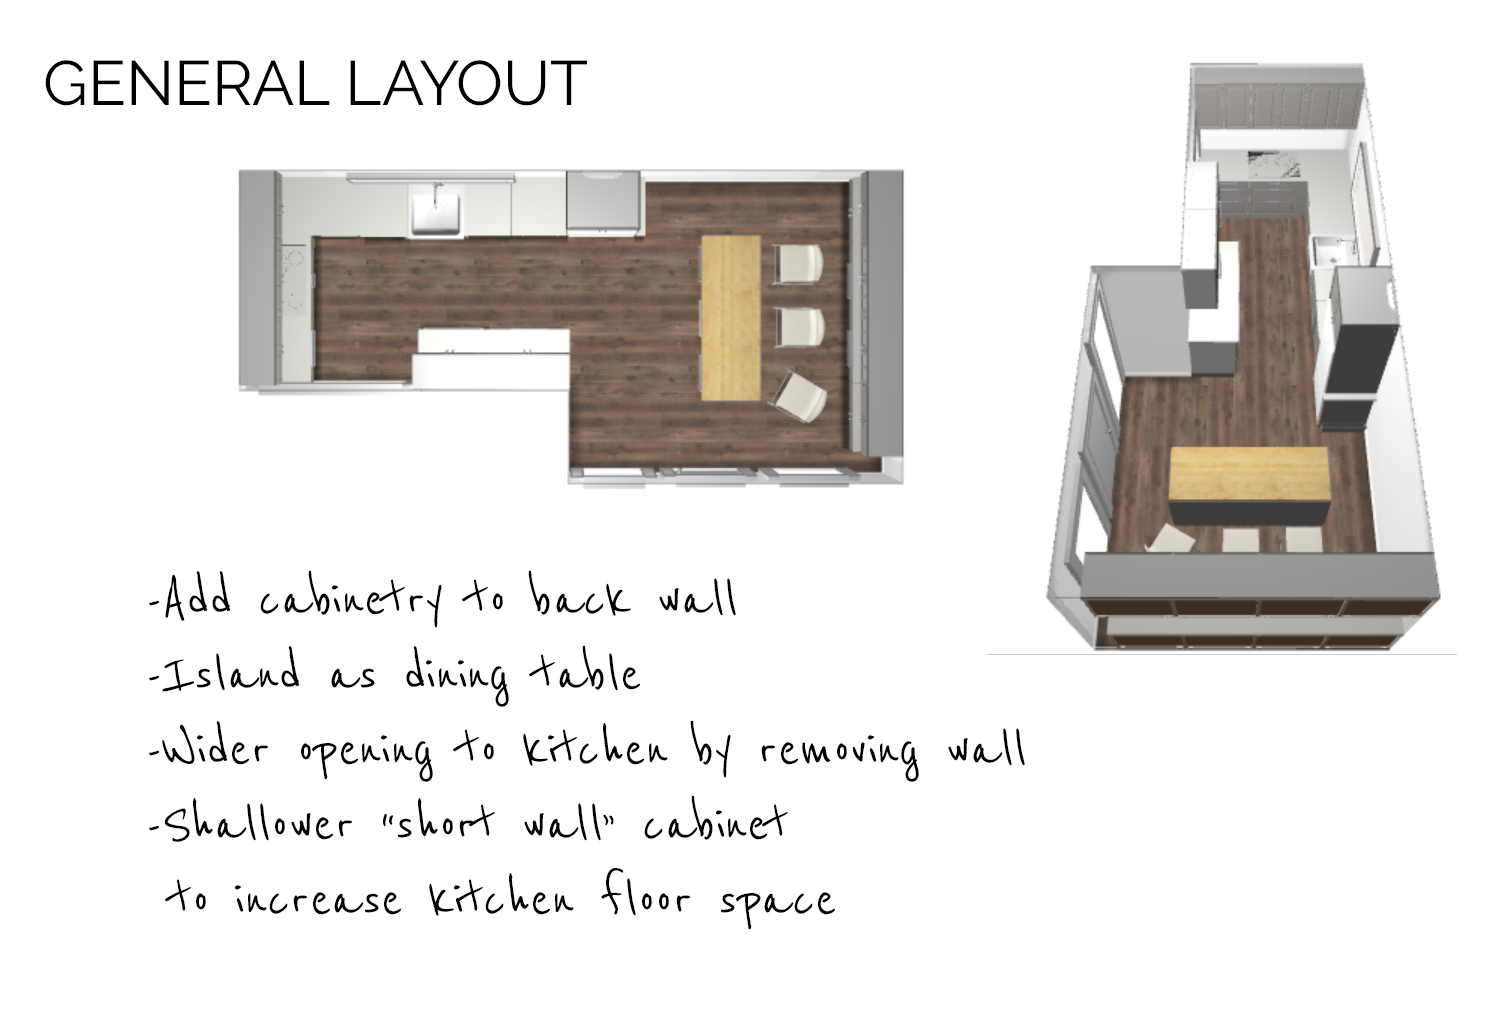
The above rendering is what we agreed to be the general layout of the kitchen. Before I move forward, let’s define the four walls in discussion for their kitchen 1) the “back wall” which is the wall in the dining area 2) the sink wall 3) the short wall which is the short wall facing the sink wall and 4) the “left wall” which, when facing the sink, is the wall to your left. Still with me? Hopefully this isn’t too confusing.
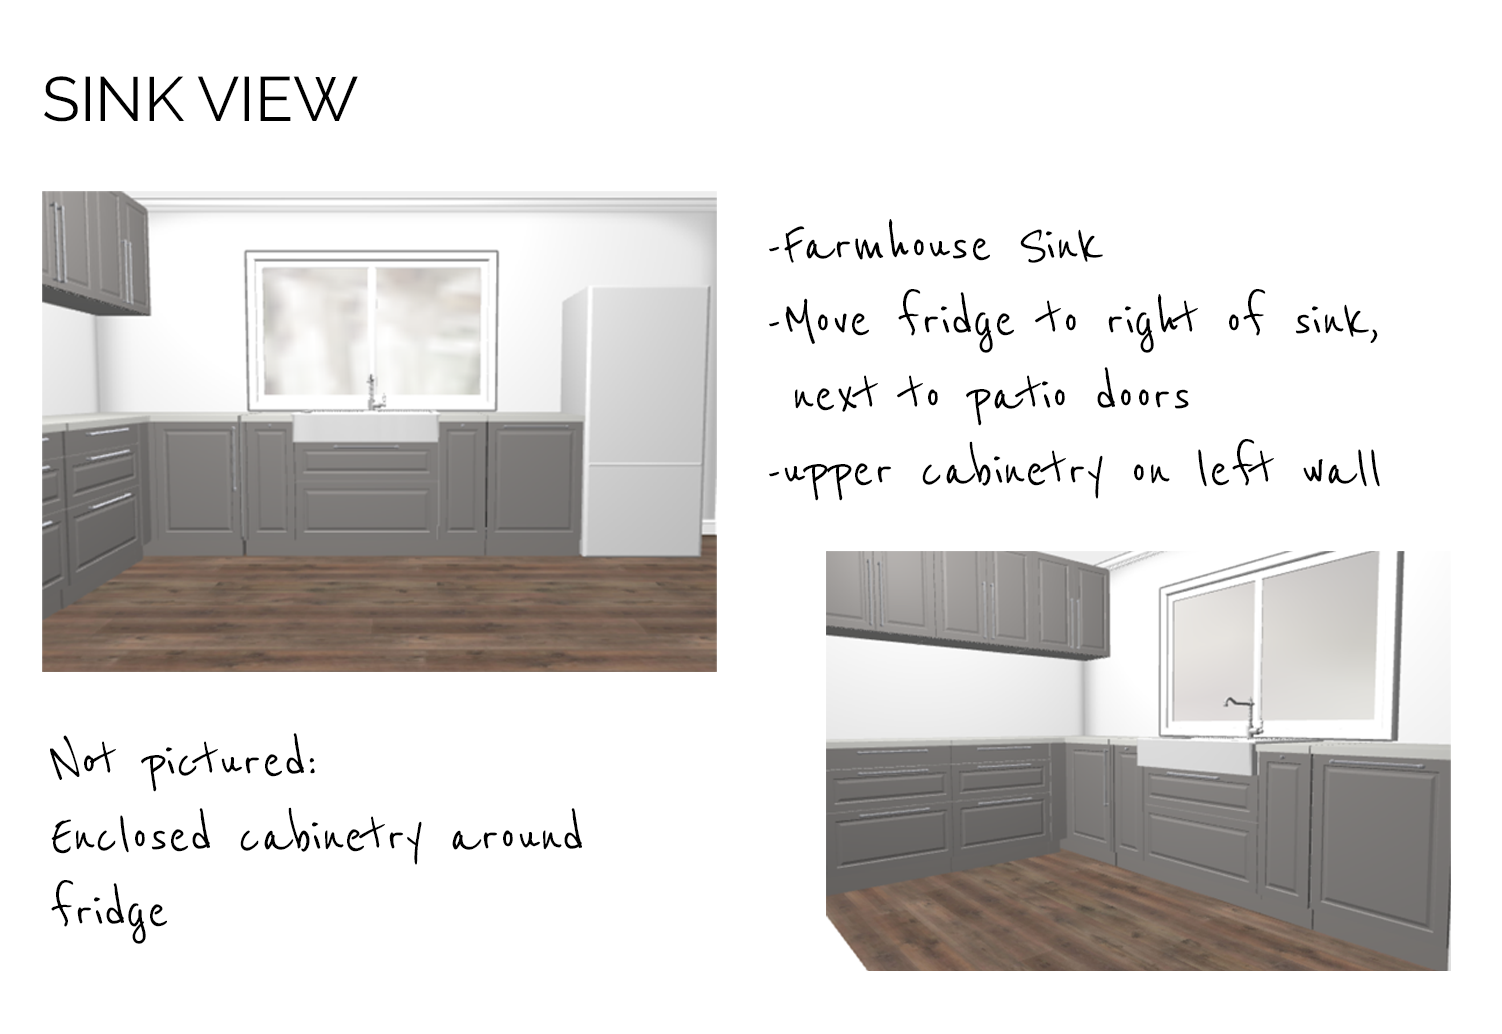
The sink wall and the back wall were pretty much set, not a whole lot of changes needed from the initial design. The short wall and the left wall caused a lot of headache, mainly because we needed to determine the width and depth of the lower cabinets on the short wall, placement of the oven and microwave and hood. There was a lot of virtual musical chairs with the oven, as you see below:
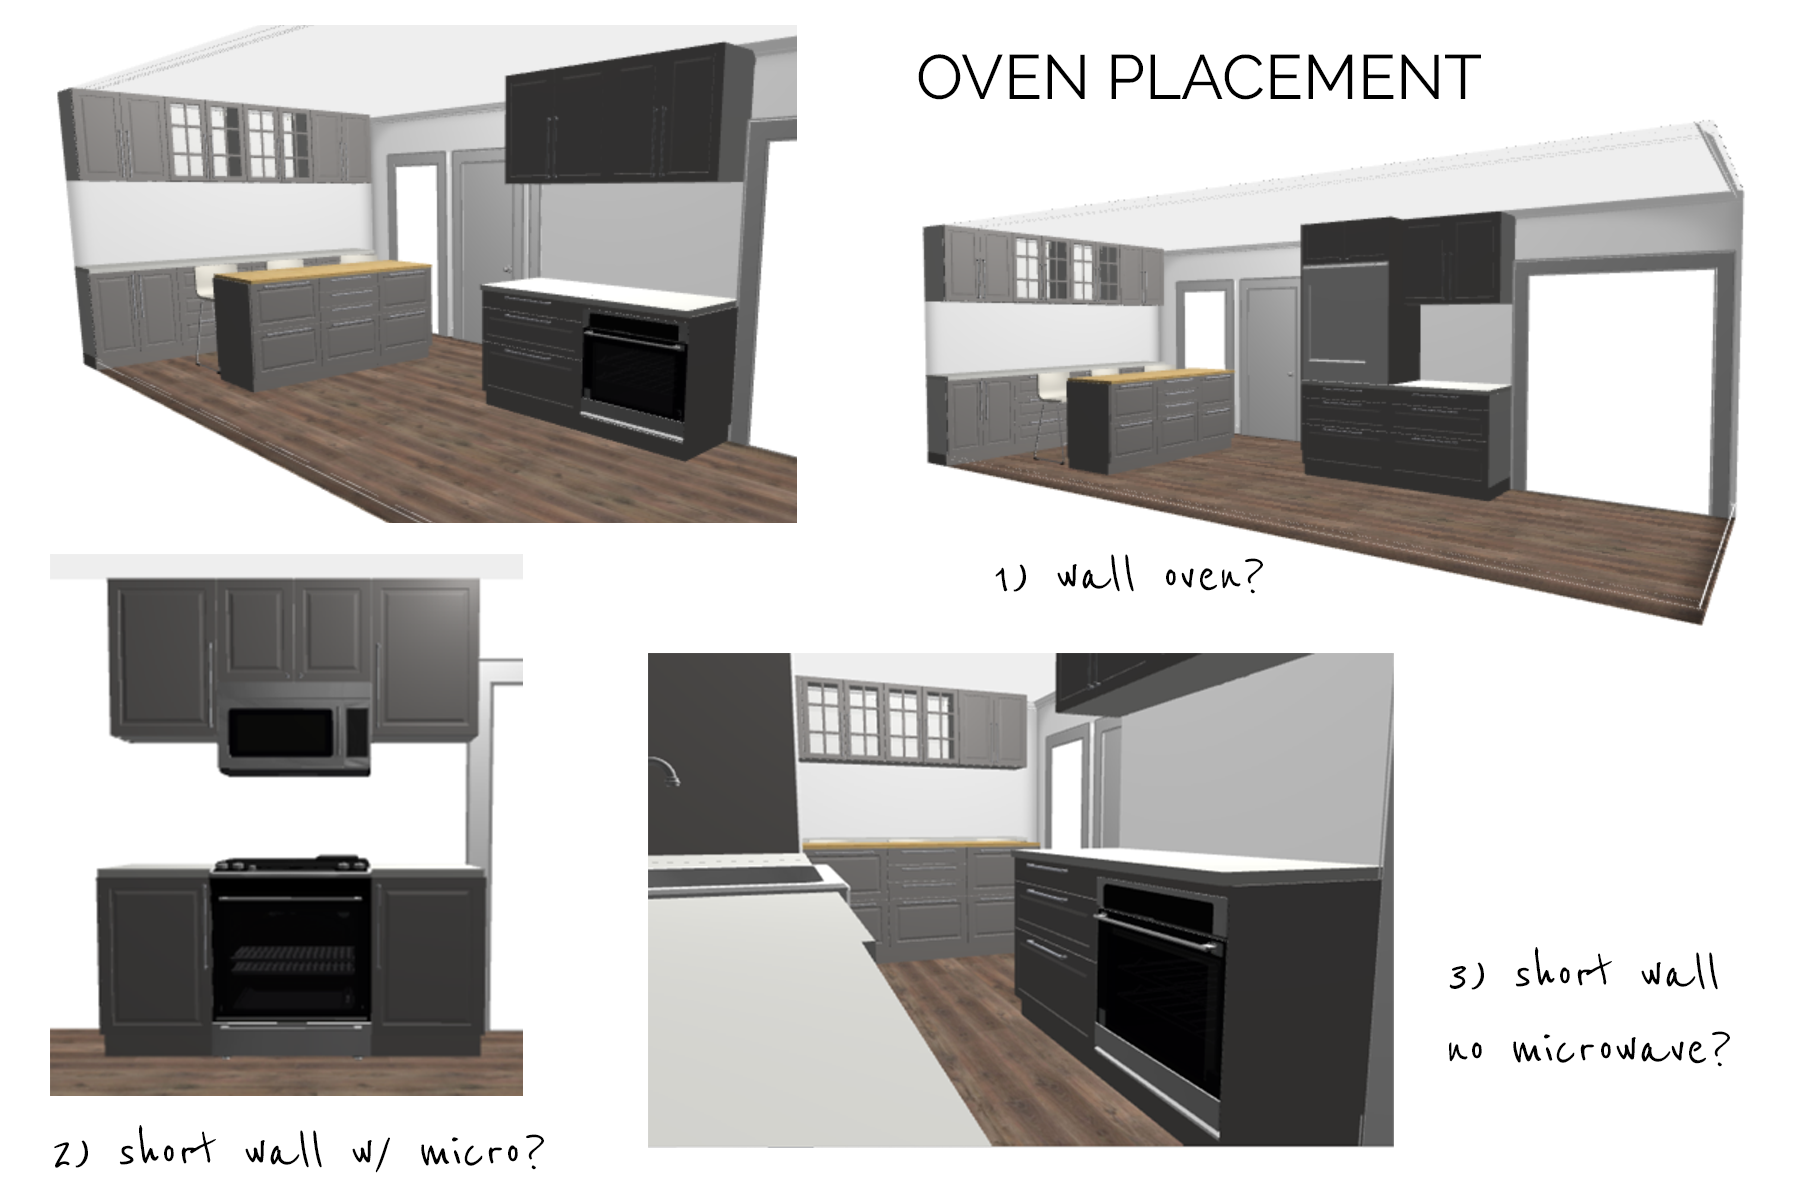
In the original kitchen, the clients had a range top and a separate wall oven. Wall ovens are not ideal in small kitchens, as they take up a TON of space and typically make a space feel less open, if not placed strategically. I was not a fan of the wall oven, but for kicks I threw in a view of the only logical place you could put a wall oven. We all agreed it wasn’t the best idea (phew!). My next suggestion was to place a full range oven on the bottom left of the short wall. This opened things up for sure, with more counterspace (check!) and symmetry with upper and lower cabinets (double check!). Oh, but what about the microwave! OK, so we moved the oven center to that wall and threw the microwave up above it. I wasn’t a fan, and suggested we add an inset oven in a lower cabinet, which the client didn’t like.
Well, while we were mulling over the placement of the oven and microwave, we soon realized that having the oven on the short wall meant that we couldn’t have shallower cabinets along this wall, as ovens are a standard depth. If you remember, this was one of our original goals – to make the kitchen feel larger. We couldn’t remove the short wall because it’s a load bearing wall in a two-story home, and making that happen would absolutely blow the budget. That really only left us with one option – the oven needed to go on the left wall. 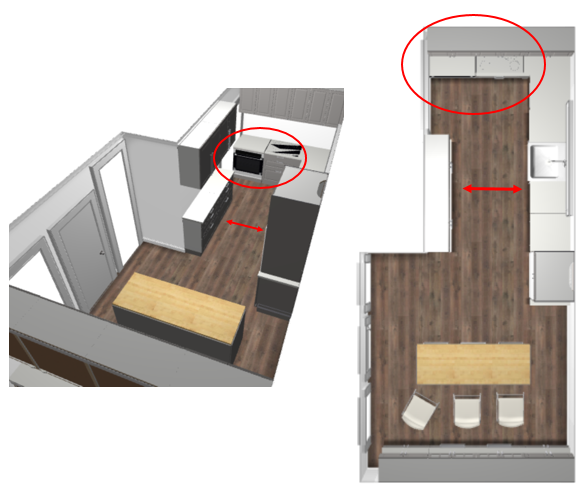
We toyed around with it on the far left, but ultimately ended up centering the oven on the wall, with a range hood directly above it. Once we had everything planned out and measured, I took the plans to our cabinet company and had a more professional 2D rendering drawn up for us.
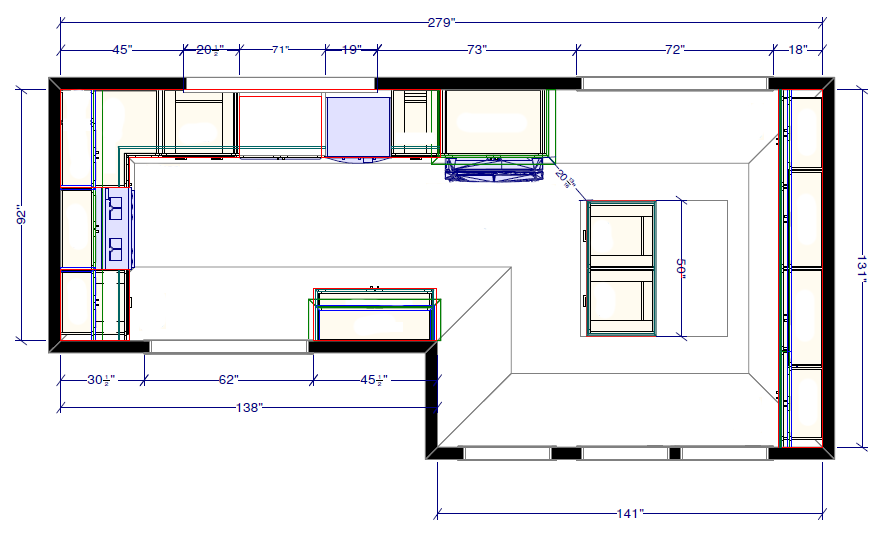
I can hear everyone asking ‘But wait! You skipped a step! What cabinet company did you choose?’. This post seriously couldn’t be any longer, so come back tomorrow and I’ll tell you about the client’s budget, and how we narrowed down our cabinet options and ultimately selected the best cabinets for our budget!
Need to catch up? Check out the kitchen before photos here, and the design process here

)
)




Brittany — what is the free software you used? thanks!!!