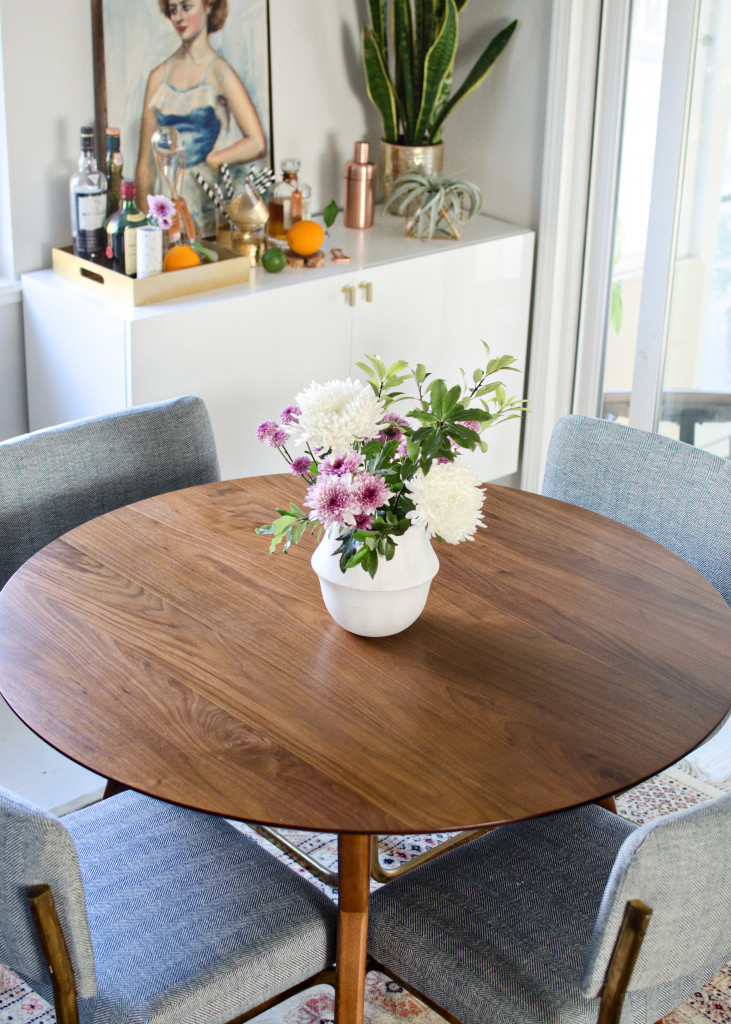
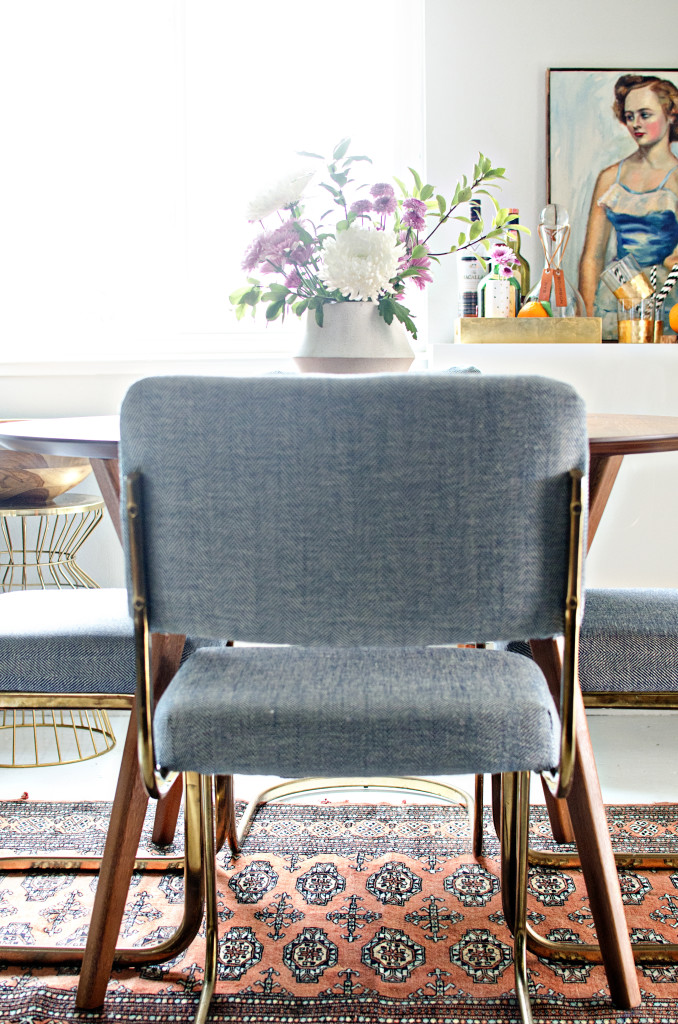
 You guys are the greatest! Thank you for all the love over Friday’s post. Working with Domino is a DREAM, and I can’t thank you all enough because if it weren’t for you taking your valuable time and reading my blog and following me on Instagram (my media of choice), I wouldn’t have this incredible, life changing collaboration going on. I received such positive feedback on our dining room and the white floors, I’m really happy I shared the space. Not every home is polished and pristine, I’m happy I could share how we made our half-done space look pretty snazzy.
Now that you’ve seen the reveal! (If you haven’t, check the post out now!) It’s time to share the DIY behind this space. First up – the dining chairs!
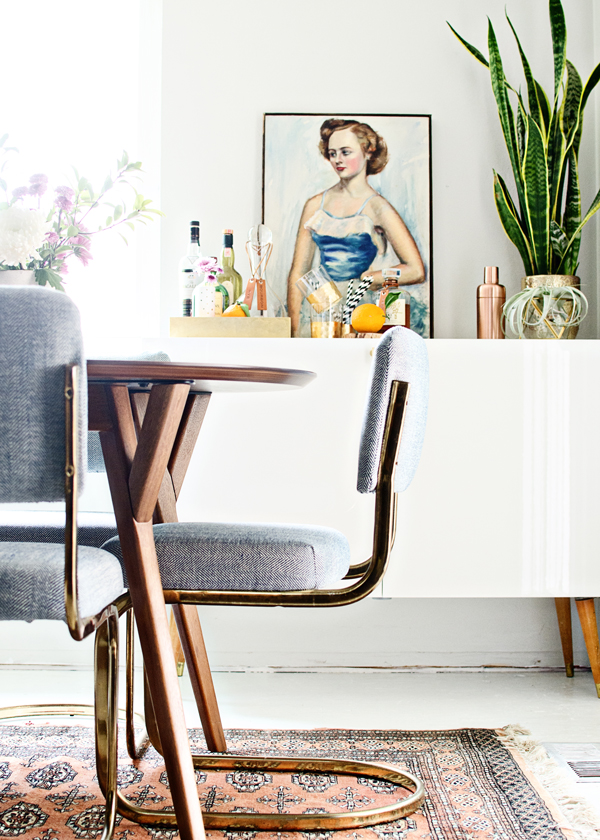
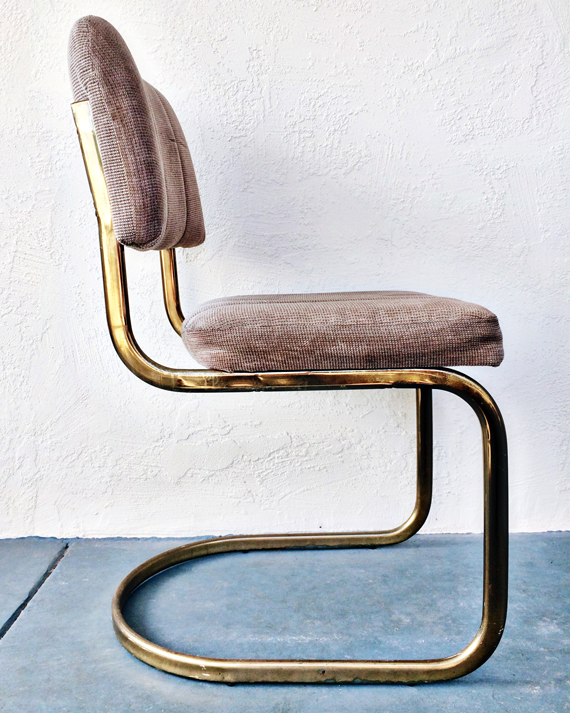 I bought the dining chairs from a salvage warehouse for $10/each. They were worth every penny for the brass base alone! What you can’t tell in this photo is just how awful they smelled. These chairs came from a smoker’s home, and probably sat in the smoker’s home for YEARS, and smelled like it too. The original upholstery was grimy and they desperately needed to be redone. I feel like I always bite off more than I can chew when it comes to upholstery projects, but these chairs seemed straightforward enough so I wasn’t worried that I would be redoing 4 of them.
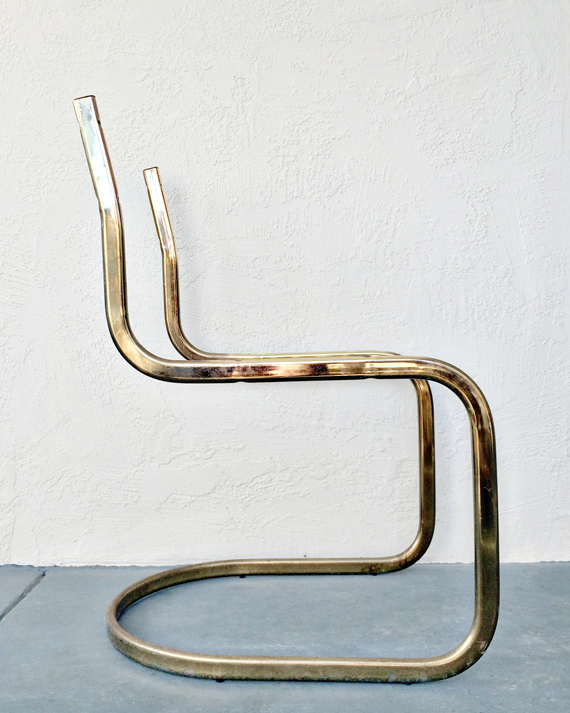
I removed the cushions on each chair first then went to cleaning up the bases. It looks like these chairs each sat in some water at some point in their lives, the bottom of the base that touches the floor are tarnished, rusty and dull. I asked my Instagram crew for some advice on how to clean oxidized/tarnished metal. Some suggested ketchup, some suggested wool brush, some suggested lemon juice and salt, some suggested Bar Keeper’s Friend. I tried a few methods, with no improvement. I think they just need to be re-plated. I called around some local shops and it would cost about $100/chair for re-plating. As much as I would LOVE to do this, it’s just not in our budget. For now (and due to the ‘Domino’ time crunch), I left the bases as is. I’ll be sure to update you if another method works!
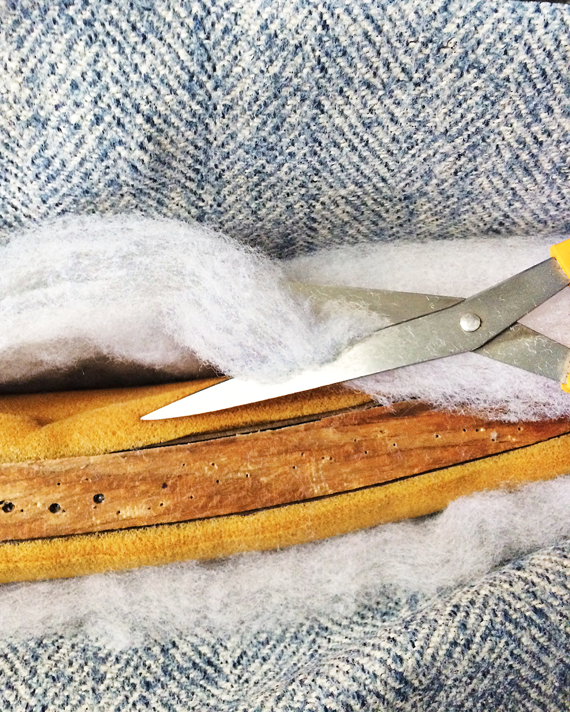
There are so many upholstery tutorials out there, I’ll spare you the details and give you a high level summary of what I did. Usually with chairs, there is an upholstery ‘equation’ so to speak: plywood + foam + batting + fabric + staple gun (I have this one) = a comfortable seat cushion. I bought new foam for the seat cushions since the ‘vintage’ foam was super stinky and flat. The back cushions were in pretty decent shape so I left the original foam, sprayed with some Febreze and wrapped with new thick batting.
It took me quite a while to find a fabric I liked for these chairs. At first I was going to upholster them in a performance velvet, but decided I wanted a bit of pattern. I found this blue herringbone upholstery fabric at Jo-Ann’s (which I bought with a coupon). It was exactly what I was looking for! I bought 4 yards, although I probably only needed 3 1/2 yards.
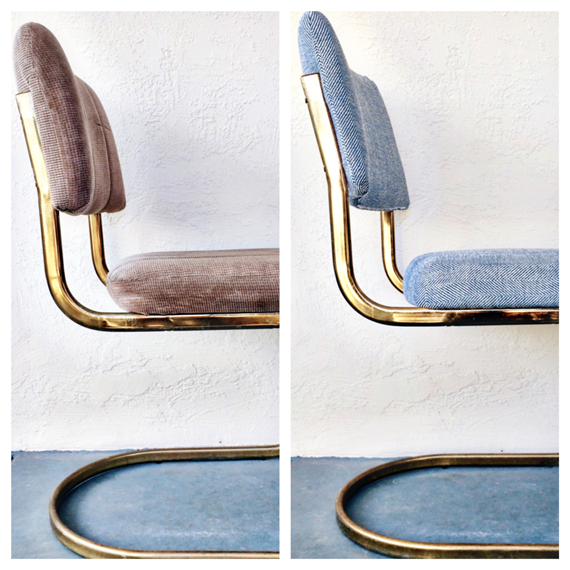
Who doesn’t love a good before & after? Once I was finished with these chairs and brought them inside, my husband immediately said “wow! this is probably the first upholstery project you actually finished!” Ha! #whatajerk

)
)


Haha #whatajerk and they do look amazing. Now I’m figuring out what to do with my brass chairs.
These came out beautifully! Great fabric choice :)
Thanks!!
Brittany! These are amazing. I have the exact same chairs (bought on CL for $10 each, too!), and they need to be upholstered so badly. I was sure I was going to use velvet, but I haven’t been able to commit, so I’ve been stalling! This is just the push I needed. They look fab!
SO FUNNY! I know they would look legit in velvet, and choosing a fabric feels so permanent!
They look amazing and what a deal!
Are you sure you linked to the right fabric? On the JoAnns website the fabric you used looks more like the ‘Richloom Studio’ than the ‘Crypton Herringbone’.
good catch! I updated the link. Thanks!
Hi! I LOVE these chairs! Did you have to sew any of the fabric or was this all done with a staple gun?
I had to sew the top and sides of the chair back, and just the corners of the seat – easy!
One thing I’ve used to clean all of my jewelry (including old brass “spoon rings” – remember those? lol) is good old fashioned toothpaste- but, it MUST BE the PASTE kind NOT the gel kind!!!! Save your money and BUY a tube of it at a dollar store OR look for sales – some pharmacies and box stores will sell the “cheaper less fancy” paste for cents on the dollar!! Worth a try! Just use a very dry/damp cloth, squeeze out a good dollop and rub in a circular pattern and allow to dry. Simply wipe clean with a dry cloth and “buff” with the same dry cloth- using an area that has no paste on it, of course!! Do NOT rinse or wash off!!!!!! All product will/should be removed by the wipe and buff method.
This also works GREAT with your rings. I use an old toothbrush to “scrub” all the stones and in between the stones to give them an awesome polished look! But, unlike the larger items (like your chair) I will wash/rinse away any remaining paste and give them a gentle drying and buffing with a soft towel. The finished results are phenomenal!!!
How it works? The paste contains a very mild abrasive and there are mild chemicals to whiten tooth enamel. Those chemicals can remove oxidation from SOME metals, such as silver and brass. Since the formulation is mild enough to use in the mouths of young children, it is also gentle enough for MOST metals. However, that being said, if you have grandma’s old set of silver, or jewelry that is precious, PLEASE, BY ALL MEANS, CONTACT a professional regarding proper care and cleaning of these items!!