 I love a good hack! I mean, who doesn’t? I saw this woven wrap bench from CB2 and… you know what happened, that thought that plagues all us DIYers danced in my head, ‘hey, I can make that!’ It’s an illness. You’ve got it, I’ve got it. There is no cure. Except money, maybe money is the cure? Sorry CB2, I can’t afford a $400 bench, so.. I’m gonna hack it? Why yes, yes I am.
Now, the take-away for any good hack is to not replicate it exactly. Make it your own in some way. I mean, unless you can hack it so exact it’s like a replica. I know my limitations and there’s no way I could hack those legs, so I took the essence of the wrap bench and made my version. Let’s go!
 Supplies needed:
First, go to the banister/decking section of your home improvement store and get the 2″x2″ pieces of redwood. I tried using the 2″x2″s in the regular wood section before in a different project and they just splintered on me. Do I know what I’m doing? Probably not. What kind of wood is in the regular wood section? Not sure! I am absolutely not a woodsmith, and I’m not going to pretend to be! I’m sure there are fancy tools that I should be using to prevent splitting wood, but alas I’m impatient and I just want to build things with my drill and miter saw. I bought 5 of the 2″x2″s in the decking section. I forget how long they are, 48″?
You will need to cut the following:
2 pieces of 45″ 2″x2″
4 pieces of 16″ 2″x2″
2 pieces of 14″ 2″x2″
Also, grab two bundles of 200ft clothesline. You might think one is enough, it’s not, so save yourself a trip back to the store and grab 2! I also grabbed one spool of neon coral cord, which is in the same section as the clothesline and chain and stuff.
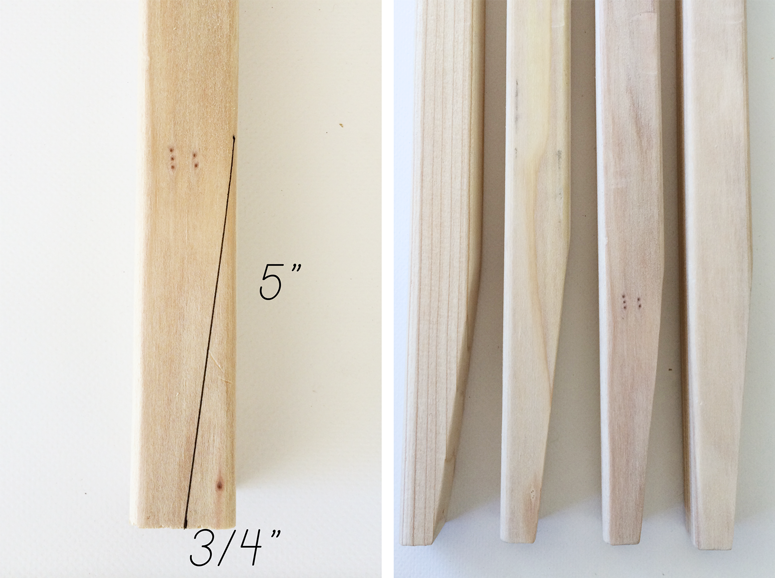 I wanted the legs to be a bit fancy, but I couldn’t figure out how to cut the angle on my miter saw for the life of me, so I measured 5″ up each 16″ leg, then 3/4″ in on the bottom, and cut along this line using my jig saw (see pic below). I followed this step with a light sanding.
 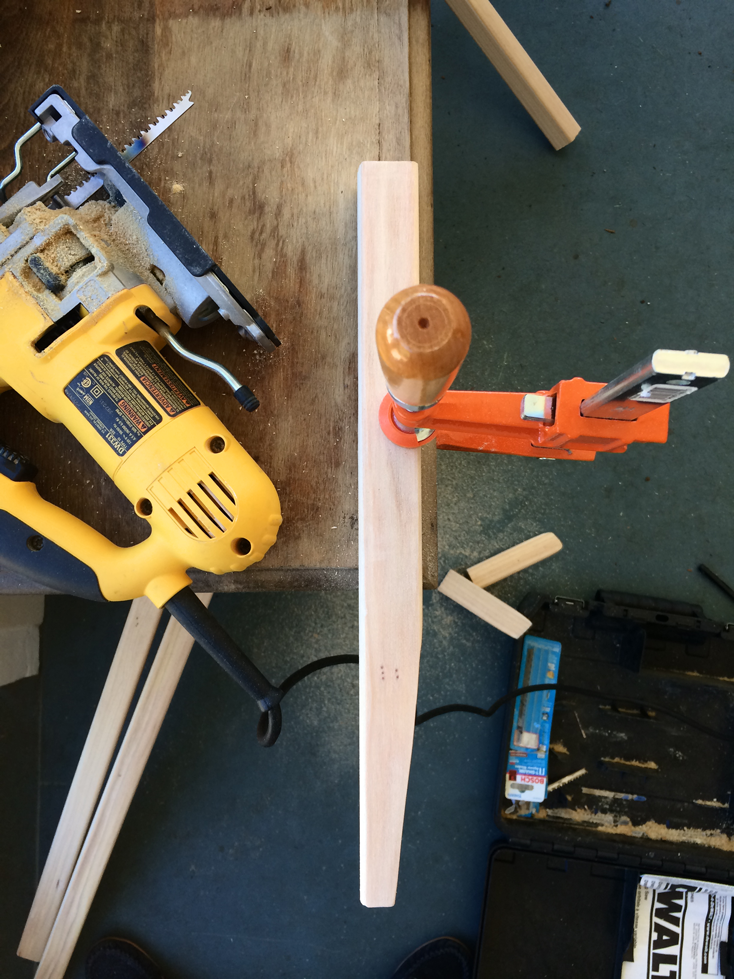 Next, and this is where I truly show my lack of woodsmithing skills, I clamped the 16″ legs and 14″ side pieces to my dining table (LOL right?) and drilled them together with wood screws. The correct way to do this would be to use a KregJig or some pocket-hole system, however I don’t have a KregJig, so I just screwed them together from the sides. I would also recommend filling these holes with stainable wood filler, which I obviously didn’t do because I forgot to buy some. I can only take so many trips back to the store for one project.
 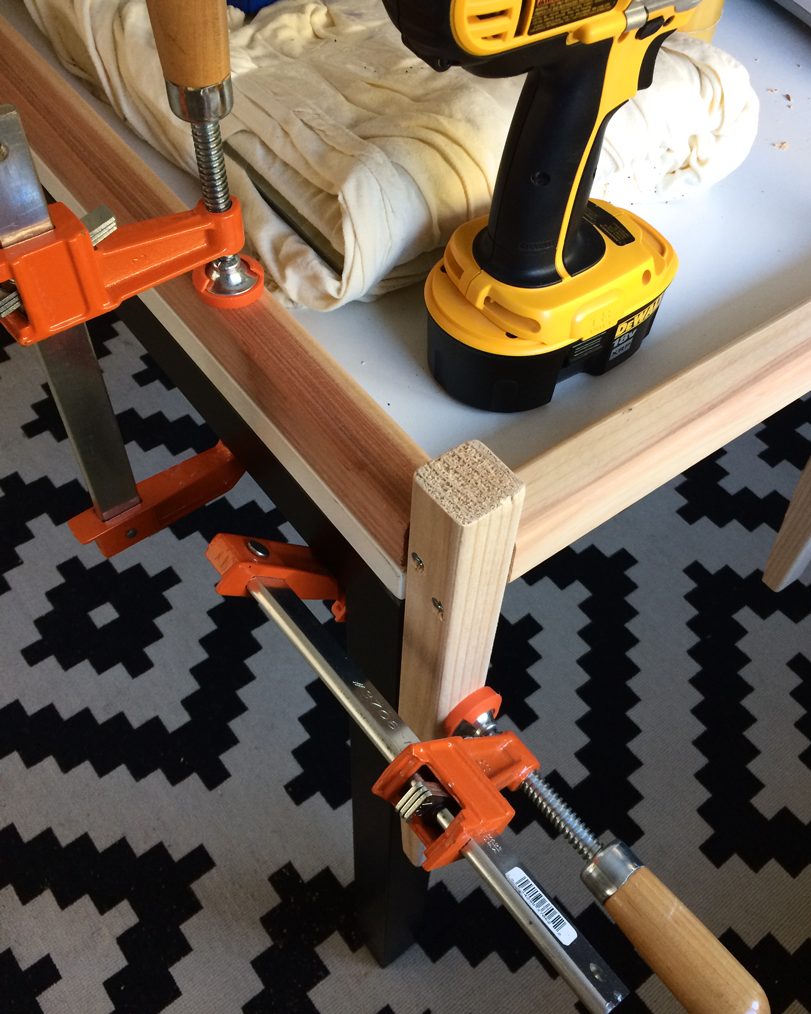 So anyway, now that you know what not to do, here is what it looked like after I did those things! It actually came out quite sturdy. On to staining!
 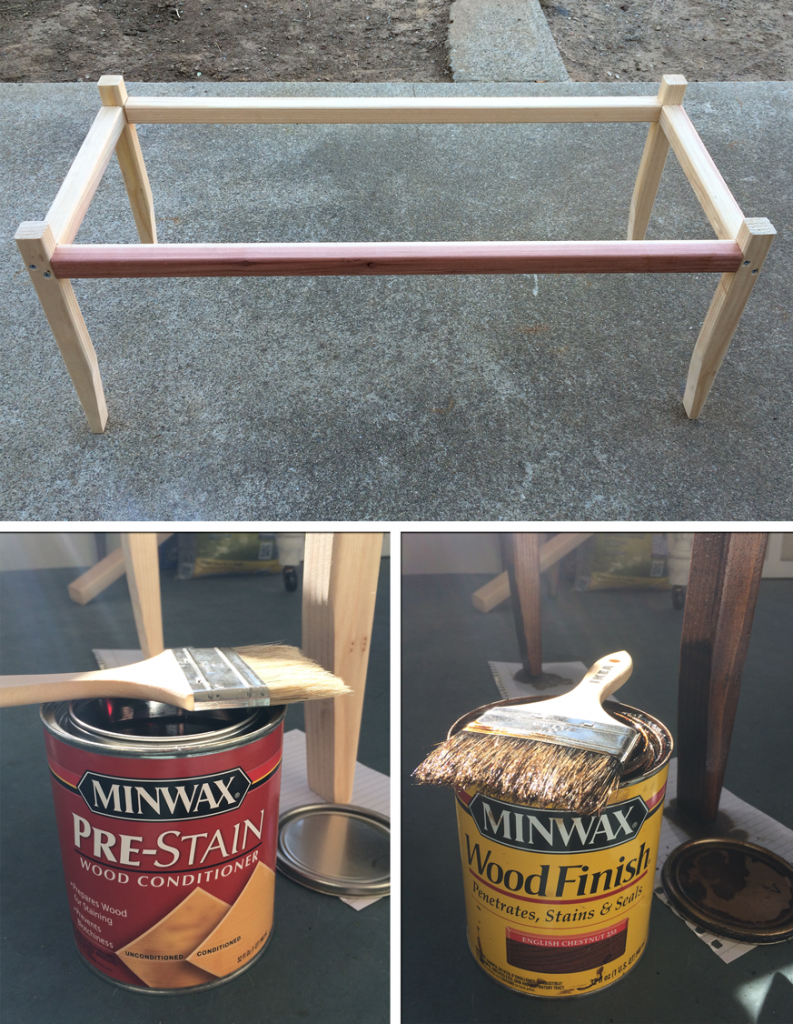 Prior to staining raw wood, you always want to apply a wood conditioner. It prevents blochiness and helps the raw wood soak up the stain more evenly.
  Once the stain was completely dry, I went right on to weaving the clothesline over and under, back and forth, all the way along the bench. Just make sure you pull very tight! I tied the ends of the clothesline to one another by threading the clothesline that ended at right end of the bench back through to the starting side, if that makes sense. The knot fell somewhere in the middle of the bench.
  I LOVE IT! Really! Even though I fail at screwing wood together “properly”, I actually love how this bench turned out. Believe it or not, it does hold my weight! Although I didn’t make this for sitting, I’m showcasing this bench as our coffee table, since our living room has been sans coffee table since we moved in back in April! This bench would also look fab in front of a bed, under a window, or in an entryway!
  Love love love, all day long!
  What do you think? Oh, and please ignore the carpet. Just pretend its gorgeous hardwood laid in an impractical chevron pattern.
)
)



This is awesome!! I love it :)
thanks!
Amazing Brittany! I love this! It would be so easy to customize your colors to match your house!
exactly! i’m kinda loving the pop of neon, and home depot sells like every color imaginable
gorgeous brittany!! love it! I have the I can DIY that disease too .. tricky upholstery projects might be a cure!
oh yes, that is true! but I can’t say i’ve never ditched a tricky upholstery project because it took too long lol. on to the next thing!
same here .. just give me a few months and I’m willing to try again! :)
I was sure you’d say a person shouldn’t sit on it because it is fragile. But you can? I’m amazed! It looks very cool.
hahaha I wouldn’t put it past me to build something you can’t sit on lol. I can sit on it fine but I probably wouldn’t test it out with my husband lol. I think that pocket hole system amps up the sturdiness. I just need to buy myself a kregjig…
Beautiful! You are so talented!
xo
Pat
Thank you Pat!
WOW! this just blew me away.
haha thanks Cassie!
Looks great! I love a great hack. I have been dying to do a succulent pottery vignette on my coffee table as well and cant seem to find the appropriate pot. Where did you get yours?
gorgeous! I have an woven bench that is unraveling….this is just the inspiration i needed to fix it myself!
HOLY SHIZ THIS IS AMAZING
You are brilliant.
This is some serisoulsly good stuff my friend. I love it. It looks awesome, and I think your woodworking skills are legit:)
It looks amazing! Your woodworking skills are way better than mine!
What a stunner! Great project Brittany.
Wonderful!! Better than the CB2 one. I would buy yours over theirs.
Oh I love this! I was JUST saying to my littlest’s preschool teacher that my home DIYing is basically like mental illness. At times a very useful and money-saving one, but still…I borderline need therapy for it.
Brittany this is reminiscent of the indian cot used in households , I used to sleep on one until a teenager and have been meaning to Replicate a similar bench here in my American home ! Love your version ! Every now and then my dad and I used to undo the jute rope and redo it ( to tighten it) . It was like our thing to do :)
Featured this on our blog today!
thank you!
The coolest woven bench has seen yet. Loved it. You are having great ideas and skills. Thanks for this lovely post. Your sense of interior is just awesome can you please suggest me something. Recently I’ve got the interior of my entire house. Reds, strong blues and vibrant greens in particular. Please suggest me the best Area Rug, as I have a wooden Dining table in my dining room with vintage cutlery set and blue color painted walls, Suggest me something which goes absolute fabulous with this combination. I’ve been purchasing the rugs from https://www.therugmall.com/8-x-10-area-rugs-best-rugs-to-buy-in-usa/ they have the great collection of rugs.
I LOVE THIS PROJECT! I’m so excited I found it. I have a busted wicker couch I’ve been trying to figure out what to do with. Did you use 400 ft of white rope? Thanks!
Loved the post keep it up!
Great posting friend. Will be back to read more.
Hey, I LOVE this bench! I made one for under my window and it turned out ADORABLE! The only problem I have is that the clothesline won’t stay even and is constantly sliding around ;( Do you use anything to keep yours in place?
I love how this turned out AND I love your style of writing!
very much great post thanks for sharing this post https://helpdeskminority.com/dns-codes-netflix-usa
superb blog thanks
wuko jelenia
I like this page!
Well you’re freaking hilarious and I love the bench. I hate reading blogs 99% of the time but loved your funny real-ness. I’m also a sufferer of the DIY disease. Anyway, I love what you’ve got going here. You’re awesome
I’m confused at how you finished off the weaving. Can you share pics or a video?