The weekly I Spy series is back! To refresh your memory, this series was created to showcase amazing DIY's I find out in the blogosphere! My day job limits my DIY time, so I thought it natural to share other amazing DIYs with my readers! If you're behind on the series, check out this page to see our previous features.
Let me begin by saying, I applaud any chick who can build things out of wood. Ana White blows my mind, she can build tables in minutes! Even the ladies who build stuff from Ana White's plans are rock stars. I was overcome by the same feeling of awe when I stumbled on Jen's blog, The House of Wood, where she shows her step by step on building knock-off Restoration Hardware nightstands.
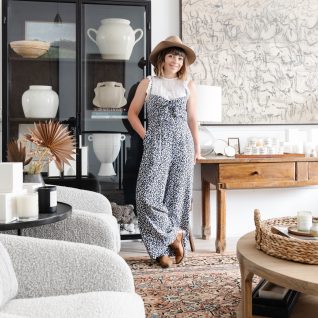
Jen is an incredibly talented singer/songwriter and home decor obsesser. She is super petite, and 7 months pregnant, and is building quality nightstands out of wood and using scary compound miter saws and Kreg Jigs! Oh how I wish I had the skills. My mind's Frankenstein voice is yelling "I WANT TO BUILD ALL THE WOOD THINGS."
Here are the Restoration Hardware nightstands, at $369 a piece:
First, Jen went to Lowes, bought some supplies, and laid them out in a pretty picture for us laymen to see exactly what we need to cut if we want to make our own:
Next, Jen busted out her handy Kreg Jig and drilled a few pocket holes in the wood to make the 2 sides, 2 fronts, and 2 back frames:
Next, Jen cut some plank paneling down to size and nailed them to the sides of the 2 side frames. The right frame shows the inside view, the left frame shows the outside view.
Next, she drilled the bottom pieces of plywood to the side frames.
Next, Jen glued and nailed on the front frames, drilling pocket hole screws on the bottom shelf. Jen chose to continue the plank paneling on the back of the nightstands, instead of using a sheet of plywood, since her nightstands will be put in a place where the back is exposed. So smart!
Jen attached the plank paneling to the back frames just as she did with the side frames (using glue and 3/4″ finish nails). The nightstand on the left shows the inside view of the back panel, and the one on the right is the view of the outside.
Then she glued and nailed the back frames onto the nightstands, drilling pocket hole screws in at the bottom shelf. Here’s the back view:
Next step – constructing the doors:
Then add the plank paneling. The door on the left shows the inside, and on the right is what it looks like from the outside:
Next you add the tops to the nightstands:
Jen shows how to assemble the tops by first drilling pocket holes, then joining the boards together, like this:
(checking out these tops make me giddy to use my Kreg Jig Jr., which I still can't believe I found in my Haven swag bag)
Jen attached the tops with glue and 1 1/4″ finish nails and gave the 2 pieces a good sanding. Then, she vacuumed up the dust and wiped the nightstands down with a damp rag to remove any remaining dust and debris.
Next, Jen stained the nightstands with Rustoleum's Dark Walnut stain
Which she ended up not liking so much, the stain came out darker than she expected. So Jen sanded and distressed the nightstands to look like this:
I think they look amazing! The stain wasn't what Jen expected, but she was able to change it up to fit her taste. Jen also provided us with her cost breakdown:
Cost Breakdown:
- Pine lumber: $92.11
- 3 Packages of plank paneling: $29.13
- 2 Sash lifts: $5.02
- 4 Strap hinges: $10.68
- 2 Magnetic clasps: $2.38
- Pocket hole screws: already owned
- Finish nails: already owned
- Rustoleum dark walnut stain: already owned
- Rustoleum polyurethane: already owned
Total cost for 2 nightstands: $139.32 ($69.66/each)
I'm so impressed. 'Nuff said. Jen's project has given me a bunch more reasons why I should hustle over to Home Depot, grab the nearest compound miter saw, close my eyes and hand them my credit card!
)
)


