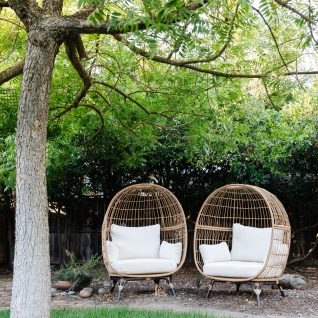
It was roughly 6 months ago when my aunt and I first started talking about the deteriorating state of my grandma’s couch cushions. My Grandma, or Meemaw as I like to affectionately call her, chose an outdoor sofa and side chairs as her living room seating. She’s a big fan of using rattan and wicker to bring nature and texture into her home. Our first thought was to surprise her with an entirely new living room set. Well, reality kicked in after we performed a little cost/benefit analysis, and we realized how expensive it would be to purchase an entirely new living room set. So, I offered up the idea to reupholster the cushions myself. Why not, right?
It took us about 3 more months to gather and purchase all the materials, then 3 more months for me to muster up the courage to tackle sewing 5 pillows and 5 cushions. Phew! It took me a long time but thankfully my aunt and Meemaw were more than understanding!
Here is the after, in all it’s beauty and glory!

It’s done! Finished! Complete! I feel like a 50lb weight has been lifted off my chest and I can finally sleep at night!
Too much? Well, I’ll have you know, I actually considered naming this post “world’s most difficult project”… but I realized I was being a little dramatic. It’s not that this project was difficult. It’s that it was such a BIG project to undertake, considering my sewing skills weren’t that strong. I knew I was in way over my head, and it didn’t help that all the materials were infesting our shared living spaces and my roomies were counting the days it took for me to finish. SO MUCH PRESSURE!
Well, it’s done now! And who cares if no one else pats me on the back for executing this massive project. I perfected my pillow sewing skills, my zipper sewing skills, and the incredibly difficult task of sewing a cushion corner. My first cushion took me 2 hours. My last? 40 minutes!
Here is a shot of the before and after:

The before doesn’t look too bad in the picture. I wouldn’t be shocked if you say you like it better before, with all the colorful pillows and the contrasting piping on the cushions. What you can’t see in the before photo is how flat the cushions get when you sit on them. So flat you might as well be sitting straight on the rattan frame! What you also cannot see are the marks and stains on the cushions themselves, which couldn’t be bleached out since the cushions have that dark contrasting piping. At the end of the day, my Meemaw wanted something fresh in this space, and that’s the direction we went.
My aunt spotted this floral quatrefoil print at Home Fabrics and Rugs, my favorite place to buy fabric (everything is between $3.99 and $12.99/yard, no joke!). The print is a mix of yellow, red, a hint of teal, and beige. We wanted the cushions to get all the attention, so we opted for a yellow and olive striped fabric for the pillows. The stripes are so teeny tiny that the pillows look a light olive in the photo.
Here is a brief list of the materials I used:
- 2 orders of 5″x 24″ x 108″ high density foam
- batting
- yards and yards of fabric (I forget how much we bought)
- 5 x 22″ pillow inserts
- 10 x 24″ zippers
- 2 spools of thread
- one L-shaped ruler
- zipper foot attachment to sewing machine
- hot glue gun & sticks to attach the batting to the foam

I chose not to take any action shots while sewing the cushions, mainly because I worked on them at night, and mainly because I was already a stress case trying to get ‘er done! I will have another big upholstery project coming up this summer, so I’ll save the tutorials for then.
I learned a lot about myself while completing this project. I learned that not everything is as difficult as it seems. I learned that it’s better to start slowly and find a groove, than let anxiety take over and give up or not start at all. I also learned, as in any challenging project such as this, it’s best to bring it down to the basics – sew one straight line here, one straight line there, iron here, pivot there. My best advice is, take one step at a time and think of your seam ripper as your friend!
Thankfully my Meemaw is thrilled with these new cushions! She didn’t care how long it took me. She absolutely loves the fabric choice, and is already talking about sprucing up her shelves and wall art to tie everything together! It’s funny what a little change can do :)

)
)


They look AWESOME!! I really love that fabric and you did an awesome job.
thank youuuuuu!
I think you did an awesome job! It looks quite professional and that was a great fabric choice. Looking forward to the tutorials!!
WOW! I am SO impressed! You did a great job! xox
It looks great!