I think it’s safe to say – everyone loves the classic chevron zig-zag print. Am I wrong? Some of you may be “tired” of seeing it everywhere, and it might be approaching it’s overuse, but I don’t see it going away any time soon.
I was thinking about it the other day, why is chevron so loved? In my opinion, (and not like it means anything!) I think chevron is loved so much because of it’s versatility and bold character. The pattern itself looks great almost anywhere, on walls, on throw pillows, on main or accent rugs, or as detail on a piece of furniture. You can add chevron accents in almost any style of home, traditional, contemporary, or mid-century modern. Even though the zig-zag print itself is a classic, it’s always retained a current and trendy feel.
If you’re anything like me, you’ve already figured out how to personalize and recreate this classic print. Before I had figured it out, I searched high and low to find the right chevron print, for an image background or yard of fabric. I searched Pinterest, Google images, stores like Target or West Elm, and would gaze longingly over the chevron fabrics over at Spoonflower. It didn’t feel right, like I was borrowing someone else’s design when I should be creating it myself.
Well, search no longer! I’m going to show you how to create your very own chevron print using Photoshop Elements!
How to Create a Chevron Print using Photoshop Elements
Photoshop Elements is the beginner’s version of Photoshop. It’s robust yet easy to use, and you won’t feel lost in it like you do in the big Photoshop software. You can download the free 30-day trial here.
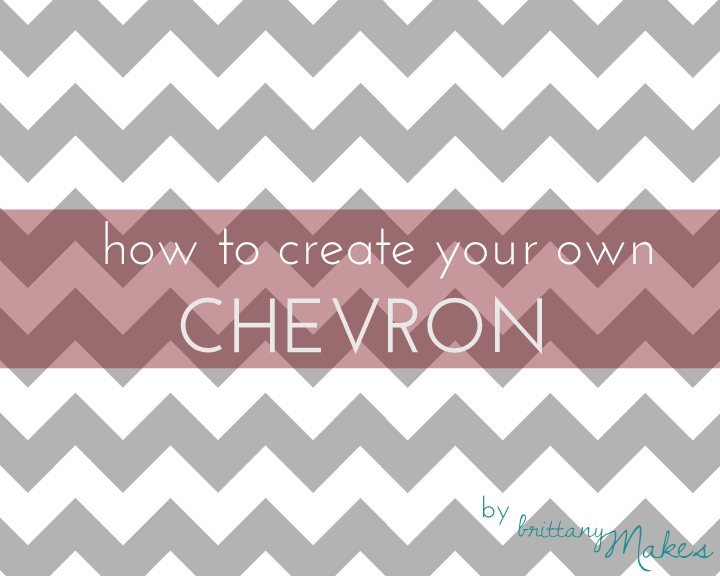
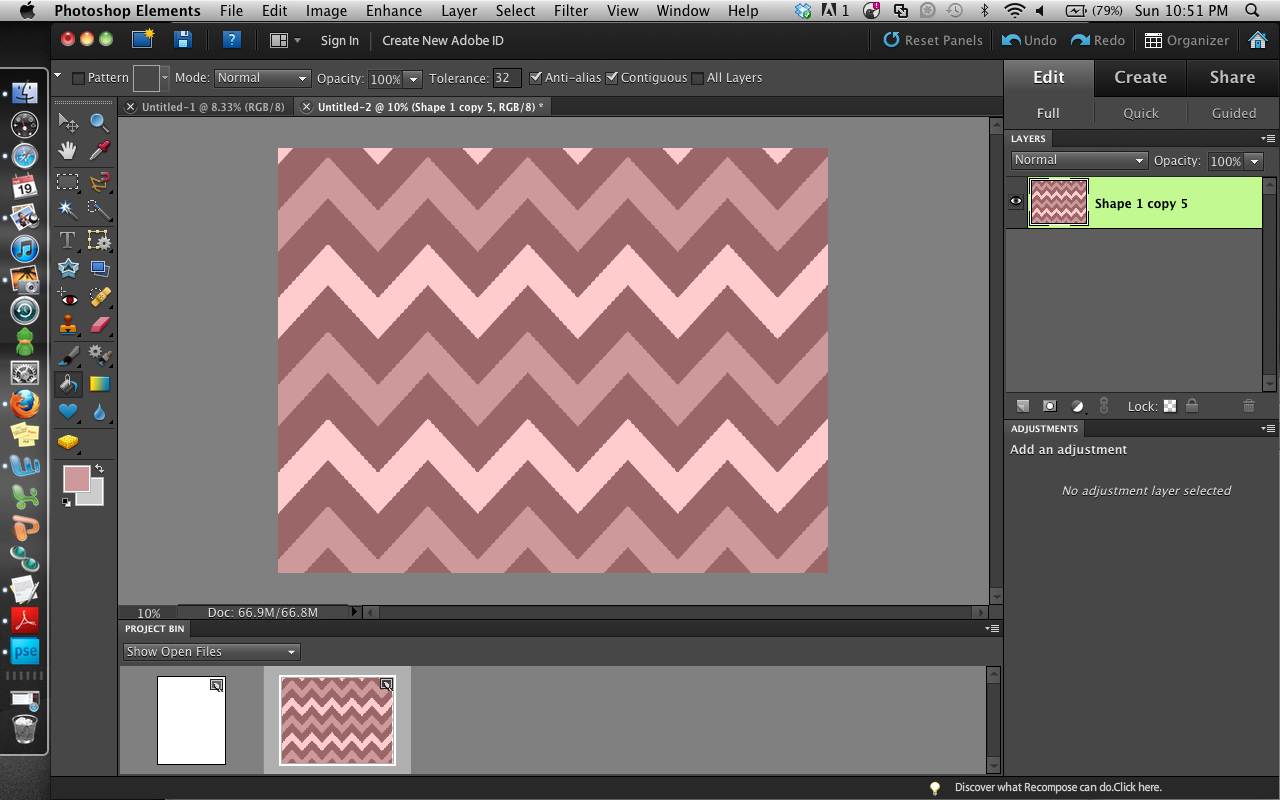
Here’s a sneak peek of the print we’re going to create:
Step 1 – Open a blank file
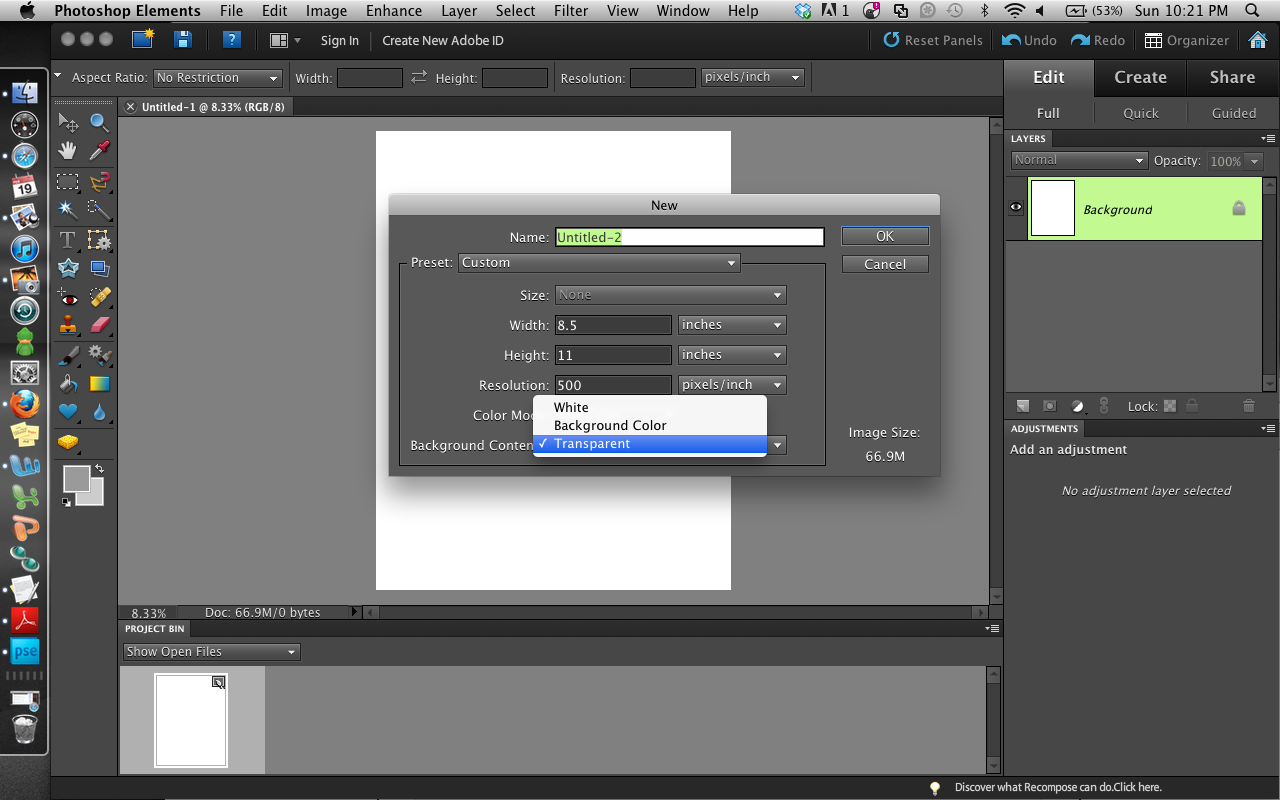
Select the size and type of background you want. I chose 8.5″ x 11″, and “transparent”
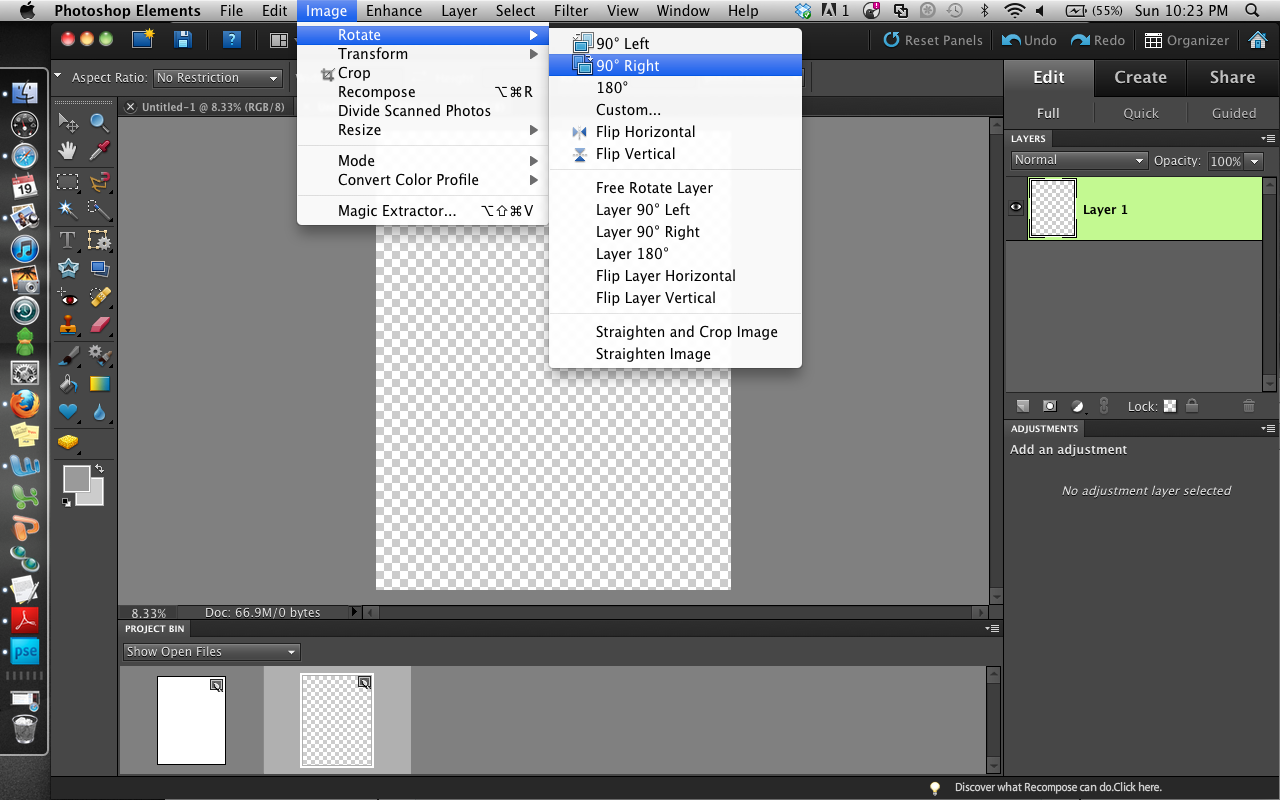
Step 2 – Rotate the canvas to landscape
Step 3 – Add a grid to the canvas

Step 4 – Click the “custom shape” tool (the heart button on the left toolbar)

Step 5 – In the drop-down menu for the custom shapes, make sure “all shape elements” is selected

Step 6 – Select “Arrow 2” from the custom shapes

Step 7 – Draw the arrow
This example is a 2″x2″ arrow

Step 8 – Rotate the arrow layer to the right

Step 9 – Duplicate the arrow layer

Step 10 – Reposition the duplicate layer next to the first layer
Use the “move” tool on the left toolbar. *Make sure you selected the duplicate layer in the edit menu on the right side of the screen before moving
Step 11 – Repeat steps 9 + 10 until you’ve created one full row of arrows (which now look like zig-zags)
Step 12 – Merge visible layers
This takes each individual arrow layer and turns it into a single layer.
*If you have a white background, make sure you turn the background “off” by clicking on the layer’s eye.

Step 13 – Change the color of the layer (optional)
Do this using the button that looks like a paint bucket. You can also do this step at the end.

Step 14 – Duplicate the new merged layer to create a second row of zig-zags

Step 15 – Reposition the duplicate layer using the move tool
Repeat steps 14 & 15 until until canvas is full

Step 16 – Merge visible layers (same as step 12)
Step 17 – Save image
A) Remove grid

B) Save file for web

C) Re-size image, then save
I usually re-size images within a range of 500 ~ 700px

Here are a couple other patterns I completed:

The ideas are endless, now that you know how to create your own chevron print! You can make party hats, party favors, cards for special occasions, digital backgrounds and web images. You can make templates for wall art or wall stencils. You can even create your own fabric on Spoonflower.com and sell it to the public!

)
)


Great stuff. Keep writing and shower your readers with such usefull information. Keep it Up!!!
Awesome. Thanks so much. Just made an aqua one for my spring mantle!
Its great likely to read online from your side of your respective web address upon net.
Your site always offer some really interesting information. Thank you for sharing it with us.
Very AWESOME!! Can you recommend any websites to print for wall art???
I just made this. However when I went to save the only option I have to save in is .gif I want to use this in elements so I can put in onto business cards. Also I can only paint the chevron pattern not the background. How do I paint the background too?
Hi Wendy! There are a couple ways to paint the background. I think easiest way would be to change step 1. Instead of selecting transparent background, you select “white background”. This will give you a background layer which you’ll see in the layer’s menu. To paint the background layer, select the layer, then use the paint bucket tool. I’m not sure why your only save option is .gif… did you save via the “save for web” option? Once you’re finished with the design, try merging all layers then saving. Hope this helps!
Yes I saved using the “save for web”, I ended up saving as a .PSD file also about to make a new one with a white background & go from there. You wouldn’t happen to have a tutorial on how to make a Sweet 16 card would you? lol
oh, thank you for this tutorial! You helped me make my first ever document in Photoshop Elements! So exciting. I am brand new to Santa Rosa, and I was excited to see that you are from this area. So beautiful–we are loving it!
I’m at the step where you use the shapes tool…but when I try to commit or duplicate it, the arrow shape disappears…new to this elements thing…help??
I happened upon your tutorial and cannot see the pics on this one or the argyle tutorial. I can, however, see your pics on your latest blog entries. Any ideas? Thx!
Hi Kelly! Let me work on adding these images back for you – I lost the image links to many of my posts when I upgraded my blog last Summer. I’ve been slowly adding them back. Sorry for the inconvenience!
Hello. I followed this step by step and when i go to rotate the arrow it rotates the whole image. :( Please help!
Never mind, i figure it out. hehe
Awesome tutorial. Thank you.
Awesome tutorial!! I’m having issues with a slight white line appearing in between colors. Do you know how this is happening or what to do to get rid of them?
Hi Ashley! Can you try starting out with the entire background as the blue color? Then draw the pink chevrons over the top of the background. That should get rid of the white lines.
I loved this. HEre is my issue similar to Ashley. I made them and came out nearly perfect but in my case, when i look at the image it looks seamless. When i print however, i get miniscule little white gaps between each section and cant seem to get rid of it. I know each Chevron are alligned proper.
suggestions?
Hi Michael – I just replied to Ashley’s comment, and will suggest the same – try starting out with the background as the color of one chevron, then drawing the other color chevron on top of the background. Right now in Ashley’s case, her white background is showing thru. If you change the background color to the color of one of the chevron stripes, it should get rid of this problem. Let me know if this works for you!
is there any way i can send you my document to show you where i stand? I would love for you to see it to make suggestions.
thank you
of course! Email it to me as a .psd (make sure to include all layers when saving) to brittanymakes@gmail.com
This tutorial is just what I have been searching for!! I currently have photoshop elements 11 (free trial, deciding if I like it ) I have done everything you have said I get as far as drawing the arrow on, then when I try to rotate the layer it will not let me do it, the layer rotate option isn’t even highlighted in the drop down box. is there something I am doing wrong or does the free trial not offer that …..
Thank you for this! :) I was searching around for the perfect chevron background for my blog and just couldn’t find what I wanted. So, why not make it myself?
I use Photoshop CS6, and these instructions translate just fine to that as well!
I was SO excited to find this! I a completely obsessed with anything chevron & I want to make my own FB cover.
My only problem I am having is my arrow has this jagged effect all around the edges :/ IDK how to fix it! I followed everything exactly. Any help is appreciated! TIA! :)
just go into the layer options where she does to merge and there will be a “simplify” option. This removes the jagged edges. I was getting them too :)
I love this however when I duplicate it doesn’t show up. What am I doing wrong?
Hey Nancy! usually when you duplicate a layer, the new layer sits right on top of the old layer. you have to use the “move” tool to move that layer over so you can actually see it. let me know if this helps!
I’m having trouble with creating the chevron as you describe it. Could you email me one? I would greatly appreciate it! mtaylor729@aol.com. Thanks so much!!
AMAZING!!! I tried to use another website to explain this and it was so confusing! This was exactly what I needed! Thanks :-)