)
)


Happy Thanksgiving everyone! I’m started my morning off with a big cup of coffee, some Christmas music in the background (a requirement from the BF), and a slice of Pandoro, an Italian breakfast tradition during the holidays.
To begin this post, I was searching for the best adjective to describe the state of my grandma’s formal dining table; thrashed, battered, beaten-up, or wrecked came to mind. My poor gram, she was already dealing with the stress of selling her vacation home. The vacation home furniture had to be moved back to her house, and unfortunately during the move the table wasn’t covered properly in the moving truck and something sharp (a box spring mattress) made its mark all over the table.
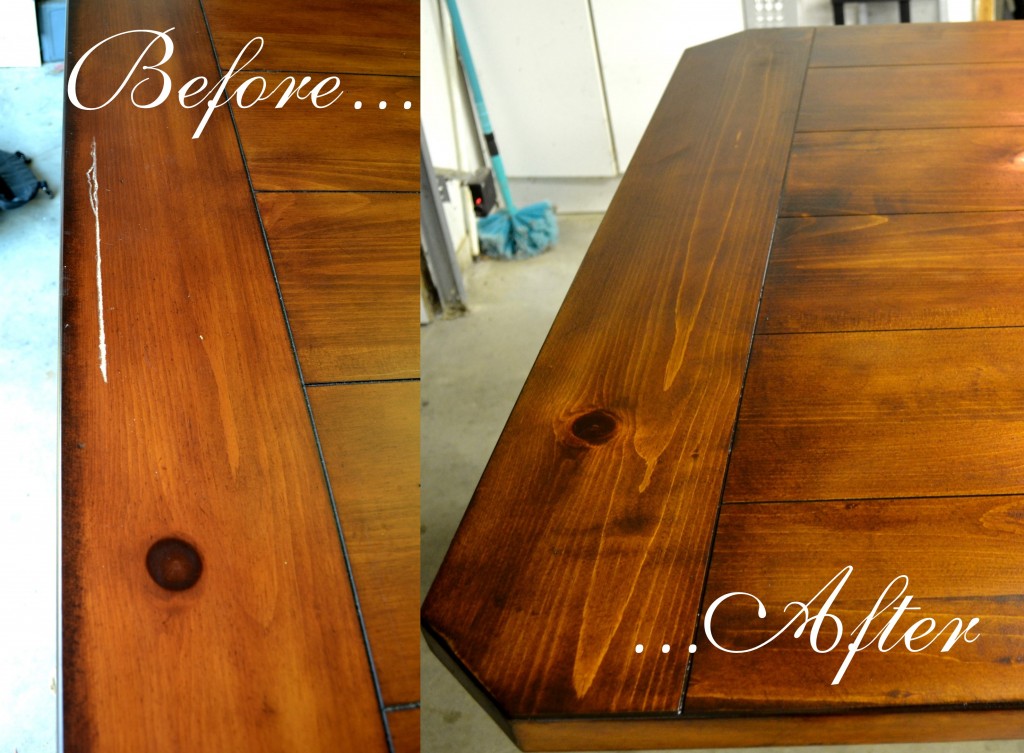
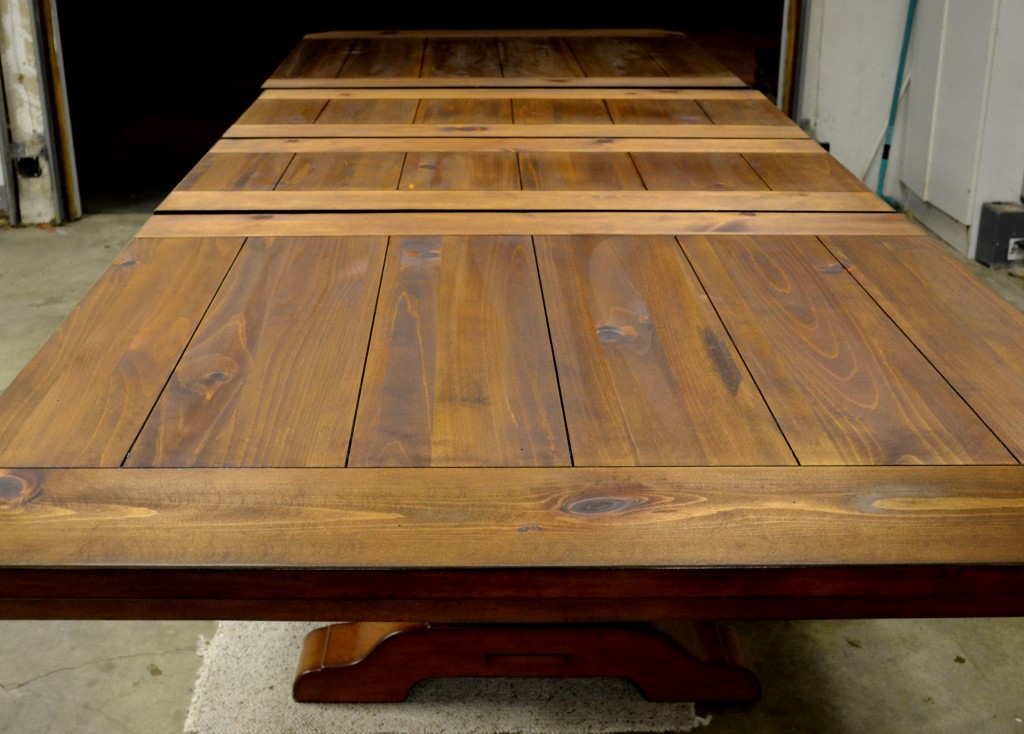
My gram was so upset when the table was pulled out of the moving truck. She had planned to move this table into her dining room in time for a Thanksgiving feast. The table she currently has only seats 8… this new table? It seats 14 people! It’s huge, 9′ long, 2 extra leaves and it seats 14. The gash in the above picture wasn’t the only disfigured spot, here are a few of the other abrasions:
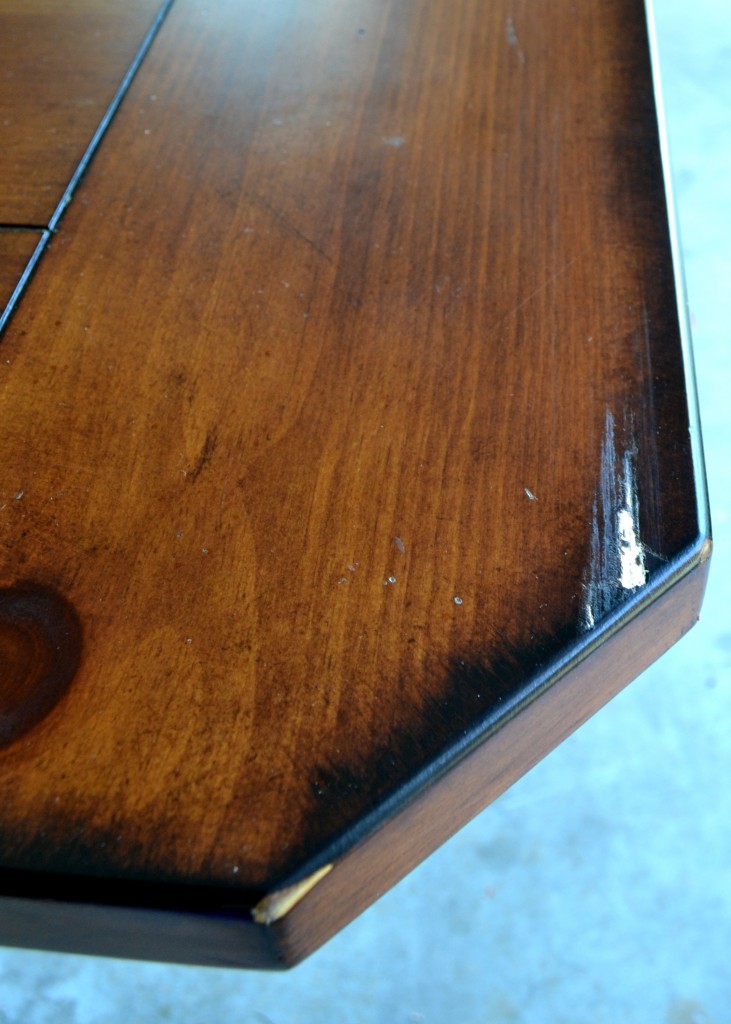
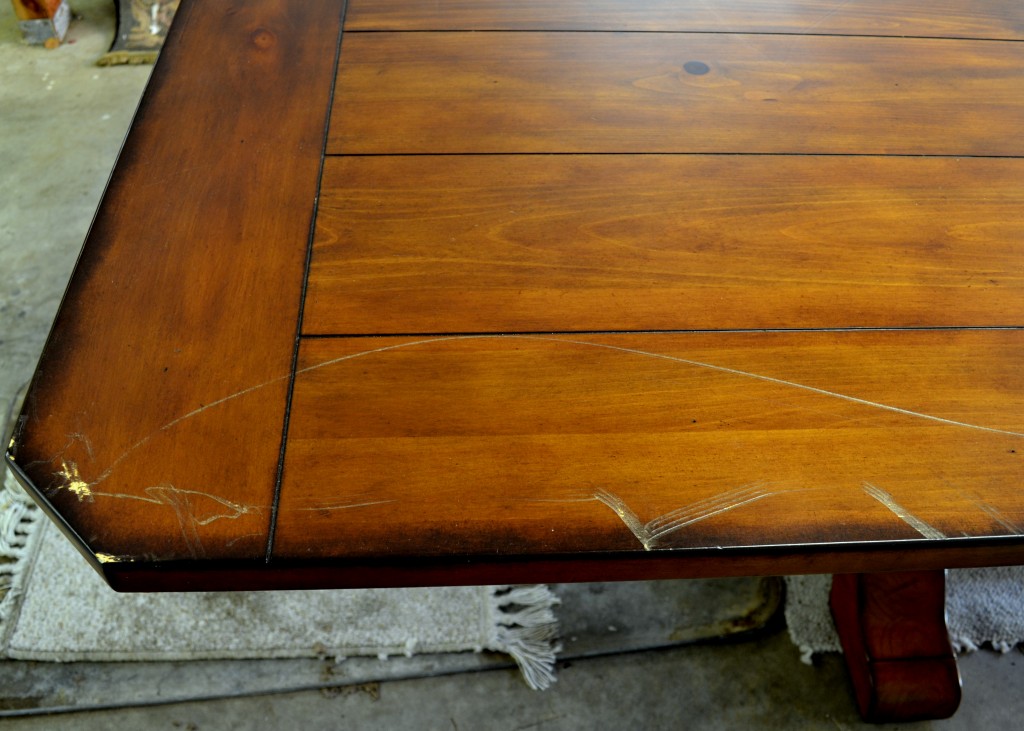
Can you imagine? Your formal dining table, the table you use for special occasions, the table you probably saved up a lot of money to afford, one of the most important pieces of furniture you own gets pulled out of the moving truck looking like it just came out of the tree shredder? You’re probably thinking, blame the movers! Make the movers pay for it! Well, my gram didn’t hire professional movers, she had the boys in the family move the furniture. Let’s just say they got the heat for this, poor guys!
Perfect opportunity for super Brittany! When my gram thought the table was trashed, “too the garbage” she demanded, I stepped in, with my fist in the air, and proclaimed “we can save it!”
OK, maybe it didn’t happen exactly like this. My gram got a professional out to look at the table and given an estimate. “$300 to do a patch-up job, or $600 do to it professionally,” he said. She didn’t want to pay that type of money, so she asked me to do it.
Here’s how I saved this table:
Step 1 – Gather your Supplies –
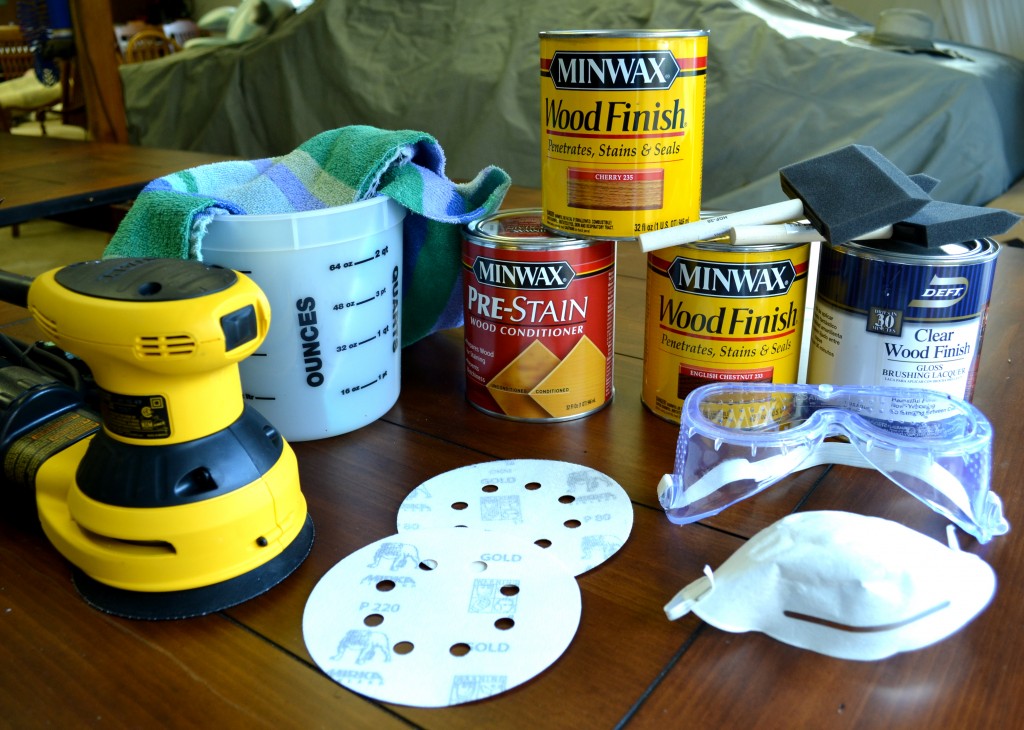
- Sander of choice, I used my orbital and a palm grip sander (not pictured)
- 80 grit & 220 fine grit sanding pads
- bucket to mix the stain
- lint free cloths or rags
- cheap-o foam brushes
- pre stain conditioner
- wood stain
- clear wood finish or polyurethane (not pictured)
- mask and goggles
Step 2 – Sand it!
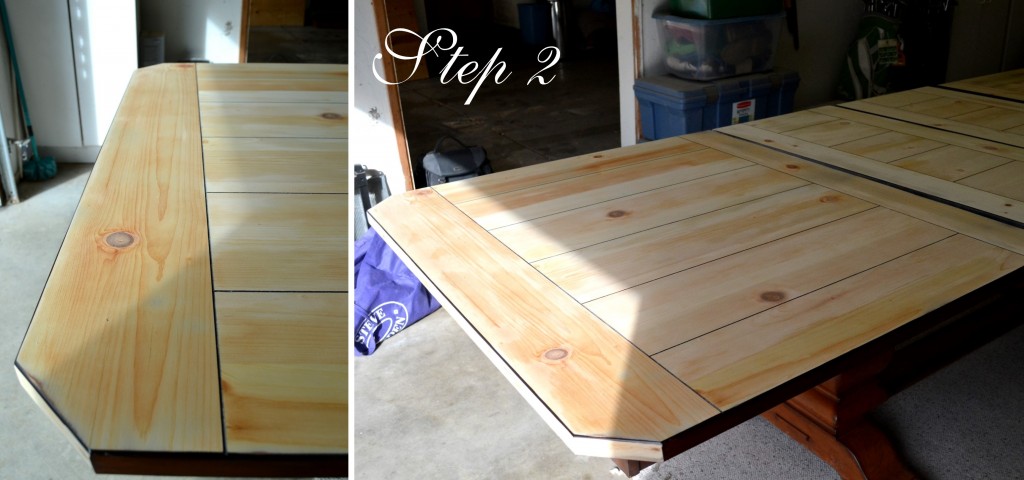
It took me almost 4 hours to sand this entire table. Two thing to note when sanding – first and most importantly, sand WITH the grain. Second, inspect how the piece was made, not all pieces of furniture are what they seem. This table looks like it was made of thick, solid planks of wood, but it isn’t. The top of this table was fashioned with a very thin layer of wood planks, fused on top of some sort of fiber or manufactured wood. I realized this as I sanded the corner, the fiber board or manufactured wood layer became visible. I had to be extra careful when sanding the top layer, not to go sand too deep.
I was lucky, I was able to sand out all of the gashes and scratches. I had prepared to use stainable wood filler if I couldn’t sand them out. The research I’ve done on stainable wood filler is it gives varied results. I was crossing my fingers while sanding, I really didn’t want to go down the wood filler route.
Step 3 – Apply Wood Conditioner
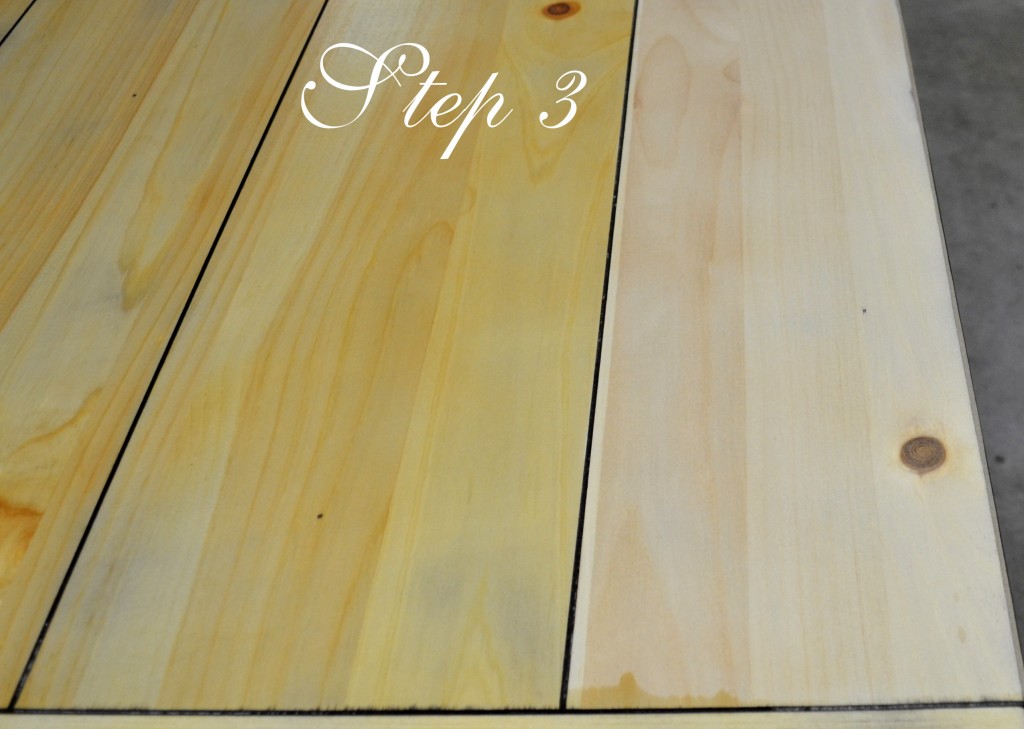
Can you see the difference? The left is conditioned, the right is raw. Why should you condition the wood? Raw wood has a tendency to unevenly soak up stain, resulting in a splotchy finish. Applying wood conditioner preps the wood to soak up the stain evenly. I used a foam brush, and applied the conditioner with the grain of the wood.
Step 4 – Mix & Apply the Stain
I took a leaf with me to the hardware store to pick out the stain I would need for the table. If you noticed in the very first picture, the stain has a 2-tone, almost ombre finish. This process is a little difficult, especially given the lighting in the hardware store. I bought the wrong stain at first, which I realized after going back home and testing the stain on the underside of the leaf. I had to go back to the store, grr.
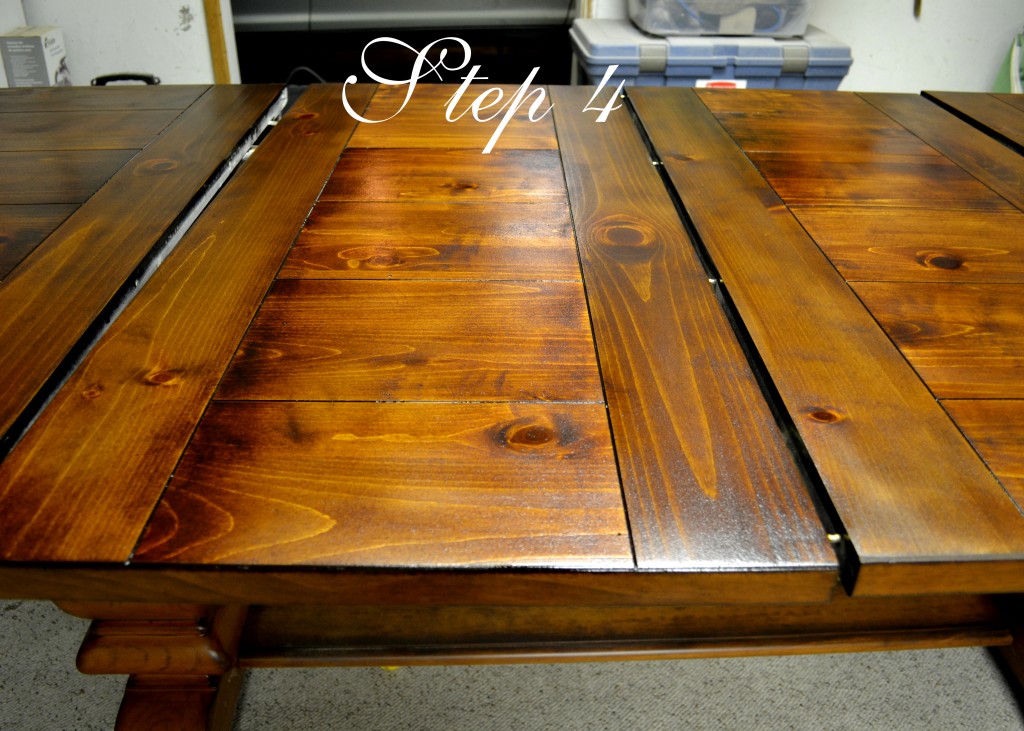
Here’s what it looked like after the first coat of stain. Remember, apply stain with the grain. Also, keep in mind raw wood is very thirsty and if you drop or splash the stain on the wood, be very quick to wipe it and stain that area, otherwise it’ll become a permanent blemish.
Let the stain dry for the appropriate time, per the instructions on the container.
Step 5 – Apply Additional Coats of Stain
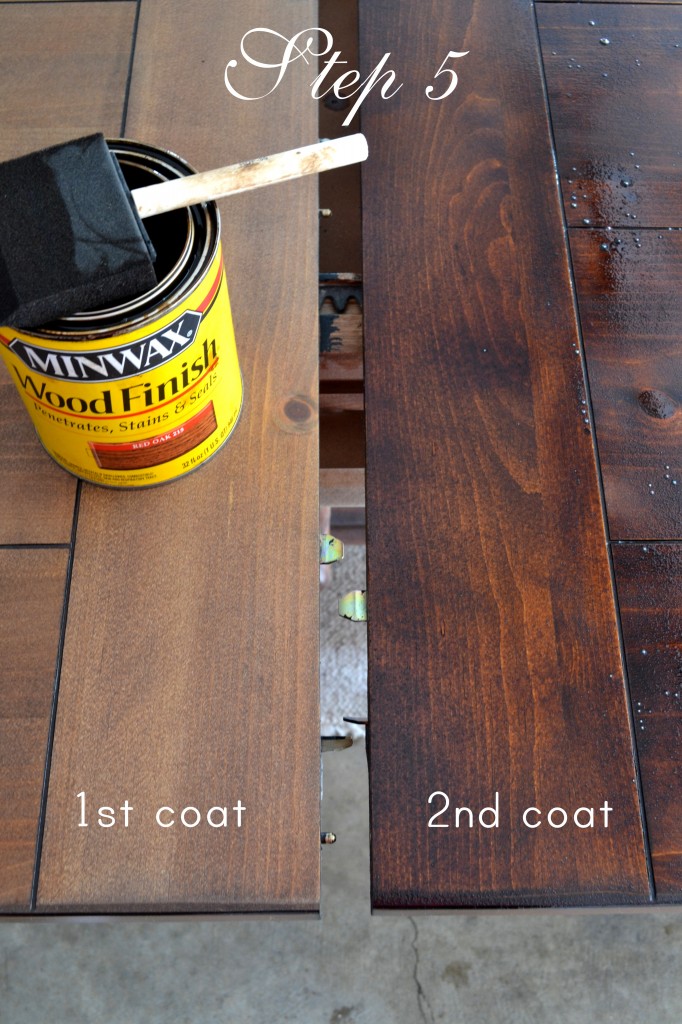
The stain will dry much lighter than you think, so you’ll need to apply multiple coats. The left is the first coat, dry. The right is the second coat. It looks really dark, right? Well, like I said, it’ll dry lighter. Check this out…
This is the table after the second coat was dry. I applied 3 coats, but on the third coat I wiped the stain off almost as quickly as I applied the stain.
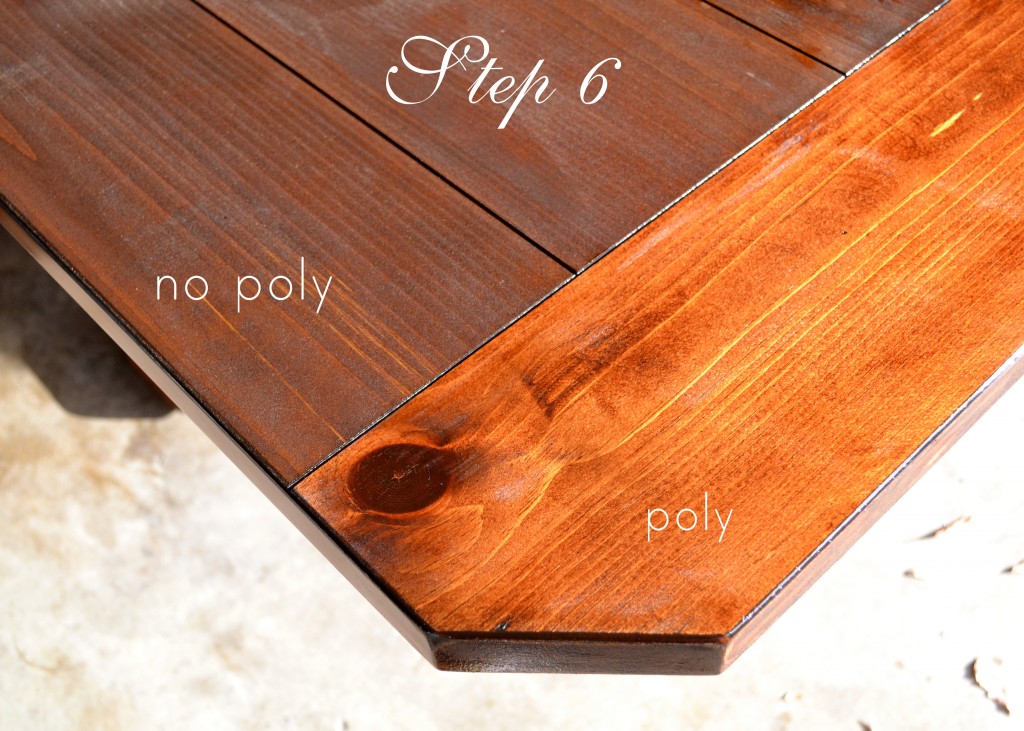
Step 6 – Apply the Clear Wood Finish
I read many positive reviews online about the Deft Clear Wood Finish, so I decided to try it over my go-to polyurethane. I have to admit, I don’t know enough about clear coats or lacquer, which is another reason I decided to try the Deft clear finish. Well, I didn’t like it. It was thick to apply, and it dried splotchy. Maybe it was the wood, maybe it was user error, I just didn’t like the final result. I sanded the Deft coat down with super fine 220 grit sand paper, then applied 4-5 coats of wipe-on poly. I also sanded in between the dry coats of poly, to make sure the surface was smooth and even.
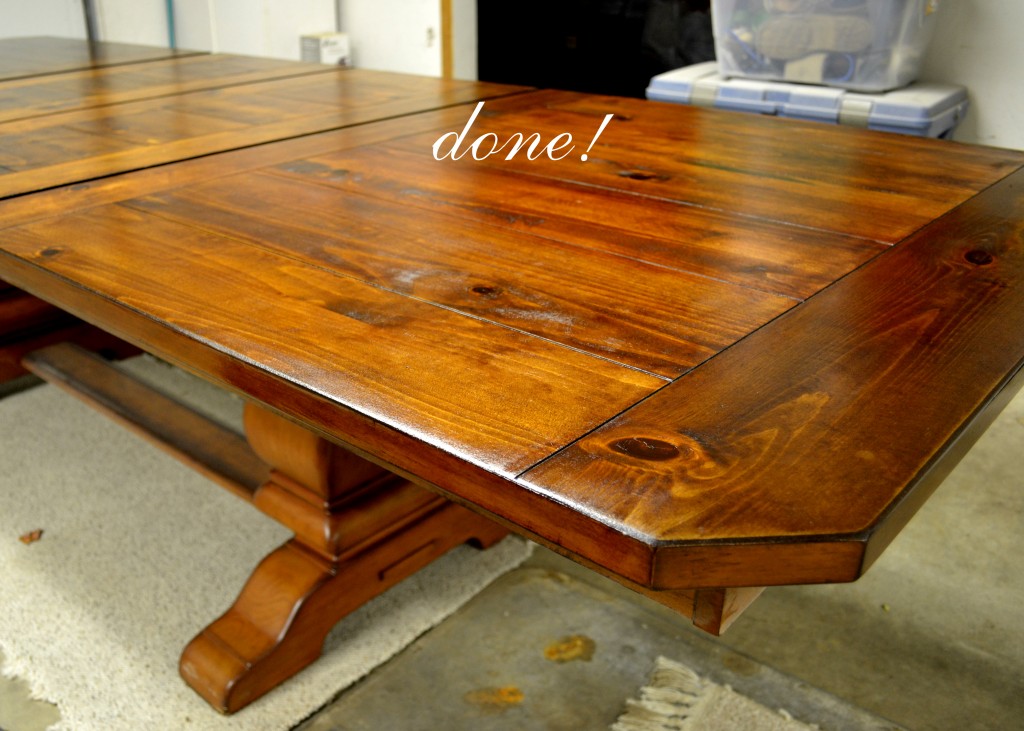
And we’re done! Let the top clear coat dry completely, at least 24 hours, then you’re ready to move the table inside and enjoy!
My gram is ecstatic we saved her table. She thought it was gone forever. Now she has to figure out how to get it in her dining room!

Phew, what a process! This table took a lot of time, but it was worth the effort. It just goes to show you, things that appear to be ruined, trashed, dead, done-skee, can in fact be saved!
Happy Thanksgiving!


You did a GREAT job! Glad Gram is happy and didn’t have to fork over the $$~
You did a GREAT job! Glad Gram is happy and didn’t have to fork over the $$~
wow! you really did save that table! I thought with that stuff you wont be able to fix the table completely as DIY is not always perfectly accurate or satisfying approach to get things done. Good job!
wow! you really did save that table! I thought with that stuff you wont be able to fix the table completely as DIY is not always perfectly accurate or satisfying approach to get things done. Good job!