)
)


When we first bought our house, the backyard looked like this:
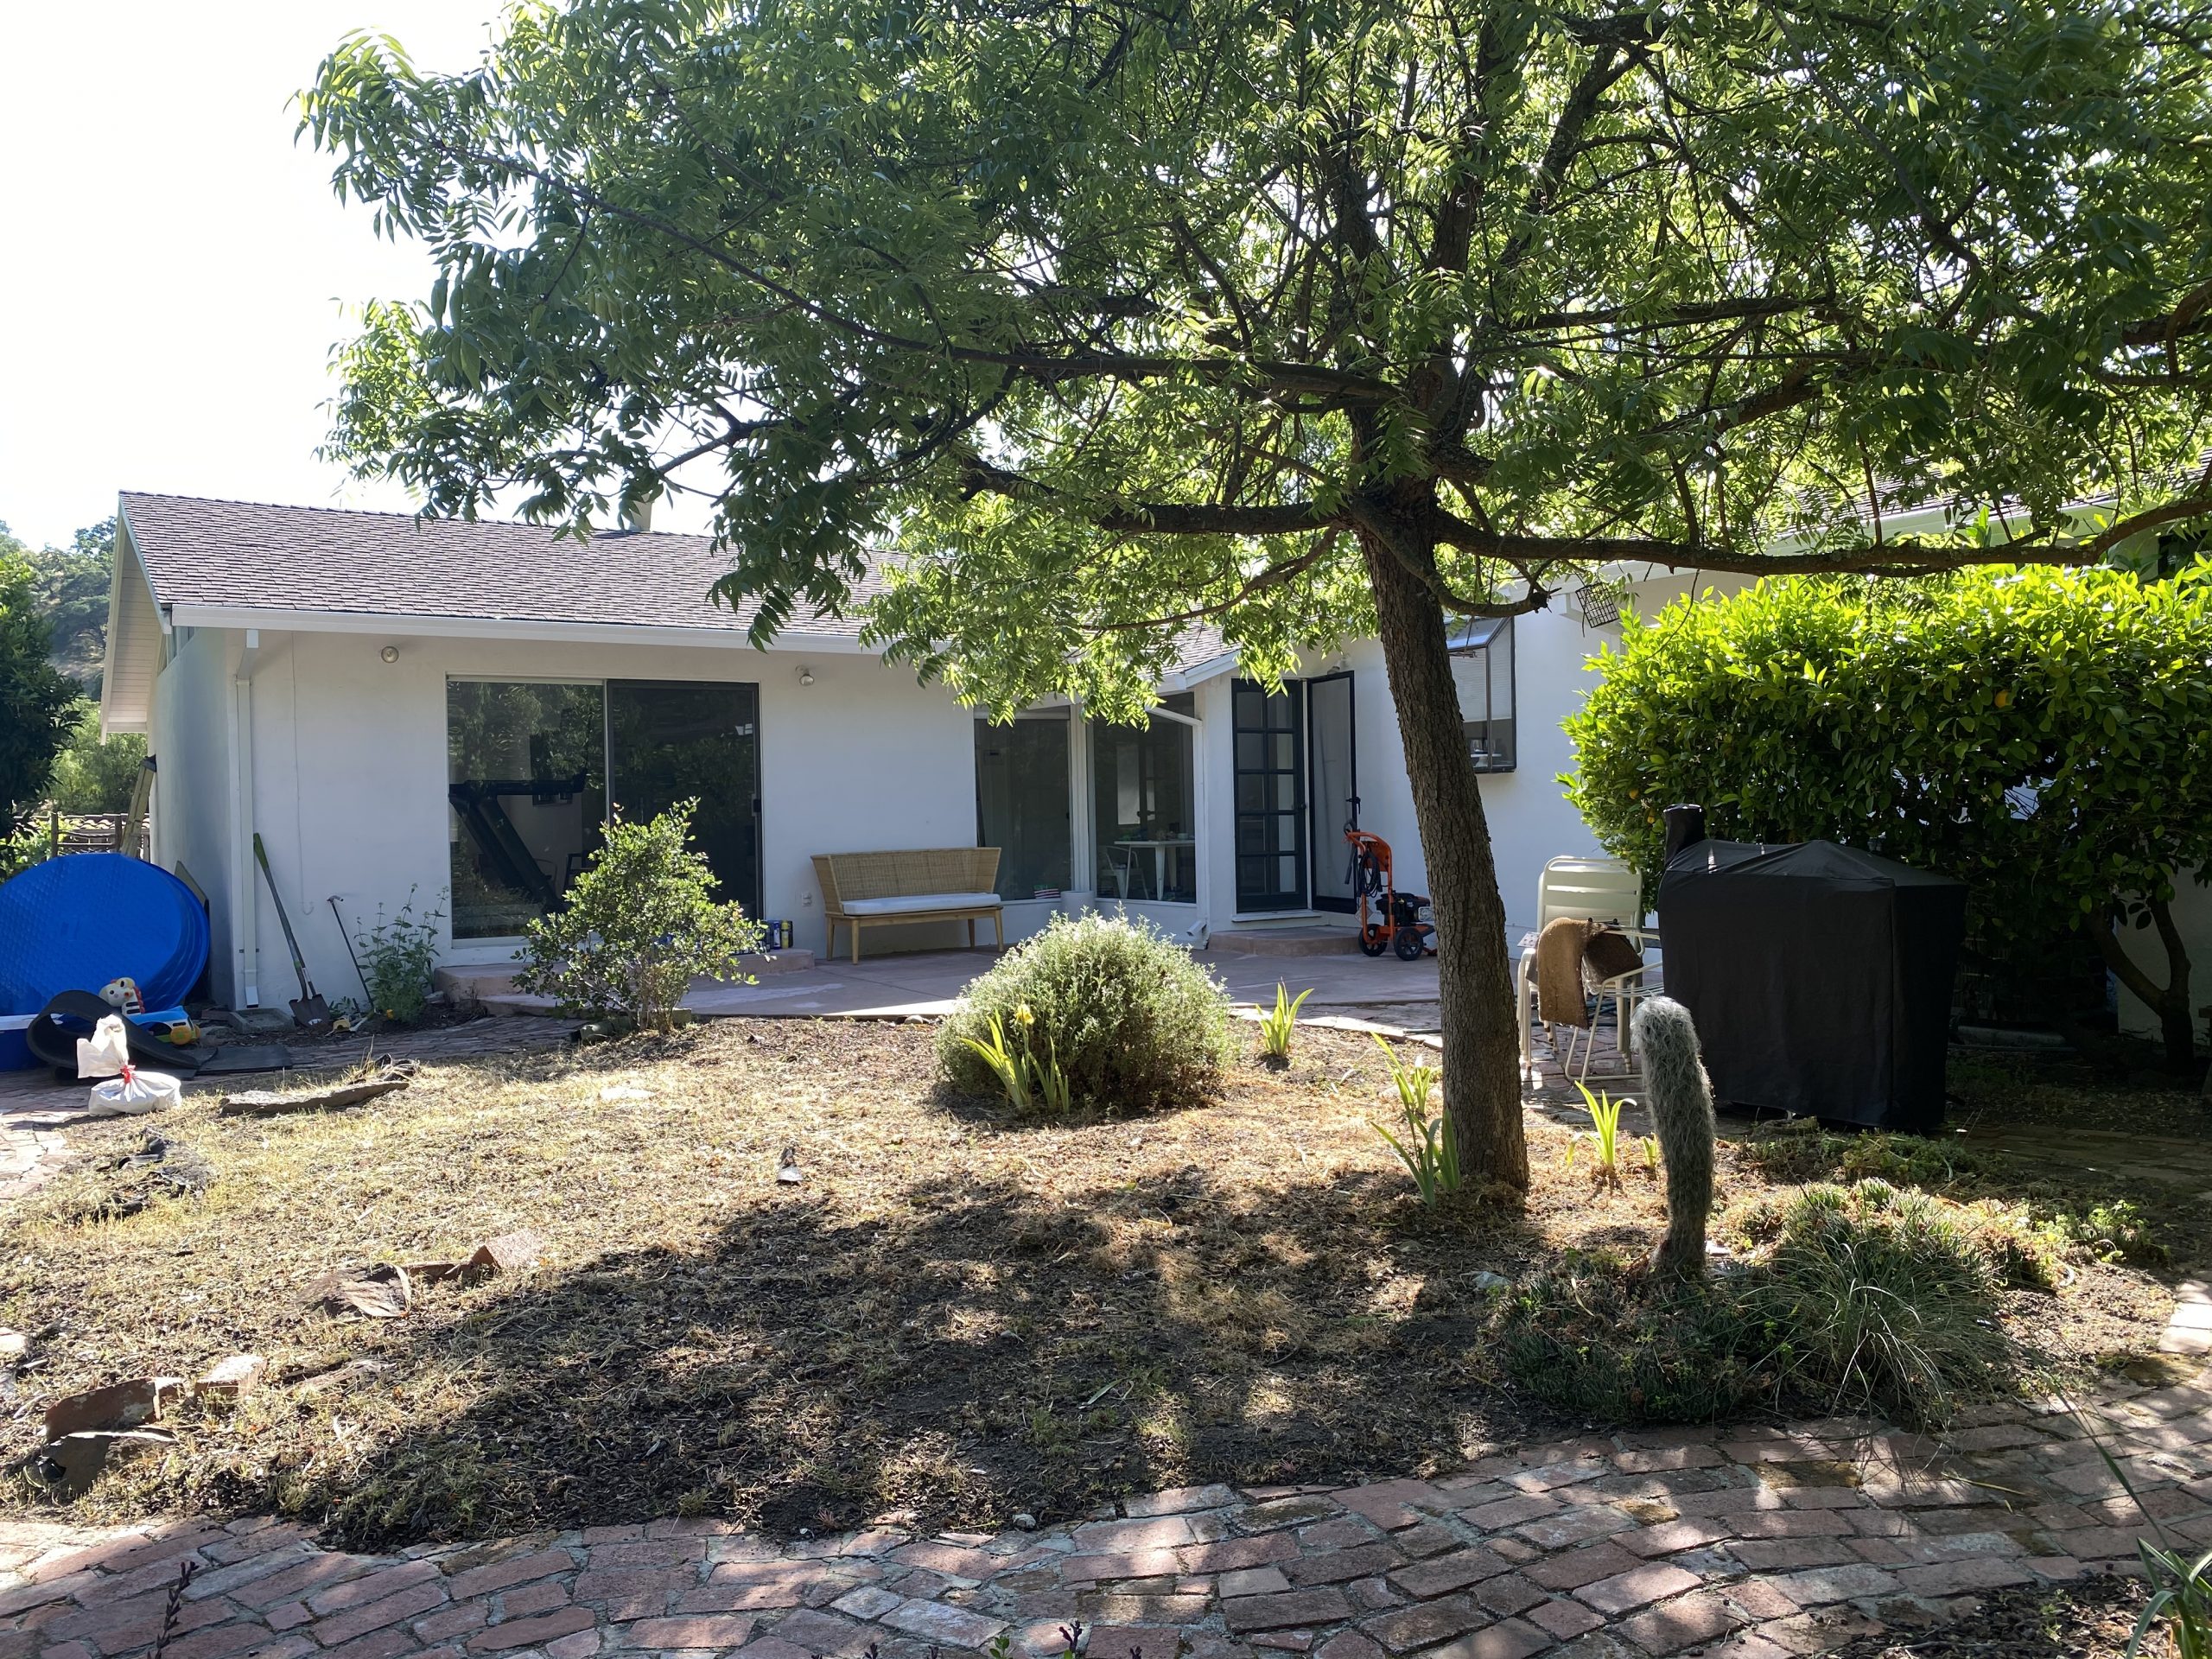
The previous owners of the home were big nature enthusiasts, and invested a lot of time and love into making the garden an oasis. They even hand-laid the brick path to represent a flowing stream.
I’m a firm believer in letting a house (and the land) speak to you. While we’ve slowly made improvements to our home over the last few years, we’ve pretty much left the backyard alone.
As our kids have gotten older, we realized that it wasn’t really working for us–we needed to reassess the space and design it specifically around the needs of a family of four.
So here’s what I was thinking for the backyard, pre-COVID:
- Phase I: Ignore backyard completely. (Phase I was already wellllll underway.)
- Phase II: Get frustrated about our lack of usable space and throw together some patio furniture, a kiddie pool, string lights, and maybe even a fire pit. Call it a day and spend the summer(s) dreaming about giving the backyard a true makeover.
- Phase III: As part of our home’s 2-5 year renovation plan, do a complete overhaul of the backyard when we redo our kitchen and our addition.
But then… March happened. Well, 2020 happened.
Suddenly the backyard space went from being a total non-priority to “we gotta do something about this ASAP.” Even after the Shelter-in-Place is lifted, we realized that any safe social gatherings in our future would probably need to be outside.
Time to get creative… and dirty
Instead of scrapping the project entirely, we decided to get back to our DIY roots and tackle the project ourselves. Our goal was to maintain the nature-like charm of the space while opening up certain areas to be more usable for our family. More of a refresh than a makeover.
First up? Creating an open, flat grass area for our kids to run around.
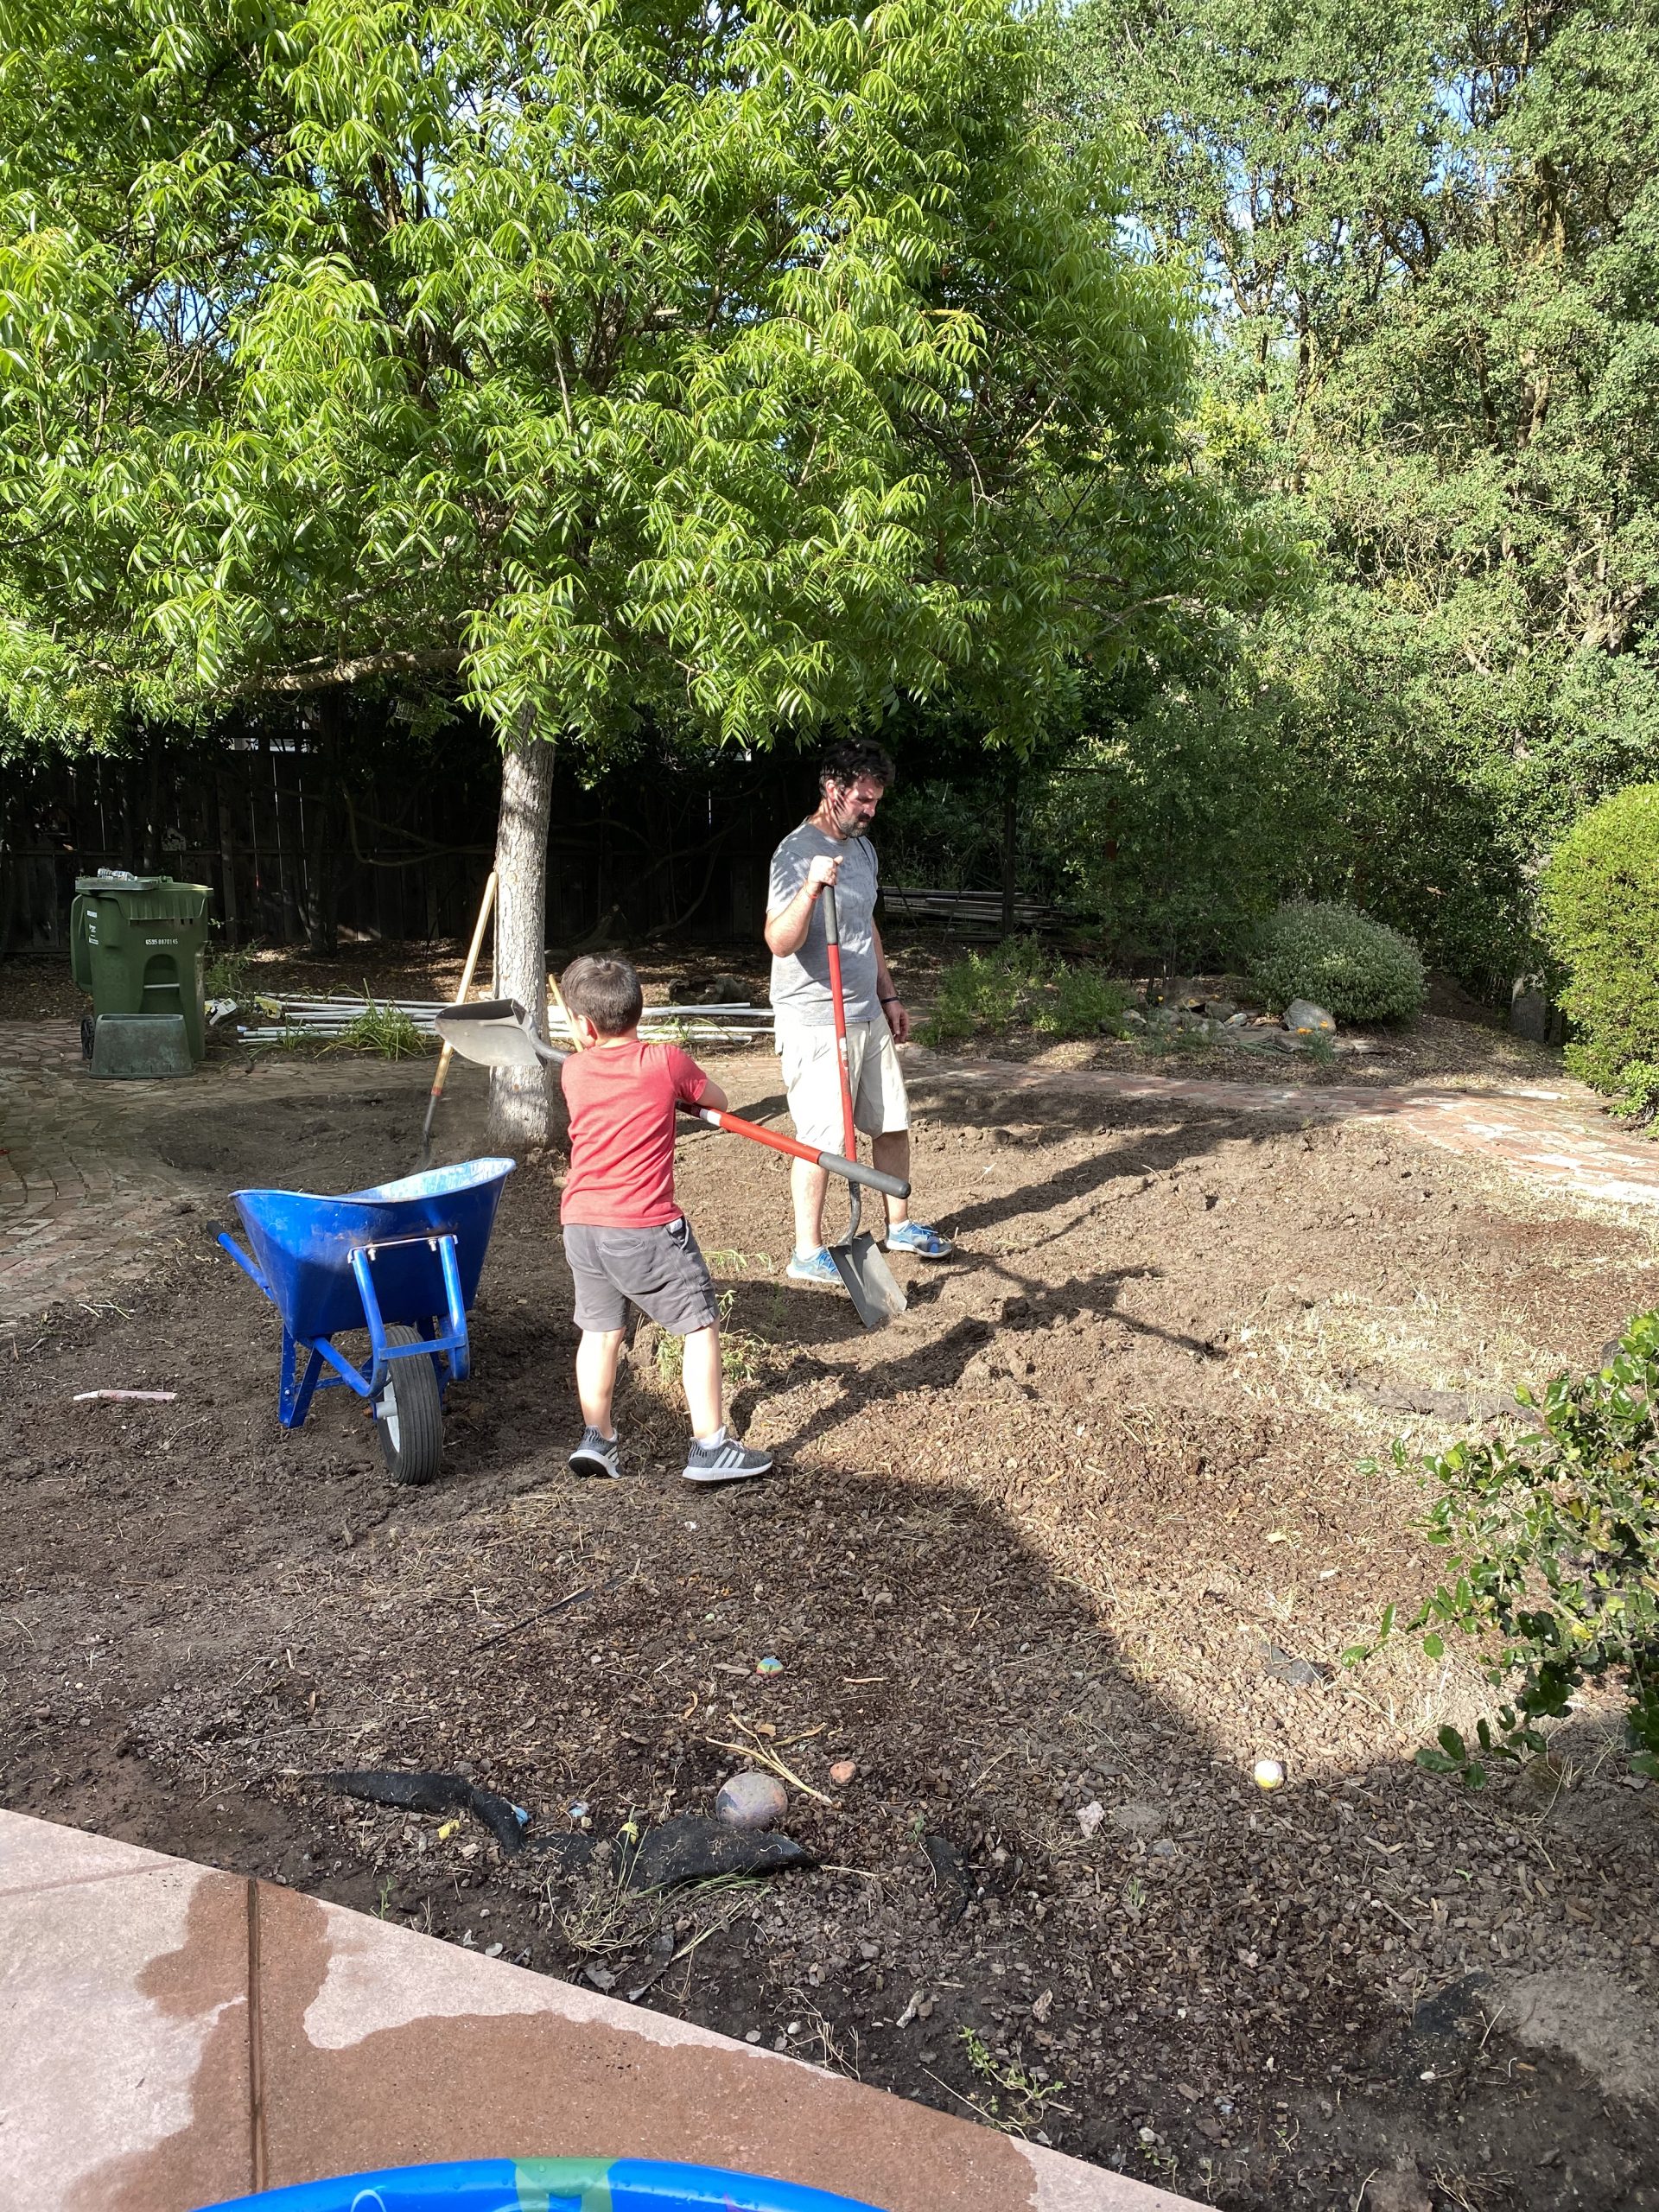
My husband and I tackled it like weekend warriors. Working on the backyard became my new Sunday workout, with some late night Peloton workouts throw in there. Eventually, I bribed my brother to help out to help with the irrigation planning and manual labour, but I gotta say I’m a little addicted to the feeling of calluses on my hands from spending all day digging outside. Swinging a pick-axe through the air is mighty satisfying!
Step 1: Clear it out
First we asked our gardeners if they could help clear the area of any weeds. Then we used flat shovels to clean out all of the bark and to level out the dirt. We relocated the dirt and bark to another area of the backyard but if that’s not an option I recommend asking neighbors if they need dirt. Your local waste management can also pick it up.
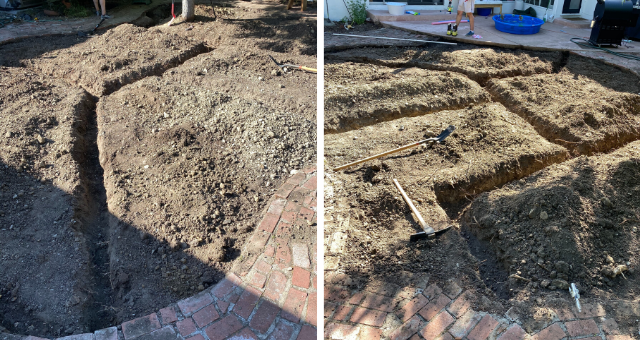
Step 2: Prep the area
To prep for the irrigation, we took a pickaxe and shovels to carve out our trenches for the irrigation pipes. Irrigation trenches need to be 8-12” deep to code so there was a LOT of digging to do.
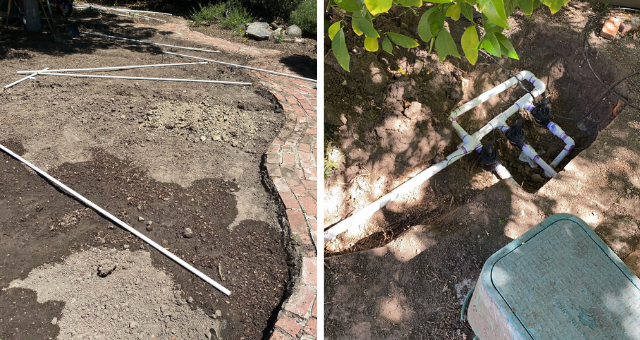
Step 3: Add Irrigation
For the pipes, we used 3/4″ PVC and placed five sprinkler heads around the perimeter of the lawn. We set our sprinkler system to go on in 3 phases so as to ensure there was enough water pressure when watering the lawn.
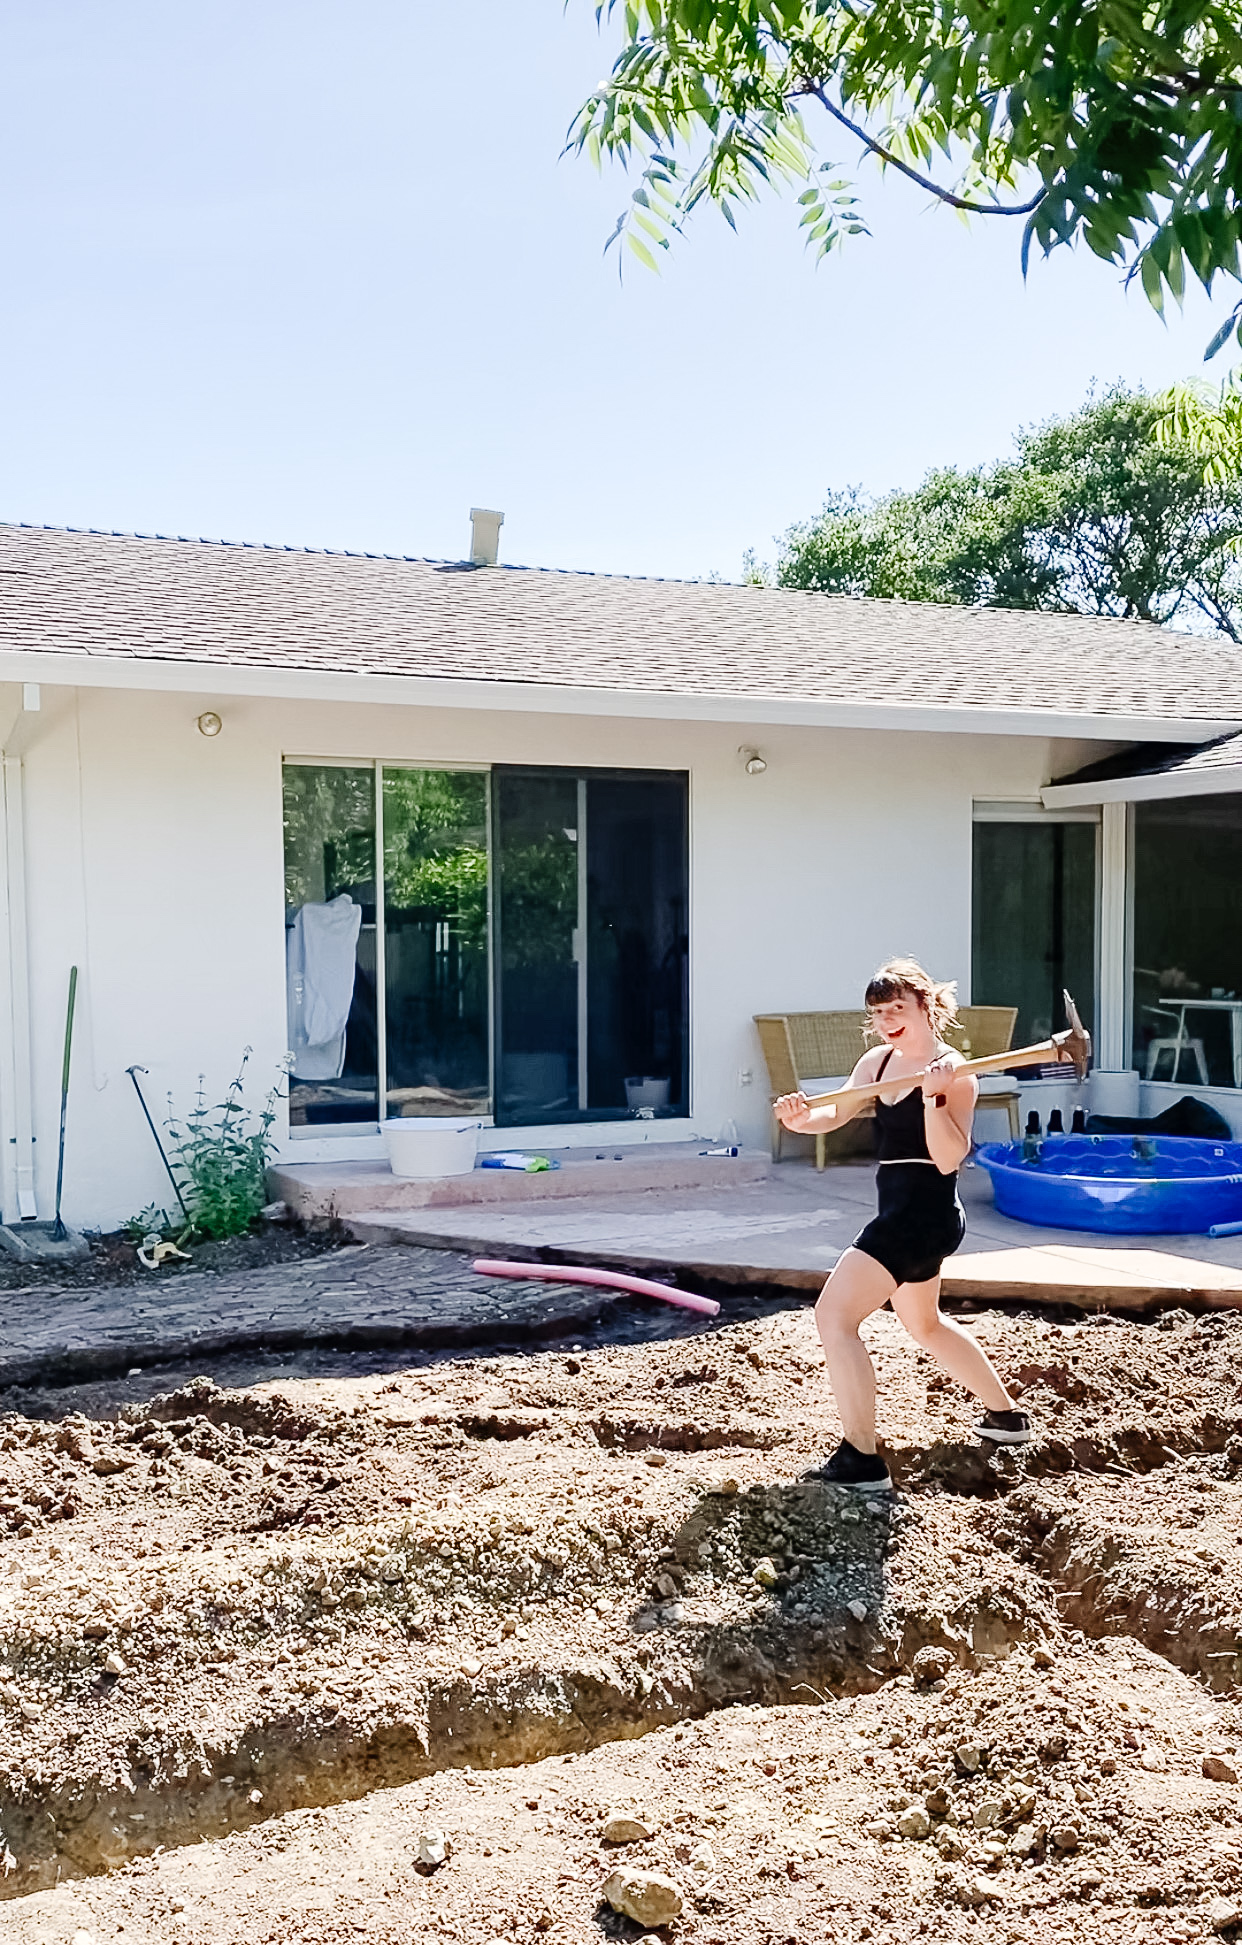
Step 4: Fill it in
Once we tested the sprinkler system, we filled in the trenches and leveled out the dirt. The pictures of this step aren’t all that interesting — it really just looks like a flattened pile of dirt. So please enjoy this photo of me enjoying my Pickaxe Workout (patent pending).
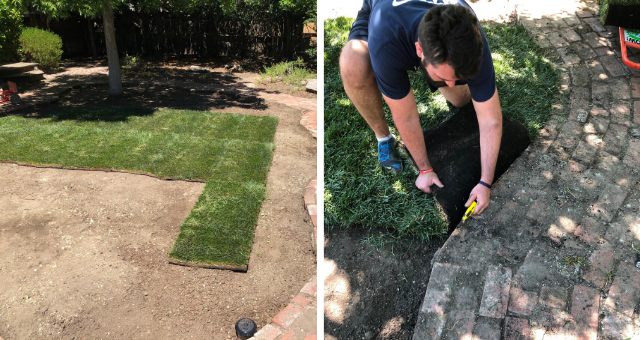
Step 5: Finish it off with sod
Then we ordered our sod.
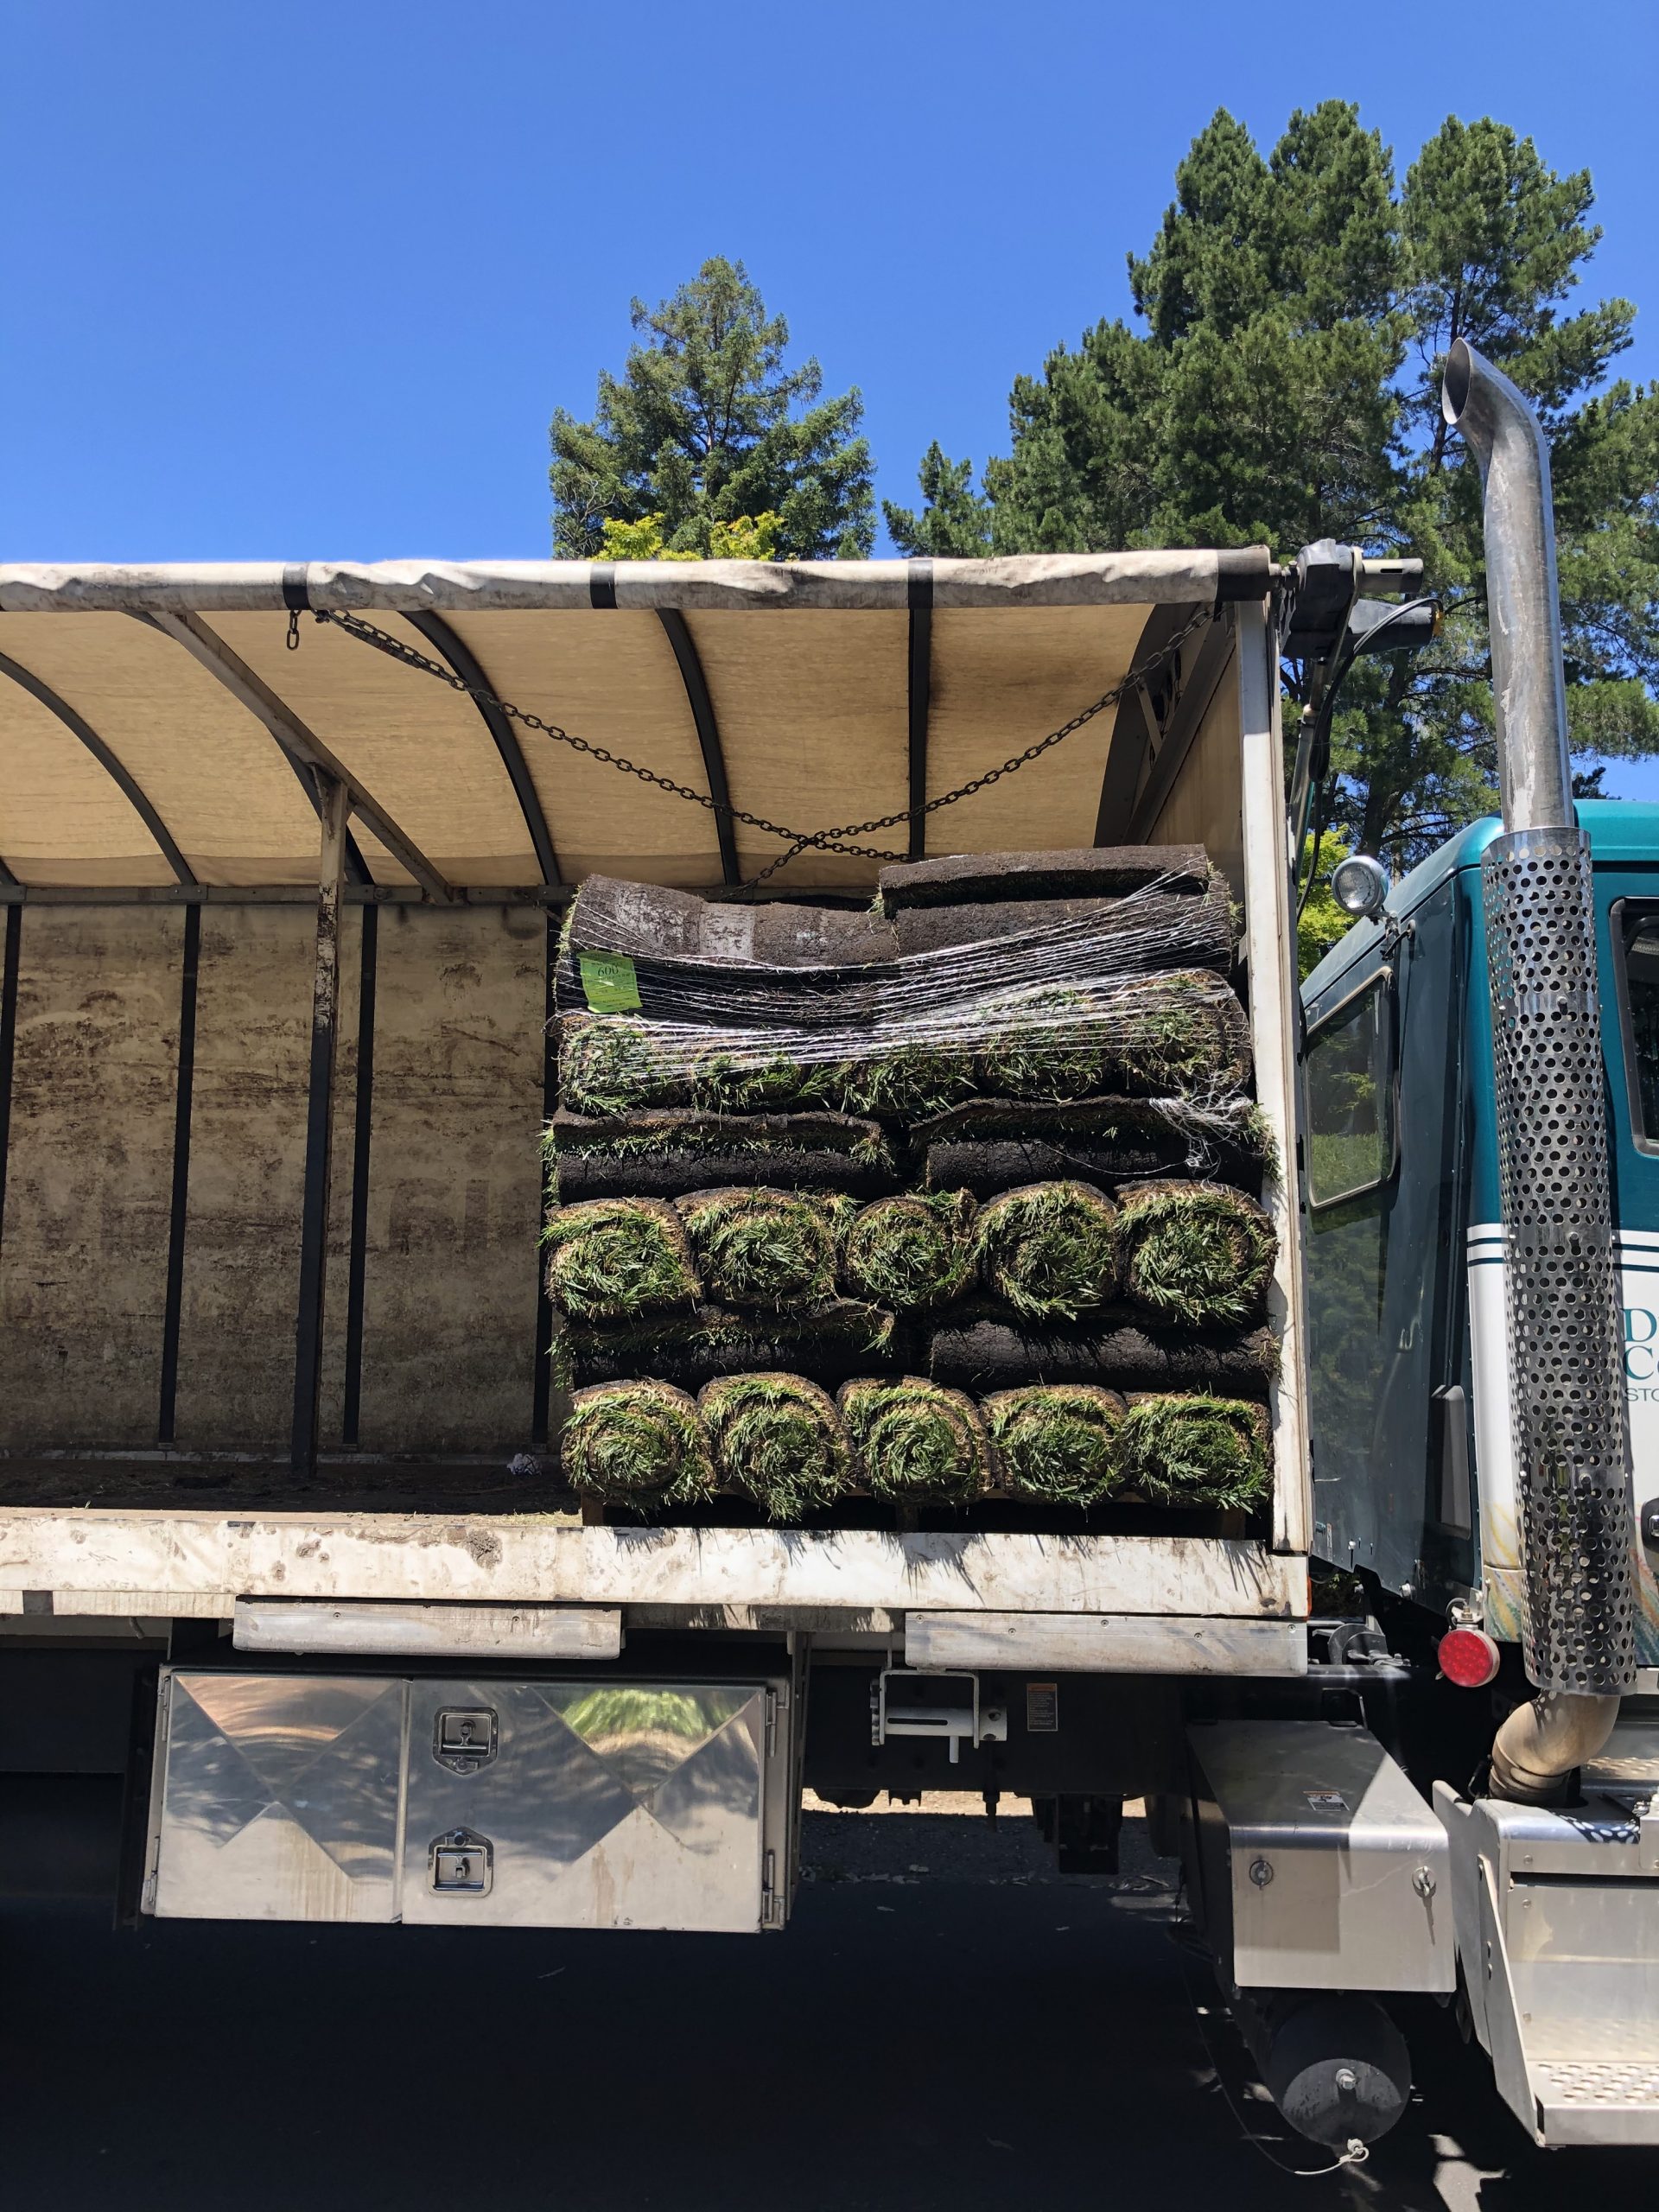
This area is partially shady and sunny throughout the day, so we wanted grass that is soft, yet hardy, can withstand both shade and direct sunlight, and also self repairs. A tall order indeed. This is the sod we went with, and so far it’s thriving!
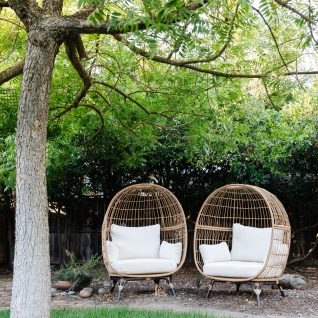
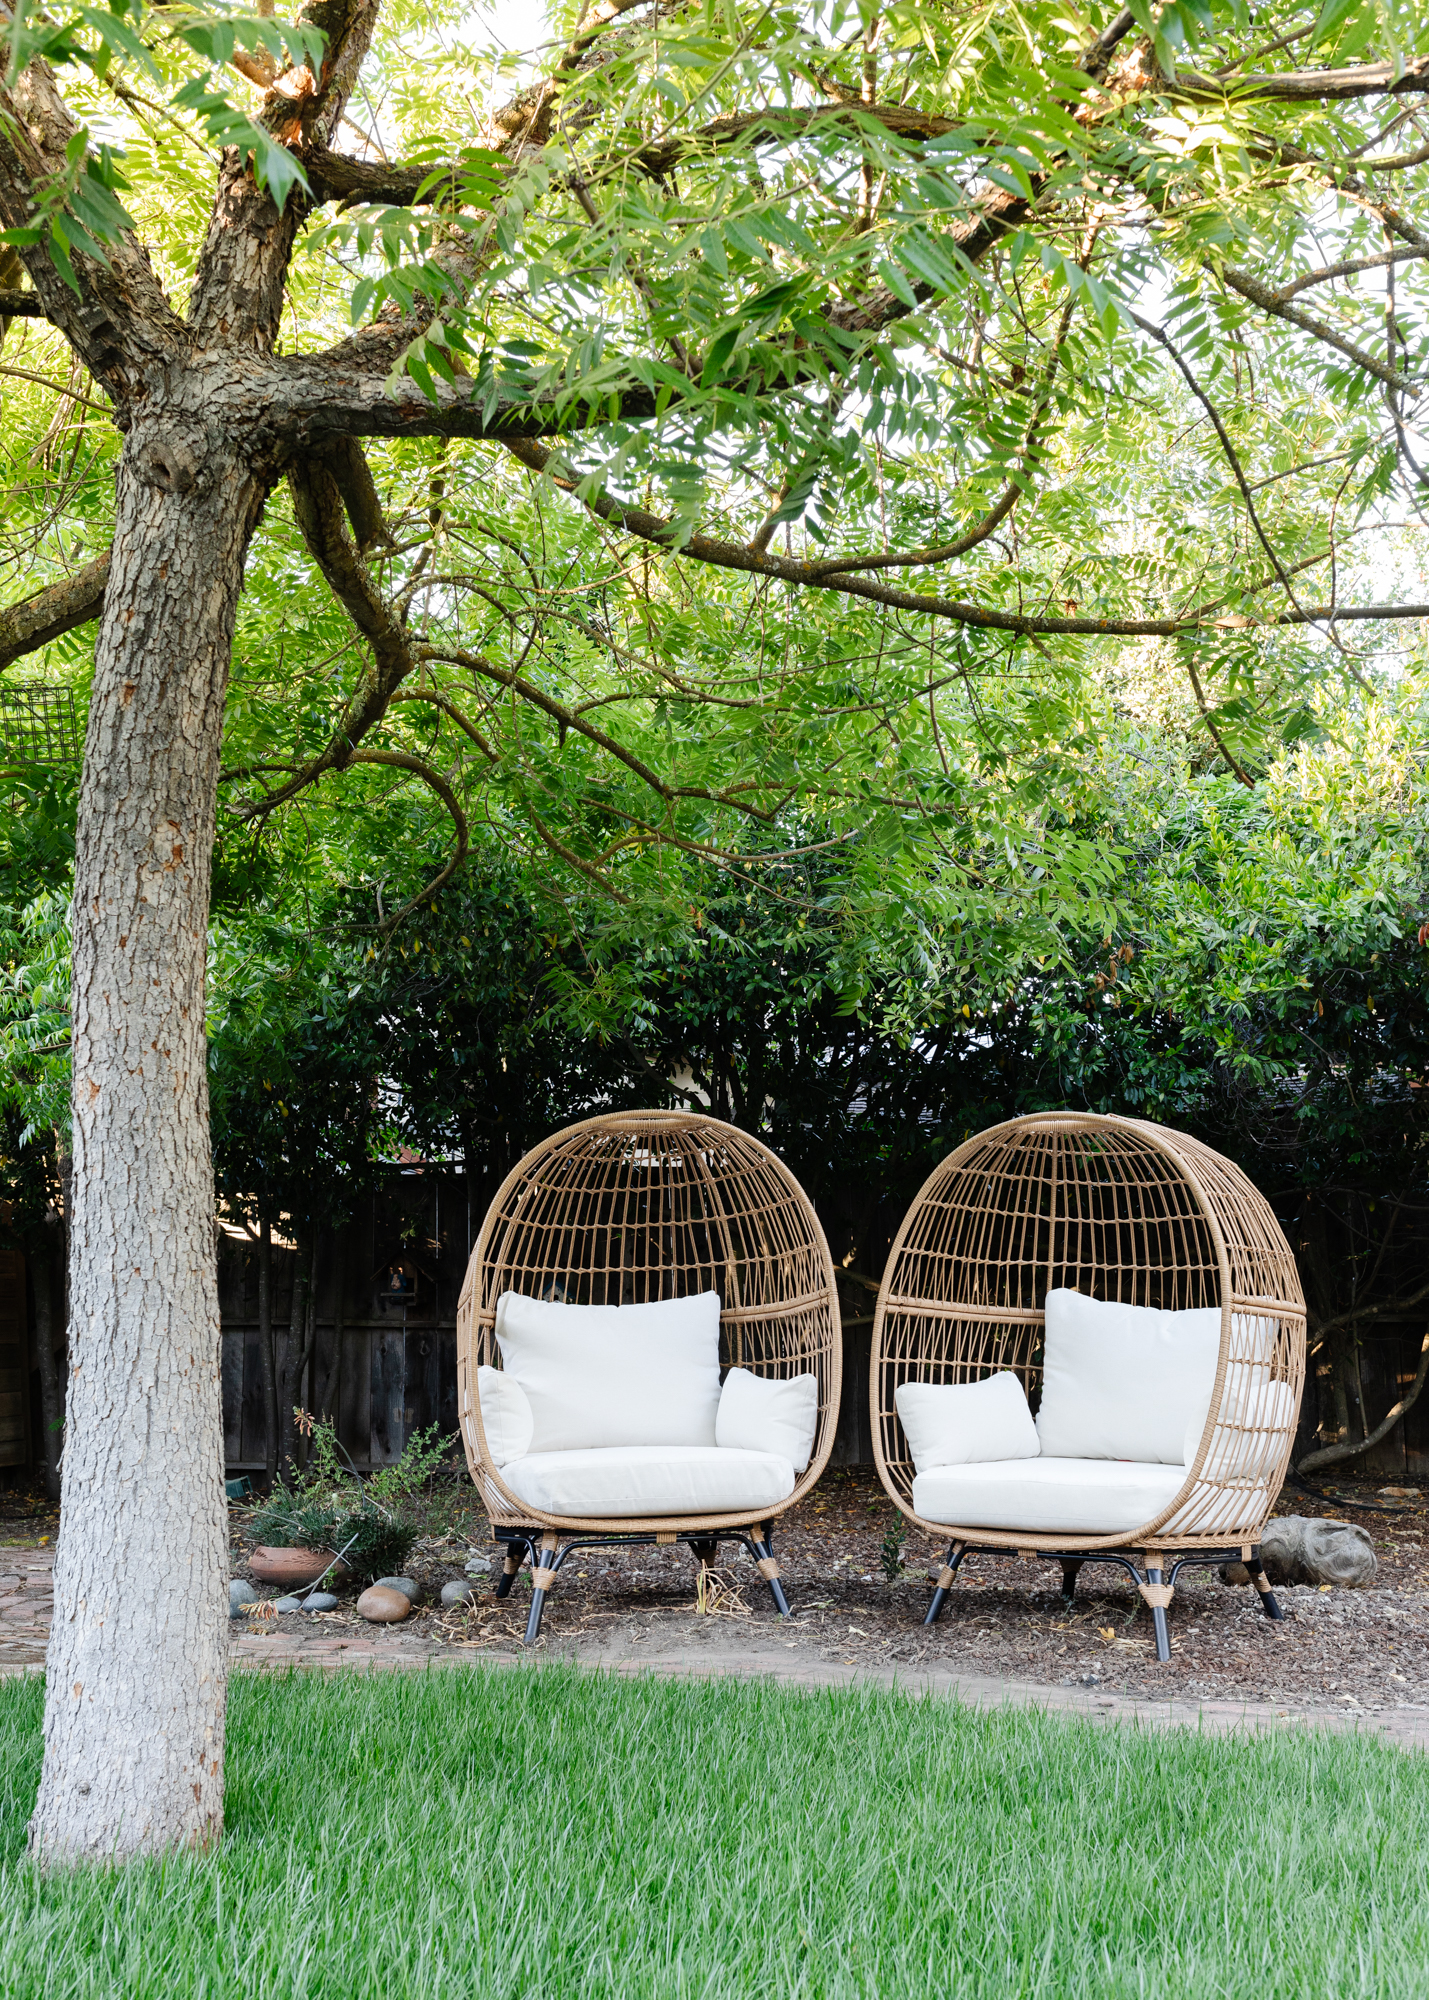
Step 6: Style it out with what you’ve got on hand
I still have some big furniture plans for this area, but we’re rocking 2 sets of these cocoon chairs from Target right now. I scooped up a set last year, and then gifted myself another set for Mother’s Day this year. They’re that good. And they comfortably fit Olive’s little Frenchie body, myself, AND my two kids. Show me another chair that can do that.
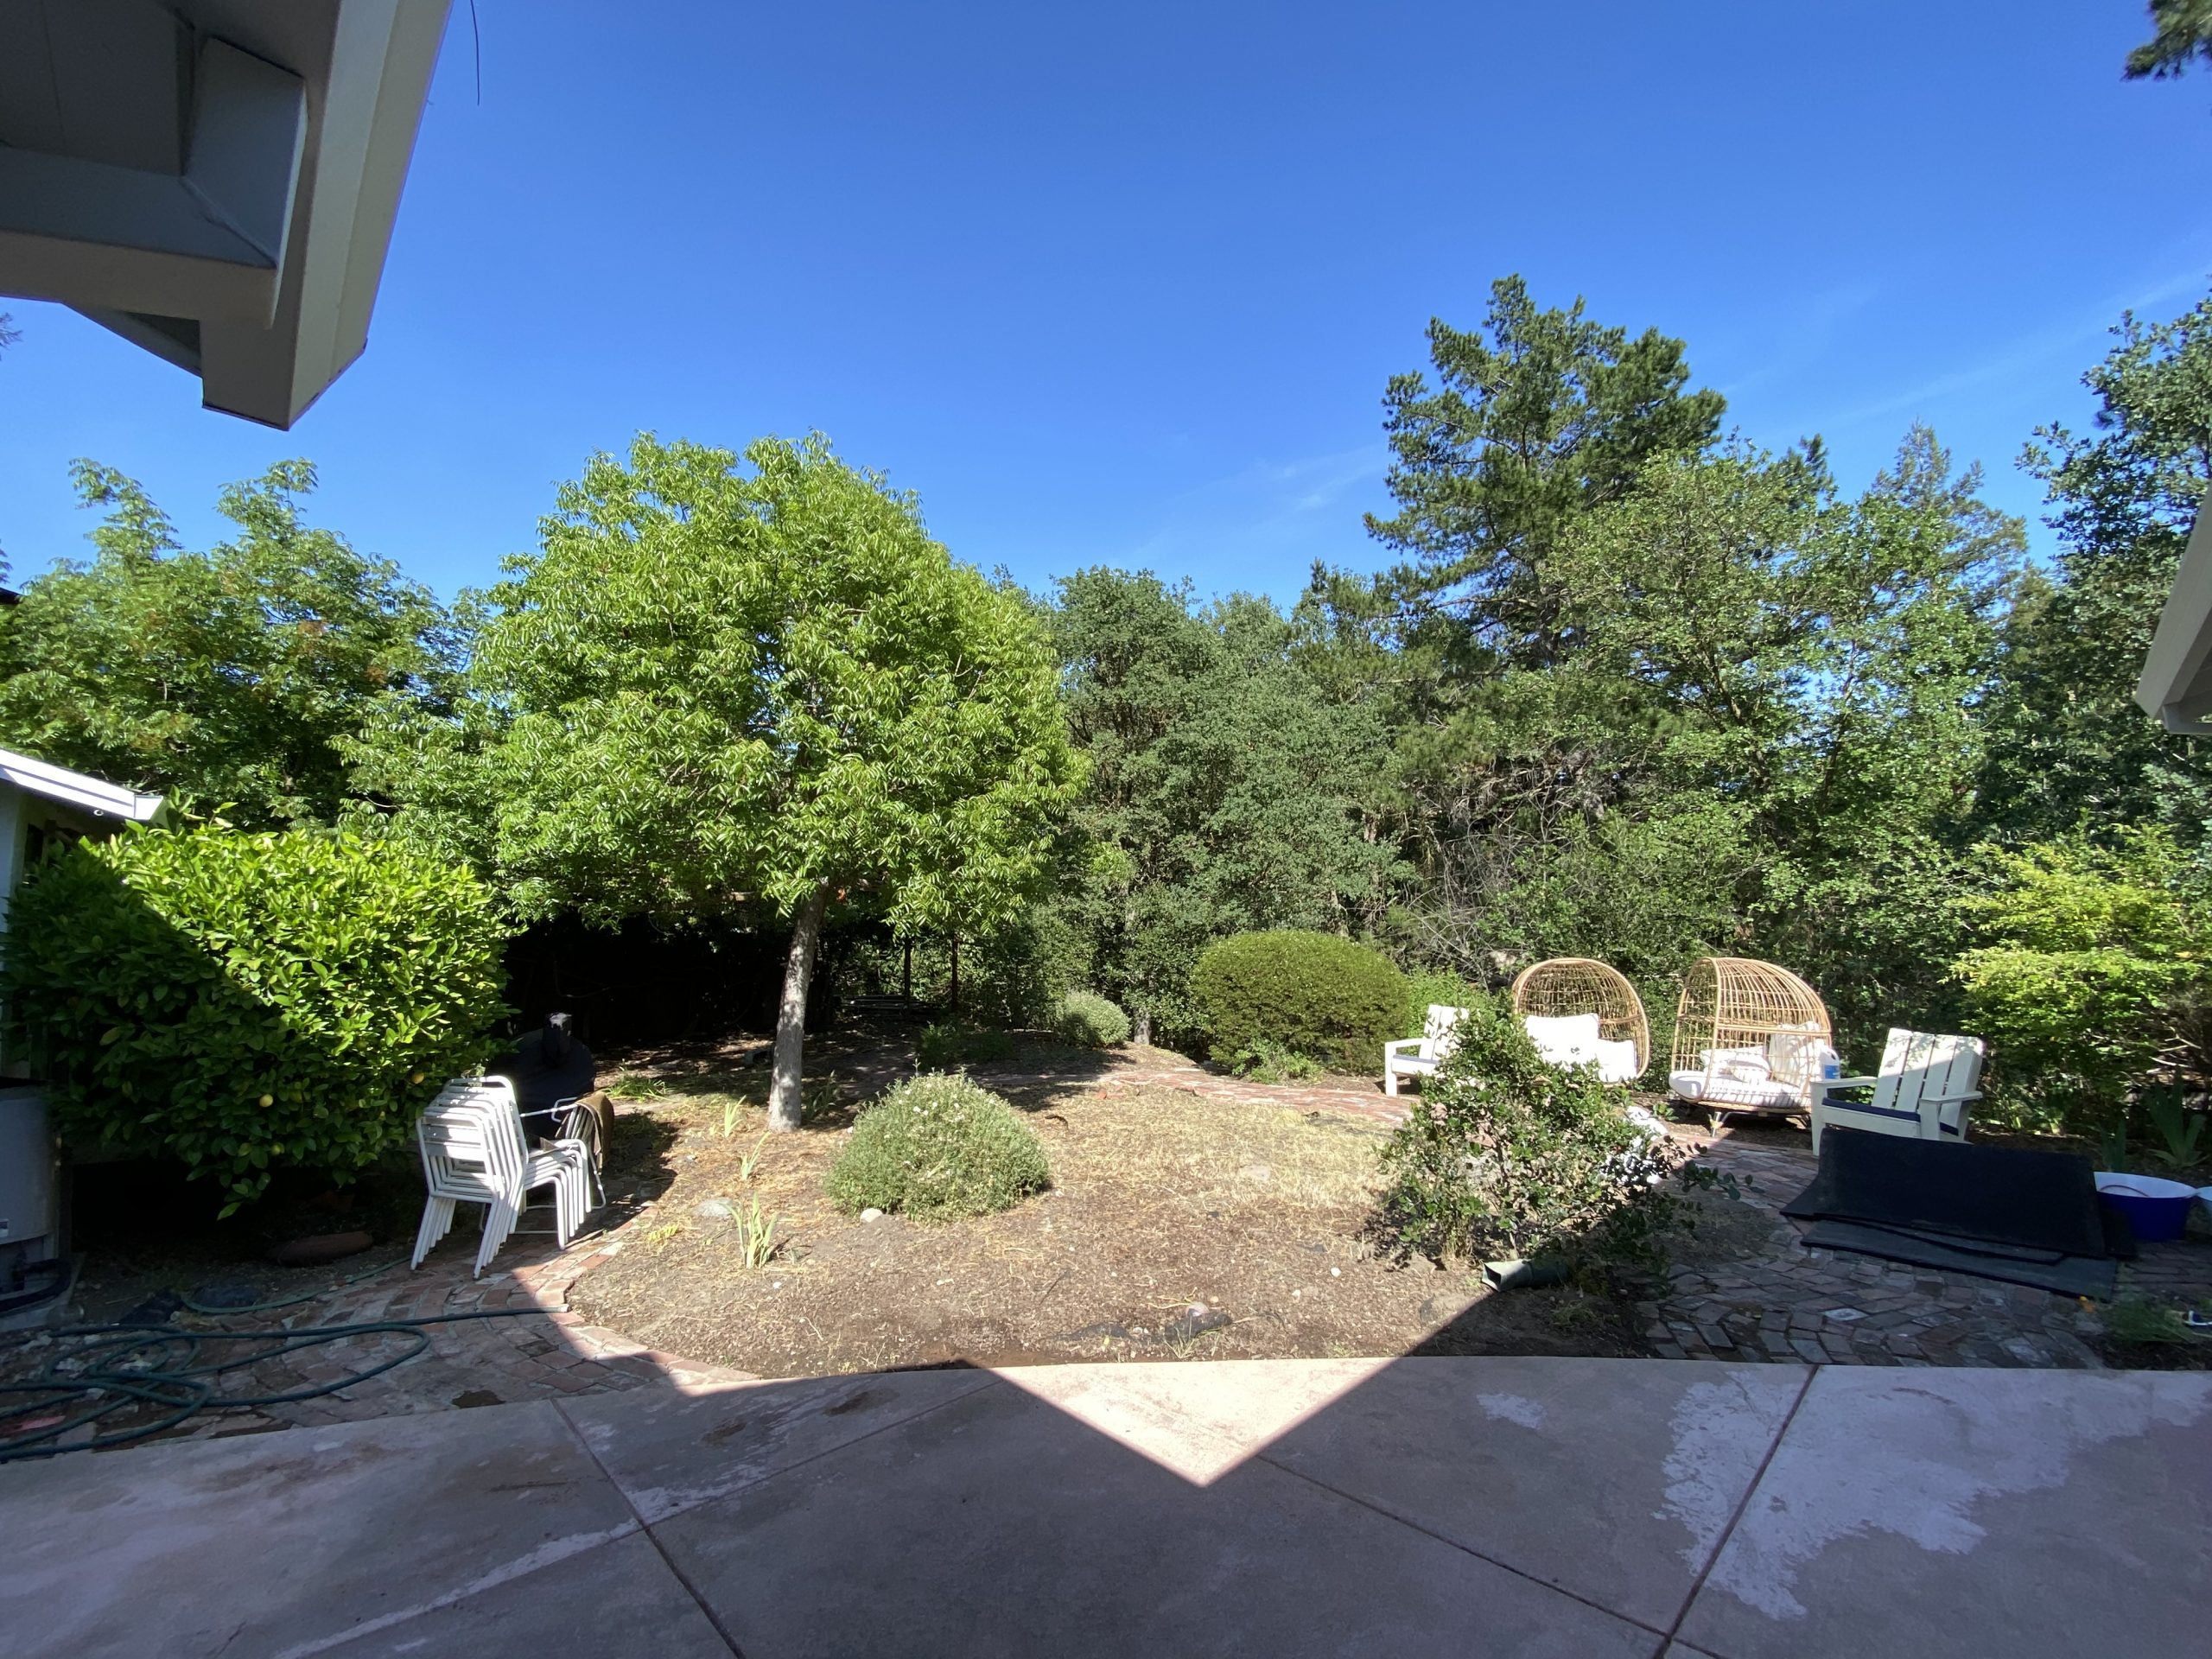
Ready for that before and after? Here it goes…
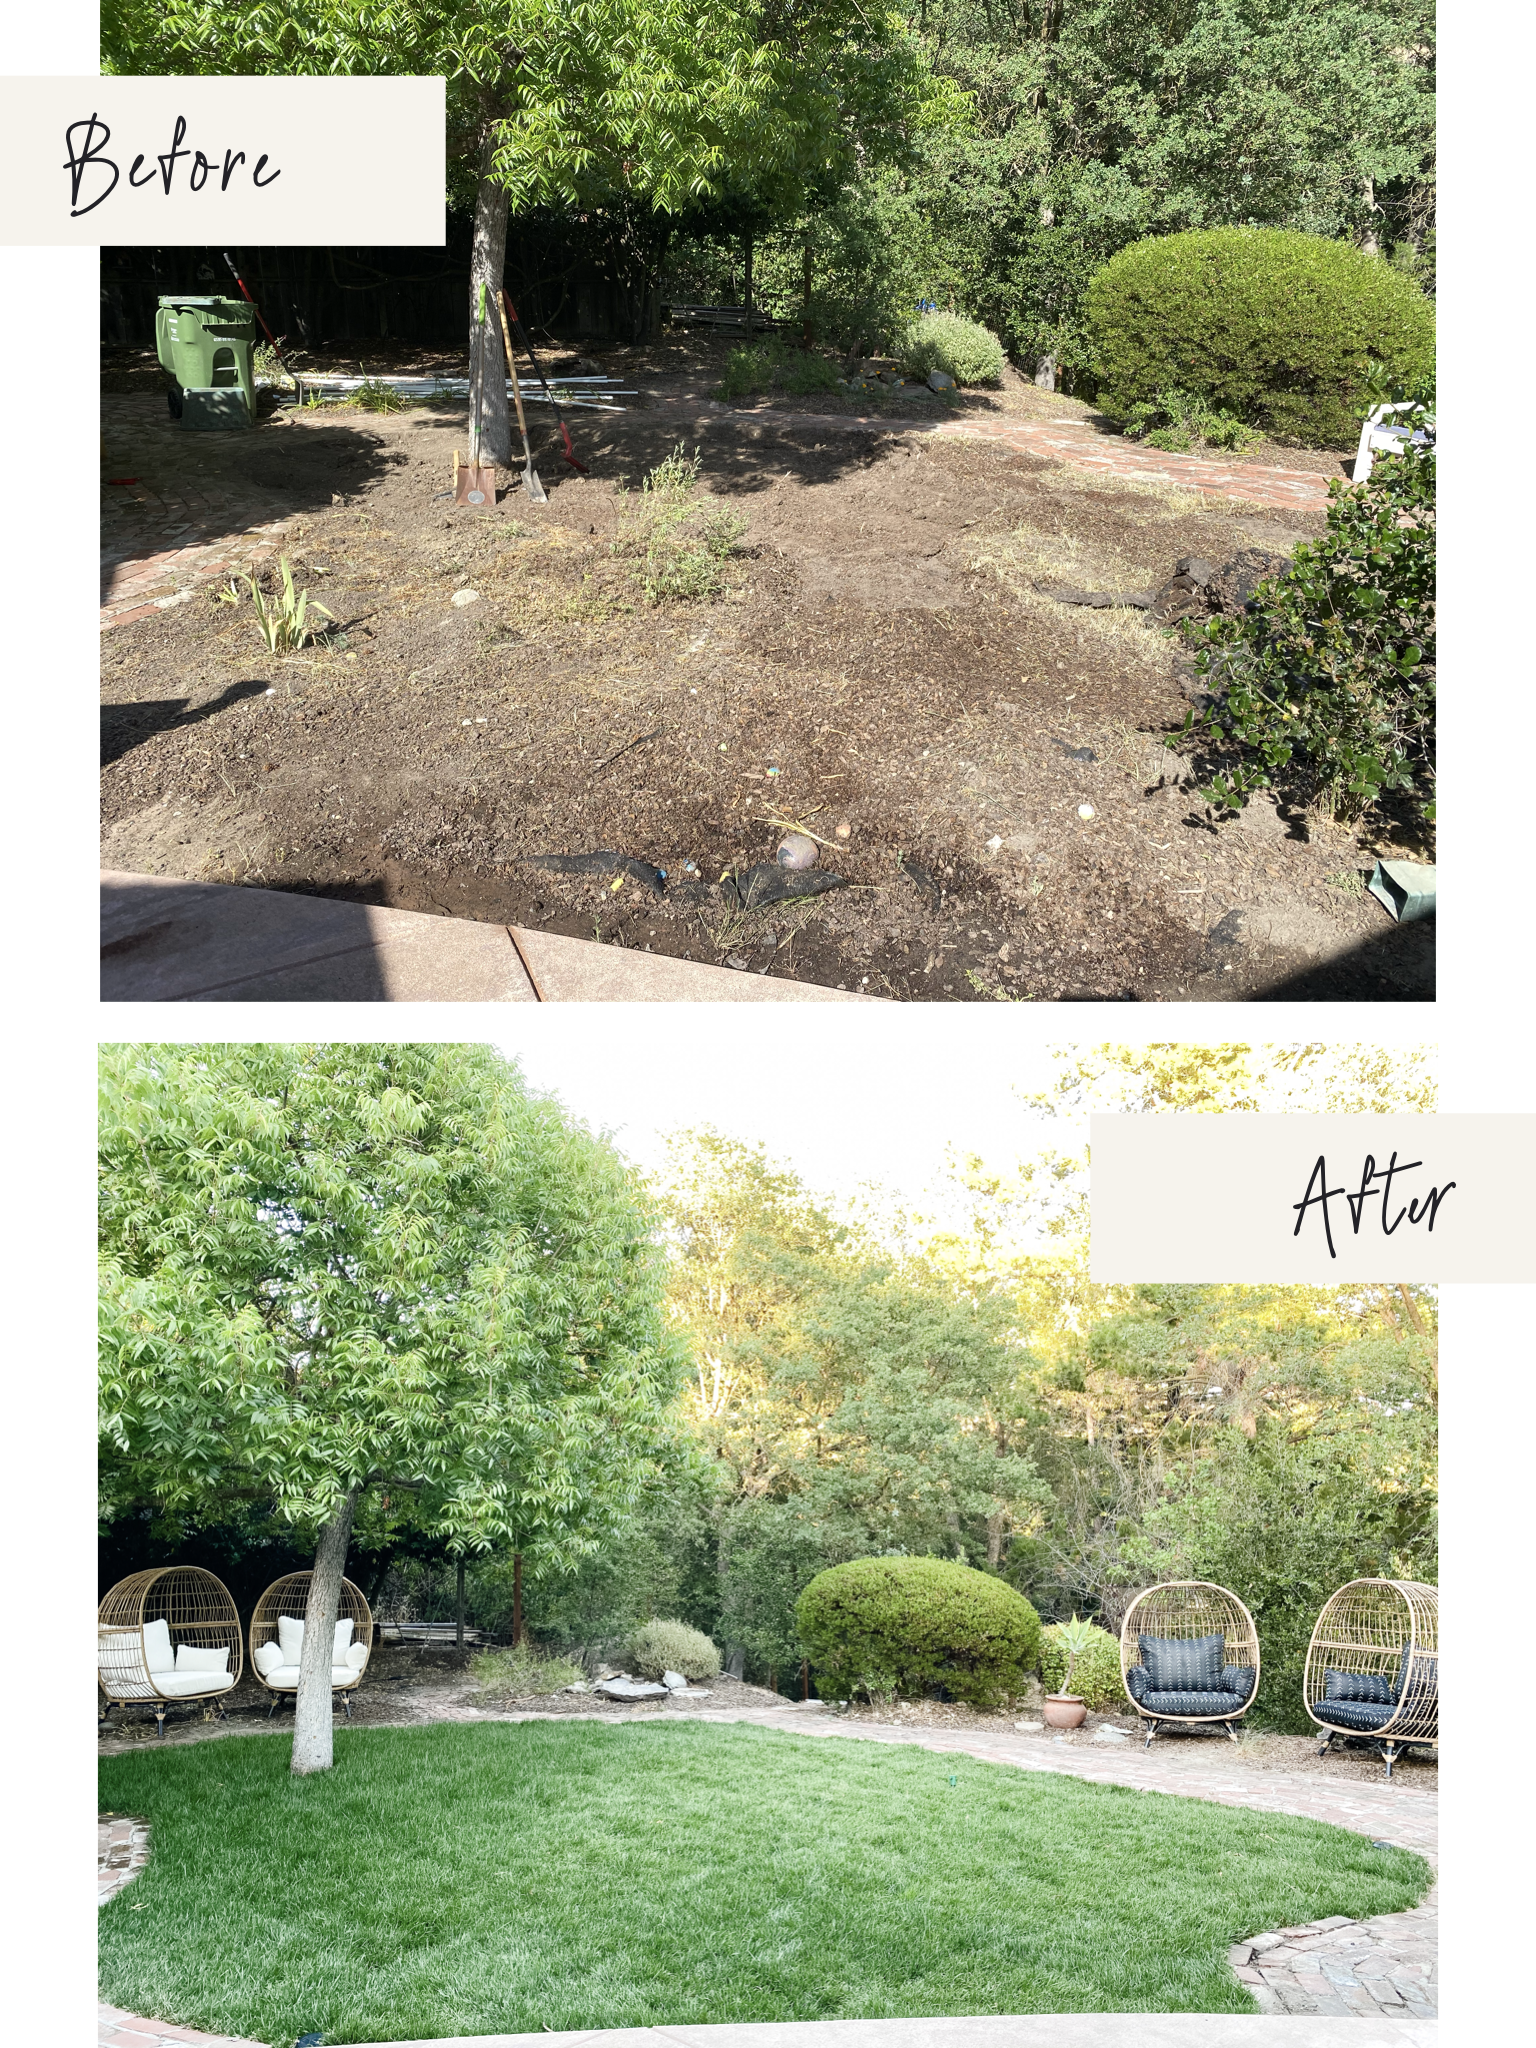
Whewwww that before and after! It’s that much more satisfying when it’s birthed from your own blood, sweat, and tears. While it’s not necessarily the backyard of my dreams yet, our family is using the space on the daily now, and that’s exactly what we were going for.
In the coming months, I’d love to beautify the space, add some string lights, maybe a potted plant or two, and create a few more hangout zones. My husband has his eye on this fire pit from Lowe’s and I’m hoping to create al fresco dining area for those hot summer nights.

It looks SO GOOD!!! Good job prioritizing! You’ll get SO much out of this!!!
A picnic is coming in hot!
This looks so inviting!! Love it.
Turned out great! Thanks for the steps :)
Thank you!!
My sunroom suddenly became important, I totally understand! I love those chairs.
It’s more than a feeling! Sunrooms are fantastic btw!
This is beautiful!!
This looks SO great. I actually think swinging a pick ax is the perfect quarantine therapy! 💪🏻
This is beautiful. I have my backyard lawn area which is rotting for the last three years and I also have an old cane swing which has become week at the top and I am no longer using it as swing. I am now inspired by your story. I am going to revive my lawn and convert that old swing into a chair like this.
Great, I wasn’t expecting end result wil be this much beautiful.